
Stand at your cake’s front edge, knife poised like a conductor’s baton, and carve a modest two-inch wedge through the bottom tier. You’ll dip your blade in warm water between cuts, scoring concentric bullseye rings that spiral outward with surgical precision. Each slice is lifted by a spatula to waiting plates. Remove dowels as tiers surrender to your hand, separating layers onto their own boards where hidden cardboard reveals itself. Whether you serve buffet-style or deliver plated slices tableside, you’re orchestrating flavor architecture where each tier tells its own story. Wrap that precious top tier in plastic, then foil, then plastic again as a time capsule for your first anniversary. The knife, wiped clean between every stroke, becomes your trusted accomplice in this edible choreography, and what follows transforms service into an organized, efficient process.
Choose Your Wedding Cake’s Flavor Layout Before Cutting

Why settle for a single flavor when your wedding cake can become a curated tasting experience for every guest. Tiered cakes offer you a canvas for culinary storytelling, where each level becomes a chapter in your celebration’s flavor narrative.
You’ll want to map your flavor layout before the first slice, considering how each tier remains accessible during service. If you’re offering alternating flavors at tables, remove each distinct tier first, maintaining clarity as you progress. You can even slice across tiers, creating miniature tasting flights that let guests sample your full range without overwhelming their palates.
Align your cutting sequence with both standard and generous servings, ensuring every guest receives consistent portions of your chosen varieties. Your thoughtful preparation transforms cake-cutting from mere tradition into an inclusive moment where everyone discovers their perfect bite among your carefully orchestrated selections.

💎 [Contents] Set includes a 13 inch Serrated Knife and a 10.75 inch Server

【Weeding Cake Knife and Server Set】1 piece cake pie pastry knife (9.3in) and 1 piece cake pie pastry server (8.9in),the ideal length and weight, providing a comfortable grip and effortless cutting motion.

SERVE YOUR CAKE IN STYLE - A beautiful cake deserves an equally beautiful cake cutting set. With a classy etched filigree design and shiny finish, our silver set is sure to match any elegant table setup.
Set Up Your Station With Knife, Spatula, and Hot Water

Once you’ve mapped your flavor architecture, you’re ready to assemble the physical tools that transform your plan into reality. Position your station on stable ground, shielded from harsh sunlight that threatens to turn your buttercream into a weeping mess. Your knife, an 8-inch precision instrument with a freshly honed edge, serves as your primary cutting tool. Your spatula stands ready to cradle each slice from blade to plate. Hot water simmers nearby, your secret weapon for achieving those mirror-clean cuts that guests will photograph before tasting. Slide a cake board beneath each tier, creating an invisible safety net that stops your blade before it kisses cardboard or dowels.
| Tool | Purpose | Pro Tip |
|---|---|---|
| 8-inch knife | Clean, even slicing | Dip in hot water between cuts |
| Spatula | Transferring slices intact | Choose offset for better leverage |
| Hot water | Preventing icing buildup | Change when it cools |
| Cake board | Protecting structural supports | Size to match each tier exactly |

Professional quality small sized spatula, 4. 25- . 75-Inch blade

Two Professional Cake Decorating Spatulas: PUCKWAY offset spatula set comes in two different sizes: 6 inch and 8 inch blade. This is your best choice to decorate a cake perfectly.
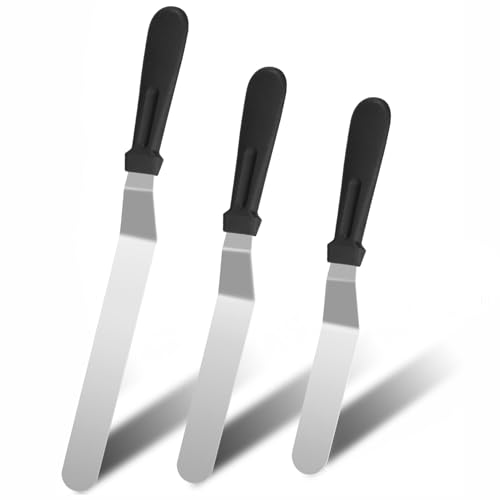
【MULTIPLE SIZES] Icing spatula set comes in Three different sizes 6, 8, 10 inches for different applications. It's great for icing cakes, cheese, pizzas, sandwiches, even cutting curds. This is your best choice to decorate a cake perfectly.
Make the Ceremonial First Cut on the Bottom Tier

You’ll position yourselves at the cake’s front edge, angling your bodies slightly toward the photographer so your hands, the knife, and the pristine fondant create a visual triangle of anticipation, much like actors finding their light. Grip the 8-inch blade with your dominant hand atop his, applying gentle, sawing pressure. Never hack or crush the sponge; it should yield cleanly without dragging crumbs across the buttercream canvas. You’re carving a modest wedge, perhaps two inches wide, because this symbolic slice isn’t meant to feed the masses but to mark the moment, a edible comma before the real work begins.

FLATTERING CLEAVAGE & SHAPE — NOT LIFT: Meet the CAKES Cleavage bra, our backless, strapless sticky bra designed to enhance your natural shape. This product was designed to bring your boobs together for seamless cleavage & shape without the straps or padding. It was NOT designed to provide lift or support.

Silver Cake Knife and Server Set: The 4-piece wedding cake cutting set includes a cake knife measuring 11.1" L x 1.2" W, a cake server measuring 10.4" L x 2.1" W, and two cake forks each measuring 7.9" L x 1" W. Its unique design adds a touch of elegance to any occasion from casual gatherings to formal celebrations

Elegant Wedding Cake Cutting Set: This elegant cake knife and server set includes a knife and server engraved with "Forever Starts Today" and "Happily Ever After Mr Mrs", along with two matching forks engraved with "Mr" and "Mrs", all beautifully engraved for a refined finish
Positioning for Photos
The ceremonial first cut is a fleeting moment when cameras flash and guests lean in with expectant smiles. Position the cake with deliberate care, ensuring the bottom tier stands as a proud, unmissable centerpiece. Angle the display so the largest tier’s edge faces your photographer directly, revealing those gorgeous layers like pages in a storybook you’re sharing with everyone you love. For truly striking photos, dip your knife in warm water beforehand. This simple trick transforms your cake cutting into a flawless, elegant performance rather than a struggle against stubborn frosting. You’re not just feeding guests; you’re creating memories that will live in frames and hearts for decades. Let that bottom tier shine like the foundation of the beautiful celebration you’re building together.
Knife Technique Basics
A sharp 8-inch blade becomes your instrument of precision as you prepare to slice through the foundation of your celebration, the proud bottom tier standing before you like a canvas awaiting its first deliberate stroke.
- Grip the handle firmly as you would a conductor’s baton, guiding your wedding cake knife technique with confidence and care
- Dip your blade into warm water, letting it glide through buttercream like a ship through calm seas
- Choose a real knife over decorative keepsakes, for stability produces clean cuts in this moment
- Slice a small ceremonial piece first, then trace concentric circles outward like ripples expanding across a pond
- Keep a spatula ready at your side, a silent partner ensuring each slice reaches its plate undisturbed
You’ve joined a tradition woven through generations; your hands now part of its continuing story.
Slice Size Control
Once your grip feels natural and your blade runs warm, you’re ready to guide that first decisive cut into the bottom tier. This is where your control matters most. You’re not just cutting cake; you’re orchestrating a moment that belongs to everyone watching, a shared ritual that transforms flour and sugar into collective memory. Dip your 8-inch blade in warm water, letting heat become your silent partner against buttercream resistance. Slice small from the bottom tier first, preserving the cake’s grandeur while serving tradition. Your slice size becomes your signature. Each 1-inch portion represents consistent, equitable service. Wield your spatula like an extension of intent and plate with precision that demonstrates confidence and skill.
Lift and Separate Each Tier Onto Its Own Board
Gently sliding a cake server beneath each tier, you’ll feel the moment when fondant and frosting release from their shared foundation.
- Slide your flat spatula under the tiered cake with steady pressure
- Pull center dowels straight up to remove them completely
- Lift each layer cleanly, protecting your architectural masterpiece
- Balance the weight evenly across your palm and blade
- Rest each section on its own fresh cake board, ready for individual attention

Cake Assembly: Cake plastic support dowels are made easily with these Wilton rods and caps, designed for quick and easy cake assembly. They may also be used with center core rods (sold seperately).

Best Helper For Cake Maker: These plastic cake dowel rods are designed to separate cake tiers slightly and create a floating illusion,will add more charming to your cake.

6-Piece Set for Every Cake Size: This cake arch guide tool includes six different templates (mini, standard, wide, and flat) to help you create uniform arches and drapes on round, square, or irregular cakes. A must‑have among cake decorating tools for bakers of all levels
Score and Cut Your Wedding Cake in a Bullseye Pattern
Where exactly should your blade first touch the cake’s pristine surface? You’ll score a gentle circle two inches from the outer edge, creating your guiding ring for the bullseye pattern that ensures perfect center alignment before the real cutting begins. Visualize concentric rings, like a dartboard awaiting your mark, then cut 1-inch thick slices radiating inward from that outer ring toward the heart of the cake, progressing systematically through each tier with balanced, even portions for your guests.
| Ring Position | Slice Width | Target Portion |
|---|---|---|
| Outer ring | 1 inch | Standard serving |
| Middle ring | 1 inch | Balanced centering |
| Inner ring | 1 inch | Precise completion |
| Center core | Adjusted | Final, cherished piece |
Keep each slice’s width consistent, treating your sharp serrated knife as an extension of your steady hand. This technique transforms the practical task of portioning into a memorable part of your celebration.

Complete Set: Cake dowels for tiered cakes includes 12 white support rods and 4 cake dividers. This comprehensive kit provides all the necessary tools for creating beautiful multi-layered cakes.
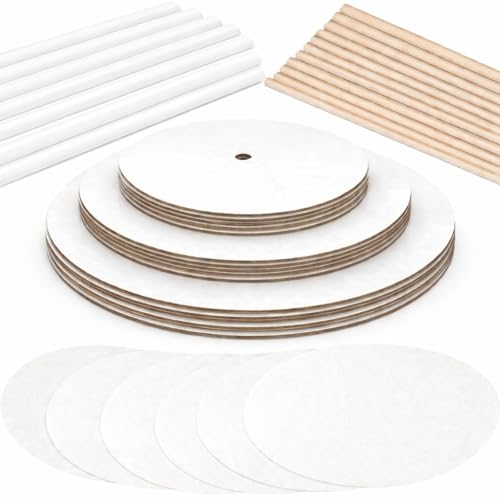
125 Piece Cake Tiering Set - Everything You Need! Comes with enough cake boards, parchment paper, bamboo dowels and plastic dowels to make five 3-tiered cakes, or even more one and two tiered cakes! Included how-to guide makes cake tiering easy and fun!

Value Package: You will get 8 pcs cake separator plates and 24 pcs plastic cake pillars, enough quantity to meet your needs, perfect for the construction of a tiered cake.
Wipe Your Knife Clean Between Every Slice
Every single slice you serve deserves a blade as pristine as the first. You’ll pause, breathe, and wipe your knife clean before the next cut begins. This small ritual transforms good slicing technique into something truly masterful, creating connection between you and every guest awaiting their perfect portion.
- Wipe the blade with a damp kitchen towel to banish sticking, especially on moister cakes where crumbs cling like stubborn shadows
- Follow with a dry towel, ensuring no water sabotages your frosting’s smooth embrace
- Clean before each new tier, preserving flavor purity across layered heights
- Keep your dedicated cloth within arm’s reach, a faithful companion through service
- Embrace frequent knife cleaning as guardianship of sharpness, preventing jagged edges born from buildup
You’re crafting moments worth savoring, one immaculate slice at a time.

Vintage silver cake knife and server. This sturdy and vibrant cake utensil is suitable for wedding day, anniversaries, birthdays or shower parties, and will add an elegance style to your party setting. Copyright Number: VA 2-335-358

Elegant Cake Cutting Set for Wedding:This cake cutting set enhances engagements and anniversaries with its graceful design. The set includes a cake knife and server engraved with "Always and Forever" and "Mr Mrs HAPPILY EVER AFTER," along with two forks engraved "Groom" and "Bride." It serves as a beautiful reminder of life’s most treasured moments

Remove Dowels and Supports as You Slice
With your knife now spotless and your rhythm established, you’ll turn your attention to the hidden architecture holding your masterpiece together. Those dowels and supports, like silent scaffolding in a cathedral, have done their work; now they must step aside as you slice each tier, preventing interference with your blade and preserving the cake’s integrity. Gently slide your cake server beneath the tier, lifting it like a treasure from its resting place, before you address what lies below. You’ll pull center dowels free during slicing, reducing obstruction and granting easier access to the layers beneath. Separate each tier deliberately, avoiding hidden cardboard or concealed supports. Plan your cutting order wisely, removing top or outer tiers first, ensuring stable, safe passage through this edible monument you’re sharing with everyone gathered.

Small Offset spatula by Ateco
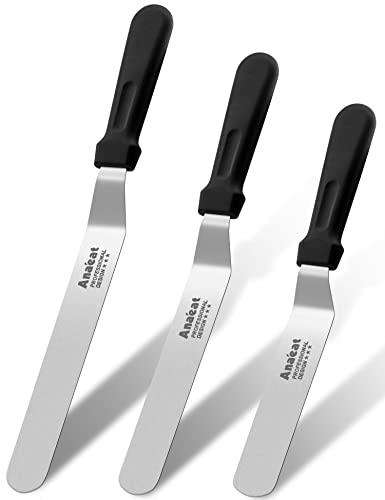
PERFECT BALANCE BETWEEN STIFFNESS & FLEXIBILITY: Anaeat Spatula gives you more control when icing your cake. The Professional Angled cake spatula is good to move easier when frosting cake. Great for frosting and smoothing icing on cakes to keep your hands and finger away from the icing.

Three Versatile Sizes for Precision and Flexibility This set includes three offset spatulas with blade lengths of 6 inches, 8 inches, and 10 inches, giving you the flexibility to handle various baking and decorating tasks with ease. The 6-inch cake spatula is perfect for detailed work, such as spreading frosting on cupcakes or small pastries. The 8-inch blade is ideal for mid-sized cakes, while the 10-inch icing spatula excels in decorating larger tiered cakes, ensuring a smooth, professional finish every time
Serve Wedding Cake Buffet-Style or at Guest Tables
Once you’ve navigated the hidden scaffolding of dowels and supports, you’ll face a decision that shapes how your guests experience the final act of this celebration: whether to invite them to a buffet of possibilities or to bring the cake directly to their seats as a personal gift from the kitchen.
Your cutting guide becomes the compass for this choice, directing each slice toward its destined presentation.
- Offer buffet-style service when multiple flavors await, letting guests curate their own sweet finale
- Deliver plated slices to tables when a single flavor unifies your confection
- Adorn each plate with fondant flowers salvaged from upper tiers during buffet presentation
- Dismantle multi-tiered creations tier by tier, extracting distinct flavors before blade meets crumb
- Deploy a rolling cart or auxiliary table as your mobile command station for seamless buffet distribution

Size:Cake knife is 12.59" long. Serving set 10.4'' long.
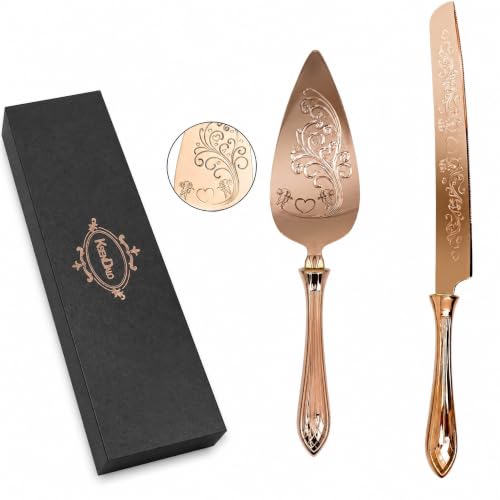
- Elegant Rose Gold Design: Elevate your special occasions with our stunning rose gold cake knife and server set, adding a touch of sophistication to weddings, celebrations, and birthdays. Such an artistic style cake server will please all during a romantic wedding or parties

Cherished Keepsake: Witness the peak of wedding romance as the couple cuts the cake together. Leave a lasting impression with this exquisite, gleaming wedding cake cutter set. It will become a cherished memento long after the big day!
Save the Top Tier for Your First Anniversary
You’ll discover that the smallest tier holds the largest promise, a confectionary time capsule waiting quietly in freezer paper and hope. You designate this top tier for preservation the moment celebration ends, whisking it away before condensation mars its fondant skin. You wrap it in plastic, then foil, then more plastic; armor against freezer burn’s creeping betrayal. You mark your calendar, counting three hundred sixty-five days until thawing becomes your ritual. Refrigerator patience comes first, then room-temperature grace. You coordinate with your partner, transforming preservation into shared intention, a private language only you two speak. When anniversary arrives, you unwrap memory made edible, tasting not merely buttercream but the year you’ve built together, layer by faithful layer.

6-PIECE CAKE ARCH GUIDE SET - Includes multiple arch guide shapes and sizes to help create swags, ruffles, borders, and decorative piping patterns for cakes ranging from 4 to 10 inches.

Package Contents: include 12 pieces plastic white dowel rods, enough quantity to meet your needs, suitable for tiered cake construction

Start cutting your dowels the easy way with the Loyal Cake Dowel Cutter
Cut Across Multiple Tiers to Offer Every Flavor
Each tier of your wedding cake stands as a separate promise, a distinct flavor profile waiting to be unsealed rather than a single monolith to be conquered from top to bottom.
When you approach your tiered cake, you’re orchestrating a symphony of flavors for guests who’ve gathered to share your joy. You’re not merely slicing; you’re curating experience.
- Remove each tier to the table before cutting, ensuring guests access every flavor
- Alternate outer half-edges sequentially so adjacent slices showcase different profiles
- Pre-arrange your cutting order using rolling carts for seamless service
- Cut larger outer rings first, revealing inner tiers in controlled sequence
- Coordinate logistics to prevent cross-contamination between flavors
Your attention transforms dessert service into an inclusive celebration where each guest discovers their preferred slice among the flavors you’ve selected.

Enough Supplies to Make Five 3-Tier Cakes! - Includes 10-inch, 8-inch, and 6-inch cake boards (5 pieces per size) with 50 parchment paper rounds, 10 wooden dowels, and 50 easy-to-cut straw dowels.
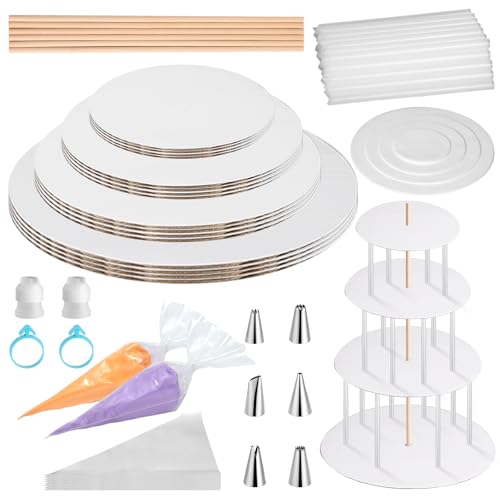
【Cake Stacking Kit】The package includes four sizes of cake boards: 10-inch, 8-inch, 6-inch, and 4-inch, 4 pcs per size. 80 parchment paper rounds, 6 wooden dowels, 50 straw dowels, 100 disposable piping bags, 6 piping tips, 2 couplers, and 2 piping bag ties

Complete Cake Tier Stacking Kit: this cake decorating kit includes 9 silver cake boards in 3 sizes: 8 inch, 6 inch, 4 inch, 60 precut parchment paper rounds, and 20 plastic cake dowels; This cake stacking kit provides enough supplies to build 3 tiered cakes or multiple 1 and 2 tiered creations, making the cake tiering process easier and more enjoyable for bakers