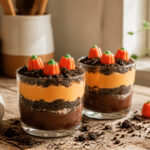

Pumpkin patch dirt cups are layered pudding desserts built to look like tiny gardens: chocolate pudding and Oreo "dirt" form the soil, orange-tinted vanilla pudding sits above as the pumpkin layer, and candy pumpkins complete the scene on top.
The trick most recipes skip is the chill time between layers.
Without at least five minutes in the refrigerator, the pudding stays too soft and the Oreo crumbs sink straight through, turning the whole cup into brown sludge instead of clean stripes.
Four drops of red and five of yellow food coloring give the exact pumpkin hue, no special orange dye needed.
Chocolate Pudding Base
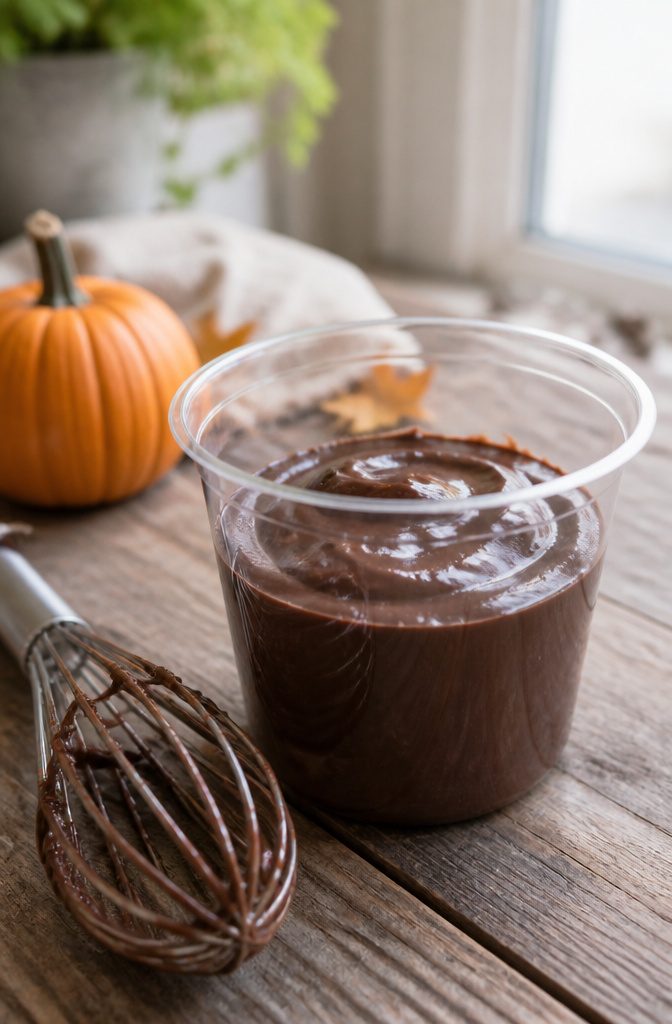
Two boxes of instant chocolate pudding, 3 ounces each, whisked into 4 cups of cold milk gives you the first layer of the cup.
I follow the package directions exactly on this step, no shortcuts. The mixture goes from thin to creamy in about two minutes of steady whisking, and at that point it gets poured straight into whatever cups you’re using.
I like 9-ounce clear plastic cups because you can see the layers later, but anything in that range works.
What matters is the chill time.
The pudding needs at least five minutes in the refrigerator to firm up before you add anything on top. Skip that rest and the Oreo layer sinks in, the colors muddy, and you lose the whole dirt-cup effect.
A properly chilled base keeps every layer sitting exactly where you put it. The pudding continues to set as the cups sit, so that first chill is doing more than cooling; it’s building the structure everything else stacks on.

Safe & Crystal-Clear Quality: Made from food-grade BPA-free plastic, these plastic cups are both durable and toxin-free, offering a sturdy yet elegant way to showcase your desserts.

Spill-Proof Protection: The no-hole flat lid creates an airtight, complete seal that locks in freshness and prevents oxidation; ensuring your smoothies, milkshakes, beverages, smooth desserts, salad or items that sit level with cup rim arrive intact and taste great; guaranteed zero leaks, even when upside down

Package Includes: Forty (40) 9 oz. Hefty Party Perfect Clear Plastic Cups, Clear Disposable Cups for Wedding Receptions, Parties, and Baby Showers
Oreo Dirt Layer
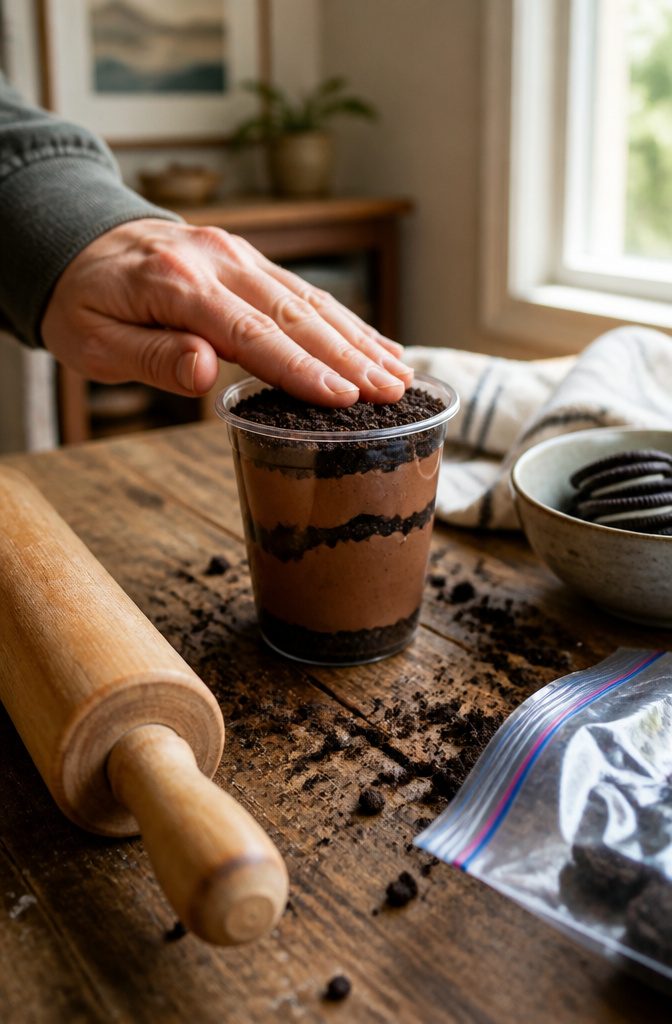
Fine crumbs read as dark soil; chunks read as cookie, and the illusion breaks.
I run sixteen Oreo cookies through a food processor until they look like potting mix, though a zip-top bag and a rolling pin do the same job if you keep at it.
The bag method takes longer and leaves a few larger pieces that need a second pass, but it spares the cleanup of blade and bowl.
One cup crushed is about the right amount for a single batch, enough to sandwich between pudding layers and still cover the tops with a thin, even layer.
Press the crumbs gently so they settle into the pudding rather than sitting loose, which keeps the cups tidy when someone digs a spoon in.
One 5.9 oz box of Jell-O Chocolate Artificially Flavored Instant Pudding & Pie Filling Mix

SIMPLY JELL-O: One 3.9 oz box of Jell-O Simply Chocolate Flavored with Other Natural Flavor Instant Pudding and Pie Filling Mix

One 1.4 oz box of Jell-O Zero Sugar Chocolate Fudge Artificially Flavored Instant Reduced Calorie Pudding Mix & Pie Filling
Orange Pudding Layer
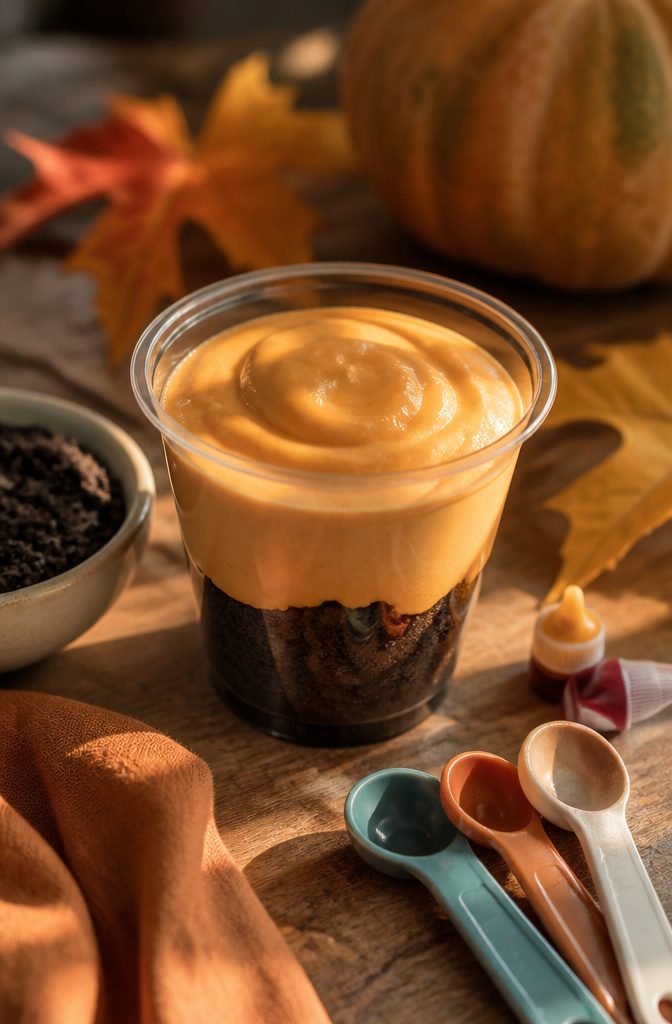
Instant vanilla pudding sets up the orange layer, same as the chocolate base beneath it.
4 drops of red food coloring and 5 drops of yellow give the right pumpkin shade without buying a separate bottle of orange. The ratio leans yellow, which reads more like fall than traffic-cone.
Stir the color in after the pudding thickens so you can see the real tone before committing. If the hue looks too red against the dark cookie layer below, another drop or two of yellow pulls it back.
This layer needs to chill firm before you add anything on top, or it smears into the dirt instead of sitting clean.

SIMPLY JELL-O: One 3.4 oz box of Jell-O Simply Vanilla Flavored with Other Natural Flavor Instant Pudding and Pie Filling Mix

One 3.4 oz box of Jell-O Cheesecake Artificially Flavored Instant Pudding & Pie Filling Mix

One 4.6 oz box of Jell-O Cook & Serve Vanilla Artificially Flavored Pudding & Pie Filling Mix
Layering the Cups
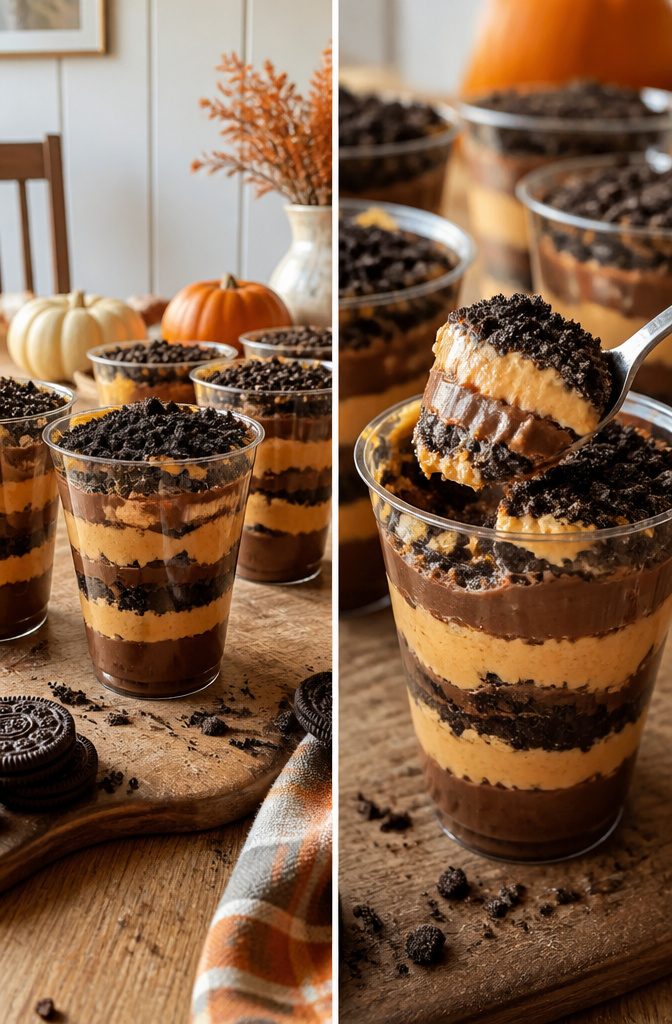
Clear cups are non-negotiable here. The whole point of pumpkin patch dirt cups is the stripe you see through the side, and that stripe only works if you build in the right order.
Darker layers belong toward the bottom, where they read as soil and shadow, and the lighter orange pudding sits above them where a pumpkin would actually grow.
I start with chocolate pudding, then a thin layer of Oreo crumbs, then the orange-tinted vanilla pudding, then more crumbs, and repeat until the cup is full.
The crumbs between each pudding layer keep the colors from bleeding into each other, so you get clean bands instead of a muddy swirl.
A spoonful of each layer is enough; tilt the cup to check the side as you go, because what looks right from the top can look lopsided through the plastic.
Four large glasses or six smaller ones is the yield to plan for, and the smaller cups actually show off the stripes better since the layers stack tighter.

Ready-to-use cookie crumbs

COOKIE DIPPER - Perfect for dunking sandwich cookies, from regular size to double stuffed
Pumpkin Patch Toppings
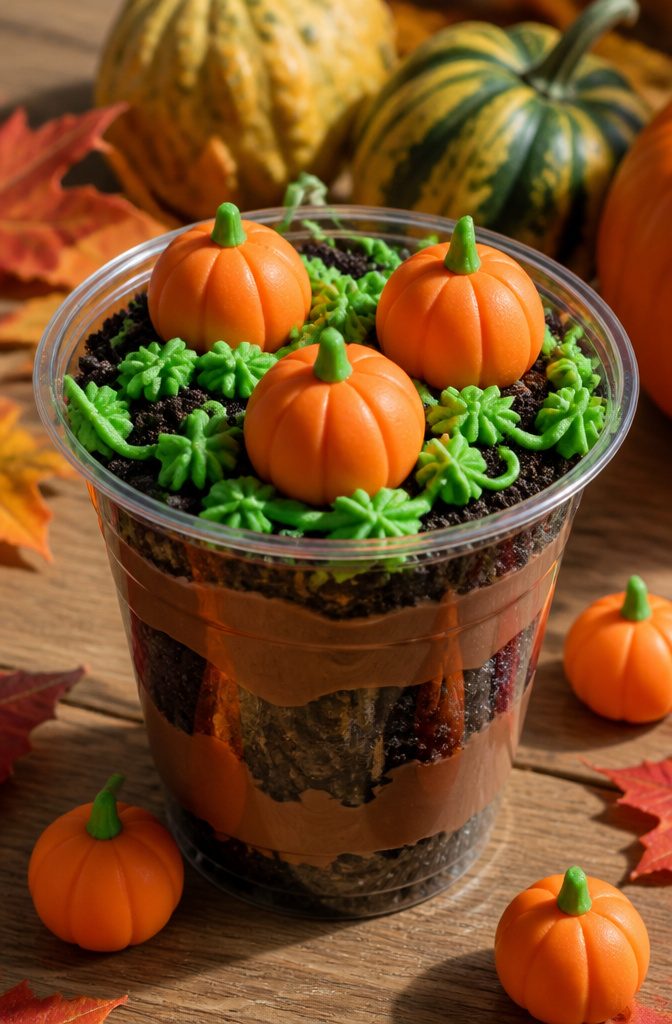
Three mellowcreme pumpkins per cup sit right on top of the crushed Oreo dirt, spaced like a real pumpkin patch with a little breathing room between them.
Some versions stop there, but a thin line of green frosting piped in loops between the candies adds the vine detail that makes the scene read instantly as a pumpkin patch rather than generic dirt dessert.
For a batch, 12 pumpkin candies total covers the job at four cups, though you can stretch to six smaller servings if you want more pieces to hand around at a party.
The extra garden details are where you decide how busy the top should get.
Gummy worms, bone candy, or Green Sour Punch Straws all work as buried or half-buried surprises in the Oreo layer, though I would not pile on every option at once.
Two accents beat five. The pumpkins stay central; everything else is optional texture for the kids to dig toward.

15 COUNT THANKSGIVING ASSORTMENT: Includes 15 edible icing decorations featuring festive turkey and pumpkin designs for seasonal baking and dessert decorating.

Decorating kit great for any skill level

15 COUNT FALL ASSORTMENT: Includes 15 edible candy decorations featuring assorted autumn leaves and acorns for Thanksgiving, fall parties, harvest celebrations, and seasonal baking.
Ingredients
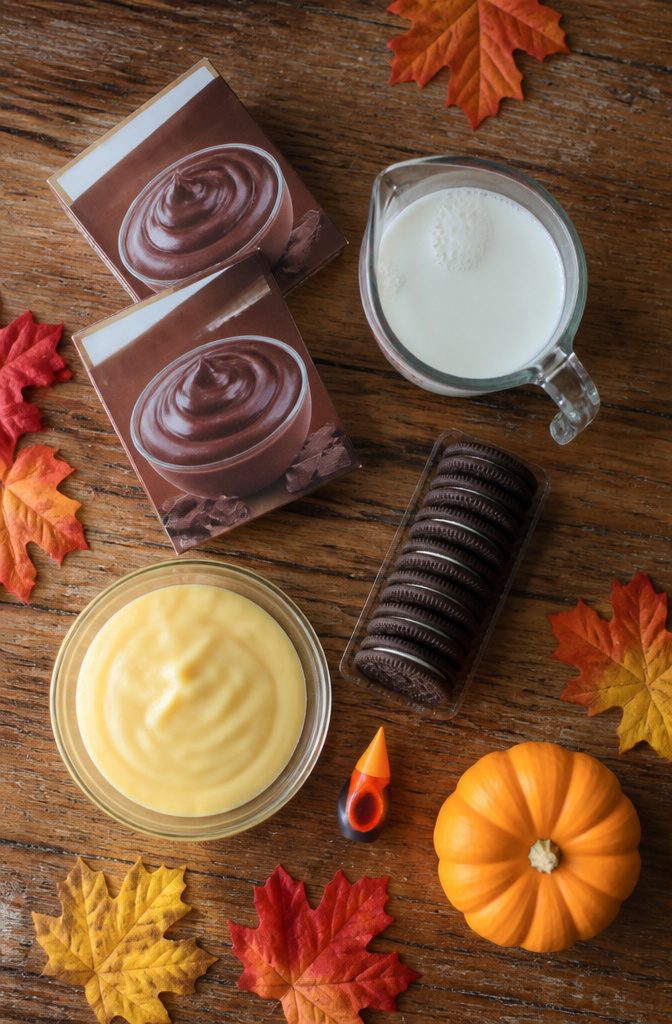
Most of this recipe is made from grocery-store staples you probably already have. Here is what you will need:
- 2 boxes instant chocolate pudding (3 oz. each) and 4 cups cold milk – this is the route most recipes take, and the one I would choose for a weeknight. The instant sets fast and holds its shape under the layers. Homemade pudding works if you prefer it, though you will need to factor in cooling time.
- 16 Oreo cookies, crushed fine. A sealed bag and a rolling pin do the job; a food processor is faster if you already own one.
- 1 batch vanilla pudding, dyed orange with 4 drops red food coloring and 5 drops yellow. No need to buy orange dye.
- 12 mellowcreme pumpkins for the patch effect.
- Green cookie frosting, for stems and vines.
- Optional extras: gummy worms, bone candy, or 2 Green Sour Punch Straws per cup cut into grass-like strips.

GREAT VALUE PACK - You will get 50 plastic cups,50 dome lids no hole.The capacity of each cup is 9 oz/250 ml.9 ounces (250ml) is the ideal size for ice cream and dessert.

Slip and Leak Safety: These 9 oz disposable parfait cups feature sturdy construction and excellent spill containment. There are no holes on the cup lid, which can keep the food fresh and preven spills

Seal & Snug: No-hole air-tight lids give peace of mind for meal prep, takeout & catering. Complete seal keeps thick smoothies, thin juices, or chunky contents right where they should. Ideal for small containers of cold drinks & coffee. No mess, no worries
Prep and Timing
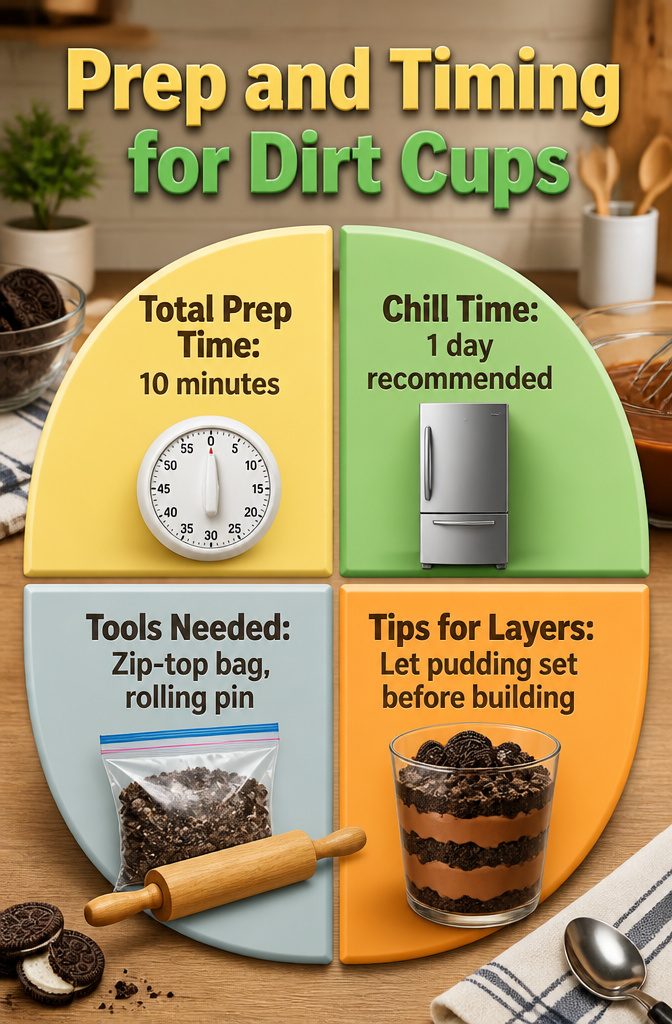
These come together in about 10 minutes of actual work, though the clock reads closer to 15 minutes total once you account for the pudding setting up.
The real wait is the chilling, and that is where planning matters. A full day ahead works fine; the cups hold perfectly overnight in the refrigerator.
For the Oreo crumbs, a zip-top bag and rolling pin keep the mess contained.
A few larger chunks in the mix add texture, so do not pulverize them completely. If you want cleaner layers, let the pudding set for at least 5 minutes before you start building.
Thicker pudding layers less milk than the package calls for, which also helps keep the Oreo and pudding lines distinct instead of bleeding together into one brown blur.

No hydrogenated fats or high fructose corn syrup allowed in any food

One 5.1 oz box of Jell-O Banana Cream Artificially Flavored Instant Pudding & Pie Filling Mix

One 3.5 oz box of Jell-O Cook & Serve Butterscotch Artificially Flavored Pudding & Pie Filling Mix
Serving and Occasions
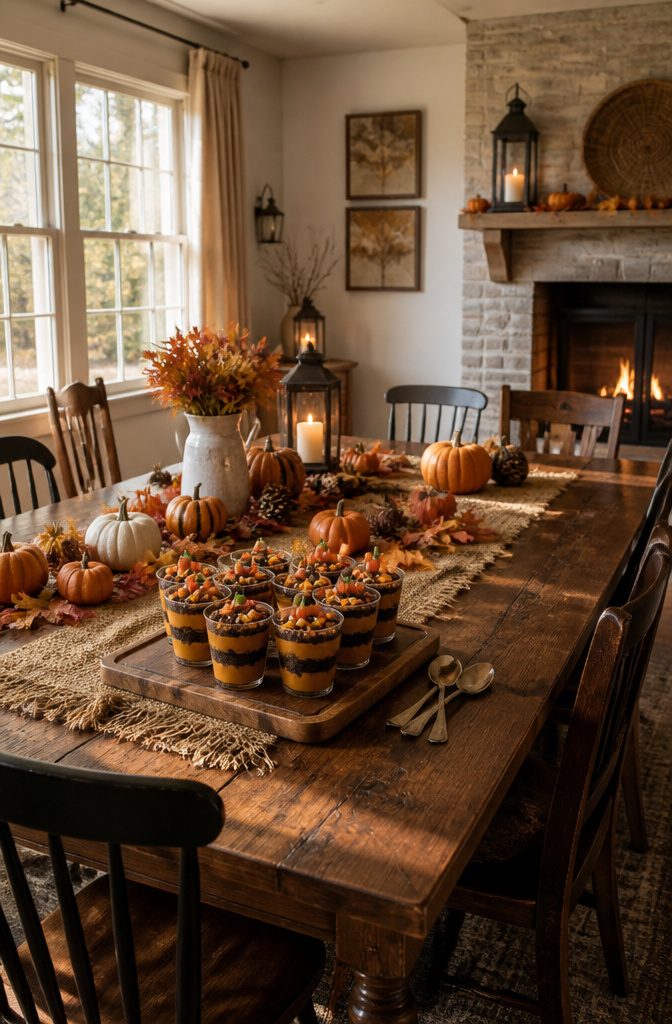
Clear plastic cups do more than hold the dessert; they turn the layers into a display.
You can see the dark Oreo crumble against the chocolate pudding, then the orange layer, then the pumpkin candies perched on top like a tiny harvest.
That visual payoff is why these show up at Halloween parties and school events, and why adults reach for them even when the kids are the excuse.
The classroom angle has shifted lately. A lot of schools no longer allow homemade snacks; anything brought in has to be sealed or individually wrapped.
One way around that is to send the components in separate, pre-packaged portions: pudding cups still sealed, Oreos in their sleeves, candies in single-serve bags.
Kids open and build their own cups, which cuts down on germ spread and keeps the activity intact.
The Mellowcreme Pumpkins do not come in tiny packages, so those need a sanitary hand-off, but everything else arrives ready to tear open.
At home, the assembly itself is most of the fun. A fellowship dinner, a fall party, or just a weeknight when dinner needs a small celebration: the cups work for all of them.
My own leaning is toward letting everyone build their own, because the layering is half the point and the cleanup is just spoons.

One 5.1 oz box of Jell-O Vanilla Artificially Flavored Instant Pudding & Pie Filling Mix

One 3.4 oz box of Jell-O Vanilla Artificially Flavored Instant Pudding & Pie Filling Mix

Jell French Vanilla Artificially Flavored Instant Pudding & Pie Filling Mix is a sweet treat on its own as well as a perfect ingredient for dessert recipes
Variations and Substitutions
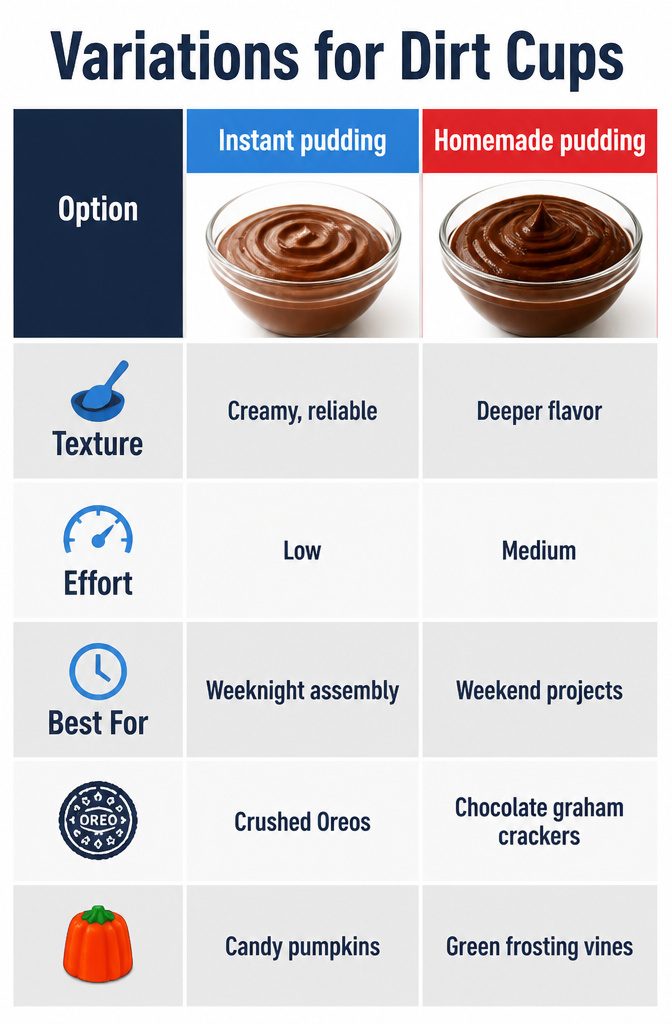
Instant pudding sets in about five minutes with cold milk and a steady two-minute whisk, which is why I keep boxes on hand for dirt cups.
Homemade vanilla and chocolate pudding layered together tastes richer, but it also means another pot to wash and a longer chill before you can assemble.
For a weeknight build, the mix wins; if you are making these for a crowd you want to impress, the extra depth of homemade is worth the trade.
The dirt layer has two workable paths. Crushed Oreos give the darkest, most convincing soil, especially if you leave some larger cookie fragments for texture.
Chocolate graham crackers crush finer and taste less sweet, which can balance the candy on top. Either way, a zip-top bag and a rolling pin handle the job; no food processor required.
Toppings are where the pumpkin patch theme lives or dies. Candy pumpkins are the obvious choice, but gummy worms, candy corn, or green sprinkles all read Halloween.
A few sources suggest piping green frosting vines across the dirt for stems, which looks sharp in photos but adds a decorating step. For a faster finish, stick the pumpkins straight into the crumbs and call it done.
| Option | Texture | Effort | Best For |
|---|---|---|---|
| Instant pudding | Creamy, reliable | Low | Weeknight assembly |
| Homemade pudding | Deeper flavor | Medium | Weekend projects |
| Crushed Oreos | Dark, coarse "soil" | Low | Classic dirt-cup look |
| Chocolate graham crackers | Finer, less sweet | Low | Milder overall sweetness |
| Candy pumpkins | Firm, thematic | Minimal | Pumpkin patch theme |
| Green frosting vines | Decorative, sticky | Higher | Party presentation |
Frequently Asked Questions
How do you make pumpkin patch dirt cups?
Start by whisking two 3-ounce boxes of instant chocolate pudding into 4 cups cold milk, then chill the pudding for at least five minutes so it firms up.
Layer chocolate pudding, fine Oreo crumbs, orange-tinted vanilla pudding, and more crumbs in clear plastic cups, repeating until full.
Top with three mellowcreme pumpkins per cup and a thin line of green frosting piped as vines, then refrigerate until ready to serve.
What can I use instead of Oreos?
Chocolate graham crackers work well, though they crush finer and taste less sweet than Oreos.
Either option can be broken down with a zip-top bag and rolling pin; graham crackers give a milder overall sweetness, while Oreos produce the darkest, most convincing soil effect.
Can I make these ahead of time?
Yes, these hold perfectly overnight in the refrigerator.
A full day ahead works fine, so you can build them the evening before a party or school event and pull them out when needed. Leftovers keep for up to three days chilled.