An entremet is a French architectural dessert where you orchestrate multiple distinct components: silky mousse, crisp dacquoise, rich ganache, and glossy mirror glaze into a single, sliceable composition that transforms every bite into a deliberate journey through contrasting textures and temperatures.
Unlike traditional cakes, you’re not simply stacking layers; you’re engineering a symphony of crunch and silk, where each element chills to set before the next joins the construction, building toward that dramatic unmolding moment when edible glass meets layered ambition.
The process demands patience, precision, and a willingness to embrace technique over shortcuts, rewarding your effort with a dessert that looks like sculpture and eats like a dream.
Mastering this skill opens pathways to even more advanced pastry techniques.
What Is an Entremet Cake?
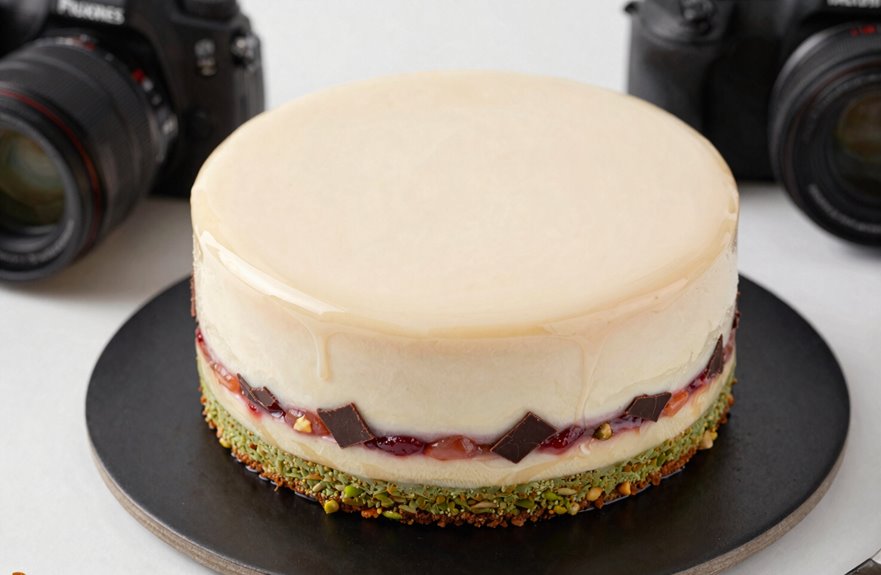
Why does a single slice of cake demand your full attention before you’ve even lifted the fork? You’ve encountered an entremet, a French dessert where architecture meets artistry. Unlike anything you’ve baked before, this multi-layered creation assembles separately prepared components: mousse, ganache, dacquoise. These ingredients combine into a harmonious whole that celebrates texture interplay over single-note sweetness.
You’re building flavor stories in rings and molds. Each layer chills until set before the next joins the composition. Your patience rewards you with that signature mirror glaze, poured center-outward in a glossy cascade that sets like edible glass. When you unmold precisely, revealing clean edges and reflective surfaces, you’ve joined a tradition once served between royal courses. This is a dessert that requires technical skill and demonstrates pastry mastery.
How Entremets Differ From Regular Cakes
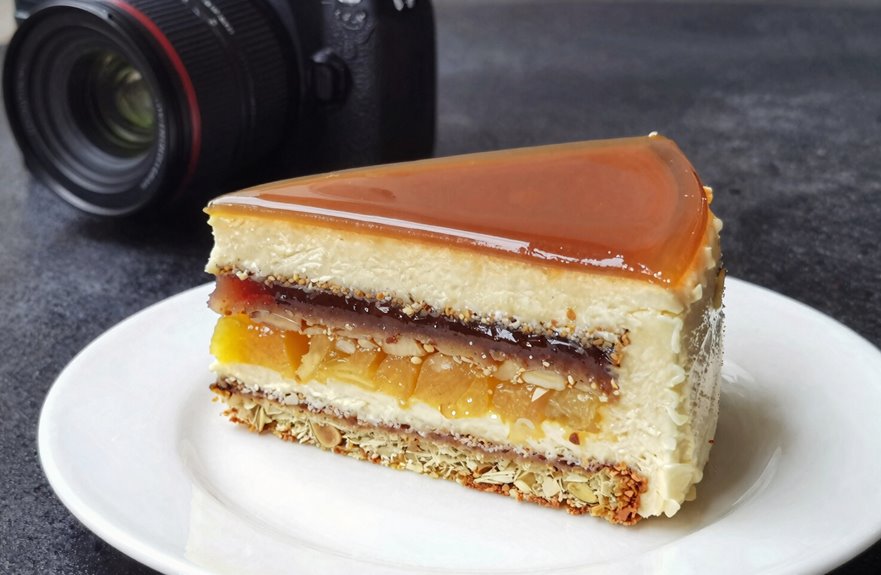
The moment you slice into a standard layer cake, you’re greeted by familiar territory: baked sponge, spread with buttercream or jam, stacked and frosted into something comforting but predictable. When you encounter an entremet, you’re stepping into a domain where precision meets poetry, where each component earns its place through deliberate technique rather than happy accident.
- Construction Method: You build an entremet in rings or molds, layering mousse and cremeux with surgical care, while cakes rise and settle in their pans like old friends.
- Texture Symphony: You orchestrate crunch against silk, freeze and set, creating harmonies that no single-bite cake achieves.
- Technical Demands: You master mirror glazes and ganache interiors, embracing steps that require advanced baking skills.
- Visual Drama: You unmold with held breath, revealing edible architecture that demonstrates mastery of pastry craft.
The Essential Layers of a Classic Entremet
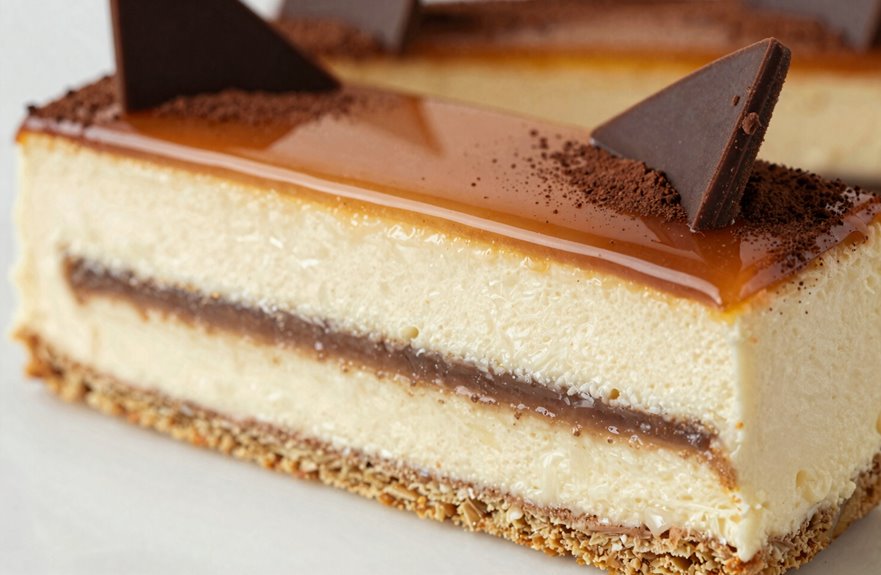
Having seen how entremets stand apart from their simpler cousins, you’re now ready to unpack the architecture that makes these desserts possible, layer by deliberate layer. You’ll build your foundation with cake, perhaps a joconde or soft genoise, then add crunch through dacquoise or feuilletine, creating textural counterpoints that sing against each other. Your mousse, whether chocolate, fruit, or caramel, becomes the silky heart that binds everything together, while ganache adds richness and mirror glaze delivers that showstopping finish. Each component demands patience: you’ll prepare them separately, chill them properly, then assemble within acetate-lined molds like a sculptor building from the inside out. When you slice through your finished creation, you’ll reveal striations of intention. These layers represent the technical precision required to transform simple ingredients into structured desserts that demonstrate the principles of classical pastry work.
Tools and Molds You’ll Need to Build One
Where do you begin when you’re building something that demands both precision and vision? Gather your tools like an architect gathers blueprints, knowing each instrument shapes your edible architecture.
Your entremet journey starts with these essentials:
- Sheet pans for baking sponge bases that’ll anchor your creation
- Piping bags and tips for depositing mousse with surgical accuracy
- Acetate sheets lining your cake rings, creating that flawless finish
- A hair dryer for gentle unmolding, like morning sun melting frost
You’ll want cake rings standing two to three inches tall, with walls wrapped in acetate sheets to cradle each layer. Freeze your mousse solid, then let it thaw slightly. This conditioning transforms your ring from a restrictive mold into a functional tool, allowing the entremet to release cleanly.
How to Plan Your Entremet Assembly Timeline
Because an entremet refuses to be rushed into existence, you’ll spread its creation across two deliberate days, each one building upon the last like movements in a symphony. On Day 1, you’ll bake your base, whip your mousses, and prepare ganache, wrapping components in parchment paper before freezing them solid. This cold rest ensures clean slicing later. Your assembly timeline demands patience: frozen rounds stack more cleanly than warm ones, and that chill firms your mousse into sculptable clay. Day 2 brings the crescendo. Glaze flows over your unmolded creation, decorations settle like jewelry, and you serve. This rhythm works because frozen components behave predictably, and layering cold elements produces the clean, professional appearance required for plated desserts.
Building the Base: Chocolate Cake and Ganache
How does a towering entremet find its footing? You’ll build it from the ground up, starting with a chocolate cake that anchors every layer above. You mix flour, cocoa powder, sugar, and leaveners with water, mayonnaise, and vanilla, beating on low then medium for one minute until the batter reaches full incorporation. You spread it into a parchment-lined quarter sheet, bake until set, cool briefly, then freeze firm. This chilling transforms soft crumb into a sliceable foundation.
Your base becomes two Genoise halves, ready to cradle what comes next. Picture your process:
- You freeze the cake for 2–3 hours, ensuring clean cuts without crumbling.
- You slice rounds that’ll stack like geological strata in your mold.
- You prepare Dark Chocolate ganache, glossy and rich, to bind and enrobe.
- You assemble with precision, knowing each element supports your edible architecture.
Creating Mousse, Cremeux, and Fruit Layers
What transforms your frozen cake base from sturdy foundation into layered spectacle? You’re layering mousse and cremeux, the dynamic duo that elevates your entremet from simple cake to architectural marvel.
You’ll fold your mousse with whipped cream or Swiss meringue, creating clouds of airy elegance that practically dissolve on the tongue. Your cremeux, meanwhile, brings silken density; a custard-like embrace that anchors each forkful with luxurious weight. These textures dance together as light meets rich in deliberate contrast.
You’ll prepare each component separately, then build your masterpiece in rings or molds, chilling between layers as a patient architect lets mortar set. Berry compotes or mirrored glazes add tart punctuation and jeweled shine. You’re constructing edible art, layer by patient layer, until your entremet stands complete.
Classic Flavor Pairings That Balance Sweet and Tart
The interplay of sweet and tart in your entremet is where technical precision meets creative intuition, a balancing act that transforms individual components into a symphony of flavor.
- You craft a berry mousse layer, its bright acidity cutting through dark chocolate ganache like sunlight through shadow.
- You brush Chambord syrup onto chocolate genoise, the alcohol’s fruity tartness awakening dormant flavors.
- You alternate berry compote with hazelnut praline, creating a dialogue between sharp and mellow, soft and crisp.
- You finish with a glossy mirror glaze that seals your berry mousse within, a jewel-toned promise of what waits beneath.
These pairings result from deliberate technique. Contrast in flavor and texture creates the cohesive dish; each layer reinforces the others through its specific contribution of acidity, richness, or textural variation.
Why Texture Makes or Breaks Your Entremet
You’ll quickly discover that texture interplay essentials transform your entremet from a simple stack of flavors into a symphony of sensation, where crisp dacquoise shatters against velvet mousse like autumn leaves underfoot, each layer demanding your full attention through the spoon. Mastering layer balance secrets means embracing the freezer as your silent partner, chilling between steps so your mirror glaze floats atop ganache without sinking, ensuring every slice reveals clean strata rather than a muddled mess. When you fold that Swiss meringue with patience and whip cream to soft peaks that barely hold their shape, you’re not just following steps. You’re conducting an orchestra where each component, from fruit purée to crunch, plays its distinct role in a progression that makes your entremet feel inevitable and refined.
Texture Interplay Essentials
When you take that first forkful of a perfectly executed entremet, your palate doesn’t just taste; it experiences a choreographed dance of sensations where crisp dacquoise shatters against silken mousse and glossy glaze yields to creamy depths beneath. You’re crafting edible architecture where texture becomes your signature voice, demonstrating mastery of dessert as an art form.
Your entremet demands at least three distinct textures, each playing its role like instruments in a symphony, building perceived depth through mouthfeel contrast while flavors harmonize underneath.
- Foundation — Firm dacquoise or sponge anchors your creation, providing structural integrity
- Core — Creamy mousse or crema creates the yielding, luxurious center you’re chasing
- Surface — Mirror glaze or thin chocolate delivers that coveted sheen and clean slice
- Interruption — Crunchy praline or nut elements surprise the palate between bites
Freezing between layers preserves these boundaries, keeping your textures defined and your craftsmanship evident.
Layer Balance Secrets
Because texture functions as both architect and storyteller in your entremet, you’re not merely stacking layers; you’re engineering a narrative where each stratum earns its place through deliberate contrast and mutual support. Your dense ganache anchors the composition, while airy mousse and crisp dacquoise create layered textures that converse rather than compete. You freeze between steps, preserving each element’s integrity and preventing the soggy collapse that betrays amateur work. Consider how berry mirror, panna cotta, and mousse transform a single bite into a journey. Jelly yields to silk yields to cloud.
| Texture Role | Your Technique |
|---|---|
| Foundation | Freeze mousse or ganache exterior for clean slicing |
| Contrast | Pair hazelnut crunch with chocolate creaminess |
| Amplification | Match berry brightness with mirror glaze sheen |
You’re building edible architecture. Every layer invites someone home.
How to Pour a Flawless Mirror Glaze
You’ll master the mirror glaze when you treat temperature like a dance partner, keeping your glaze at precisely 104°F while your cake waits, thoroughly chilled like a smooth stone ready to receive a waterfall. Before you even lift the pitcher, you’ll bloom your gelatin in cold water, coaxing it into soft submission, then marry it to your heated sugar-cocoa base until every crystal dissolves into liquid silk. This preparation is your foundation, the quiet work that makes the final pour possible. When the moment arrives, you’ll pour from the center outward in one confident, steady stream, watching the glaze cascade evenly across your entremet’s surface like a glossy curtain falling into place, transforming your creation into something that belongs behind a pastry case, gleaming under soft lights.
Glaze Temperature Control
Why does a single degree transform your entremet from gallery-worthy centerpiece to sticky disappointment? You’ve felt that sting, watching your mirror glaze seize or slide, and you know the culprit: glaze temperature dancing outside its narrow window.
Master this, and you’re one of us.
- Hold your glaze temperature steady at 104°F (40°C), that sweet spot where viscosity flows like silk yet sets with conviction.
- Bloom your gelatin in cold water for five minutes, then fold it into warmth. This marriage creates the flawless firmness you crave.
- Pour from center outward, letting centrifugal grace banish air pockets before they scar your surface.
- Maintain that 104°F (40°C) throughout. Chill the cake, and you’ll witness dull, streaky betrayal instead of mirror-bright perfection.
Temperature is your ally. Treat it thus.
Surface Preparation Steps
Your glaze waits at that perfect 104°F, a liquid mirror ready to transform, but the canvas beneath it demands equal respect. Neglect surface preparation, and even flawless temperature control cannot rescue the result. Surface preparation becomes the foundation that lets mirror glaze achieve its legendary glassy reputation.
You’ll freeze that mousse cake until it reaches a solid, frosty core. A cold surface catches the glaze like a frozen pond catching moonlight, setting it instantly into streak-free brilliance. Hydrate your gelatin properly with five minutes in cold water, then warm your glucose and cream mixture with care to prevent whitening before it forms. Strain every bubble away; imperfections lurking in your liquid will betray your craft. Precision in these steps elevates your results.
Pouring Technique Basics
Temperature, that silent conductor of transformation, demands your full attention as the glaze meets its frozen stage. The mirror glaze rewards your patience with liquid glass. Keep it at 104°F, no hotter, no cooler, and watch it transform from ordinary to extraordinary.
Your entremet cake waits, frozen solid, ready to receive its glossy armor. Strain away every bubble, every whisper of imperfection. Then pour from the center, rotating slowly, letting gravity do its elegant work.
- Freeze your entremet cake until it’s rock-solid, protecting every delicate layer beneath.
- Strain the mirror glaze through a fine mesh, banishing bubbles to achieve that flawless reflection.
- Pour confidently from center to edge, rotating as the cascade finds its natural path.
- Catch excess glaze below, ready for your next creation. Nothing wasted, everything celebrated.
Entremet Layering Mistakes to Avoid
How often do you find yourself staring at a finished entremet, its once-pristine layers now slumping like a failed soufflé, and wonder where the precision you planned so carefully disappeared to? You’re not alone in this frustration, and mastering these pitfalls brings you into the circle of pastry artists who’ve learned through patient practice.
Respect the freezing between layers. It’s your architectural foundation, preventing the oozing collapse that betrays rushed assembly. When your cream isn’t whipped to proper peaks, or fruit bleeds unthawed moisture into delicate structures, you’re inviting soggy defeat. Let ganache and mousse chill completely before building upward; impatience here creates sinking strata and smeared boundaries. Test your mirror glaze temperature on a small surface first, avoiding the cloudy, tacky disappointment of thermal miscalculation. These disciplines transform you from hopeful beginner to confident creator with reliable results.
How to Slice and Serve Entremets Cleanly
The careful architecture you’ve built through patient layering deserves an equally thoughtful finale. The moment you release that entremet from its mold tests your craftsmanship. You’ve mastered the technique that transforms layering into precision work.
- Loosen your masterpiece: Gently warm the acetate with a hair dryer. The mold will release its grip as the heat softens the barriers between cake and coating.
- Transfer with confidence: Slide your entremet onto a rack, where cooling solidifies the structure further.
- Heat your blade: Dip your knife in hot water, wiping between each slicing motion. This produces clean, unblemished portions with defined layers.
- Serve immediately: Present each slice while textures remain distinct and separate. This preserves the contrast between components that your careful construction created.
Where to Find Tested Entremet Recipes
When you’re ready to transform careful technique into edible architecture, tested entremet recipes become your blueprint for success. You’ll discover these treasures in dedicated pastry resources and trusted blogs like Sugar Geek Recipes, where step-by-step assembly guides walk you through acetate-lined rings, 8-inch molds, and the critical freezing intervals that yield pristine slices. Vetted recipes emphasize multi-layer construction such as chocolate genoise, berry mousses, and ganache, spanning timelines across multiple days. Reputable sources specify equipment and foundation components with precision, while some highlight halal adaptations, welcoming you into traditions that honor both craft and community.
| Recipe Source | Key Features | Skill Level |
|---|---|---|
| Sugar Geek Recipes | Step-by-step assembly, mold tips | Intermediate |
| Dedicated Pastry Books | Professional timelines, equipment lists | Advanced |
| Adapted Community Recipes | Halal-friendly, traditional techniques | All Levels |
| Vetted Food Blogs | Detailed freezing stages, clean slicing | Beginner-Intermediate |