
These soft peanut butter cookies taste like a Reese’s cup collided with your grandmother’s recipe, except they look like they crawled out of a Halloween decoration bin. Total time runs about 35 minutes from mixing bowl to finished spider.
The catch is timing: the mini peanut butter cups have to be frozen solid before baking, and you have roughly sixty seconds after pulling the tray to press them into warm cookies before the residual heat turns room-temperature candy into a puddle.
Get that right and the chocolate legs pipe cleanly onto a body that actually stays put; get it wrong and you have thirty-six melted blobs instead of spiders.
Most recipes call for 36 to 48 mini Reese’s cups depending on cookie size, and the lower temperature of 350°F gives you the wider, softer base those eight piped legs need.
What These Cookies Are
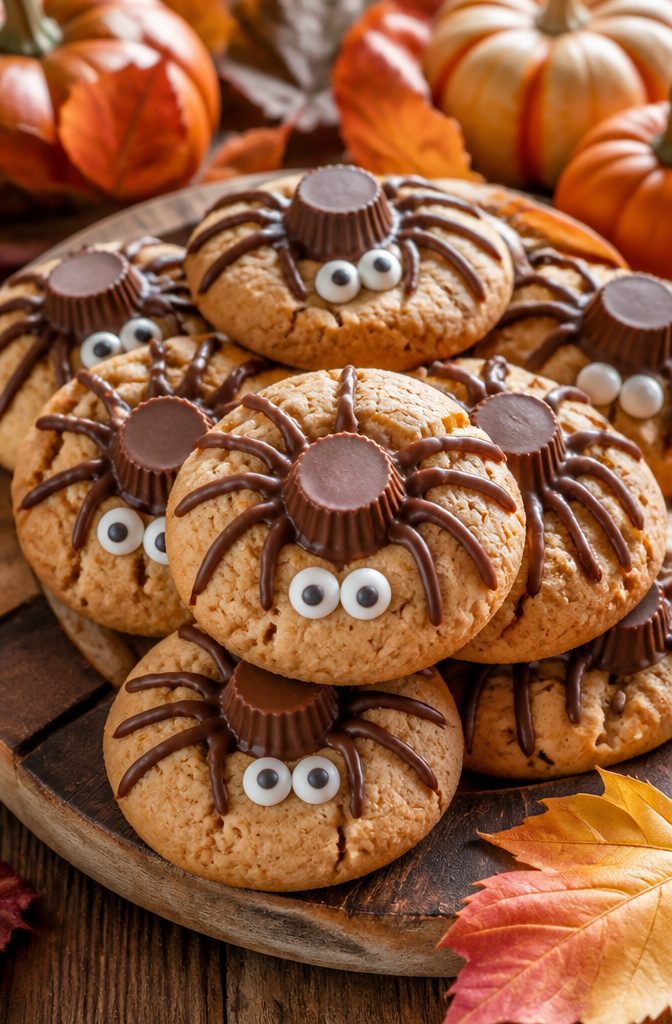
Peanut butter spider cookies are exactly what the name promises: soft peanut butter cookies baked round and puffy, then topped with a mini peanut butter cup while still warm from the oven.
A few dots of melted chocolate and a pair of candy eyes turn that cup into a spider body; eight more chocolate lines, drawn with a toothpick or piping bag, become the legs.
The finished cookie looks like something that just crawled out of a Halloween decoration bin, except it tastes like a Reese’s cup collided with your grandmother’s peanut butter cookie recipe.
These show up most often at Halloween parties and classroom treat exchanges, the kind of October afternoon where you need something festive that does not require a pastry degree.
The appeal is partly the look and partly the assembly-line efficiency of it. You bake the base cookies, press on the cups, pipe the chocolate, and move on.
No fondant, no food coloring, no specialty tips. Kids can manage the legs if an adult handles the melted chocolate; the process keeps them occupied for a solid twenty minutes, which in Halloween-week parenting is a genuine unit of currency.

Dark chocolate mini cups with peanut butter filling

Mini peanut butter cups in premium milk chocolate

Contains one (1) 30-ounce party pack of REESE'S Miniatures Milk Chocolate Peanut Butter Cups Candy
Peanut Butter
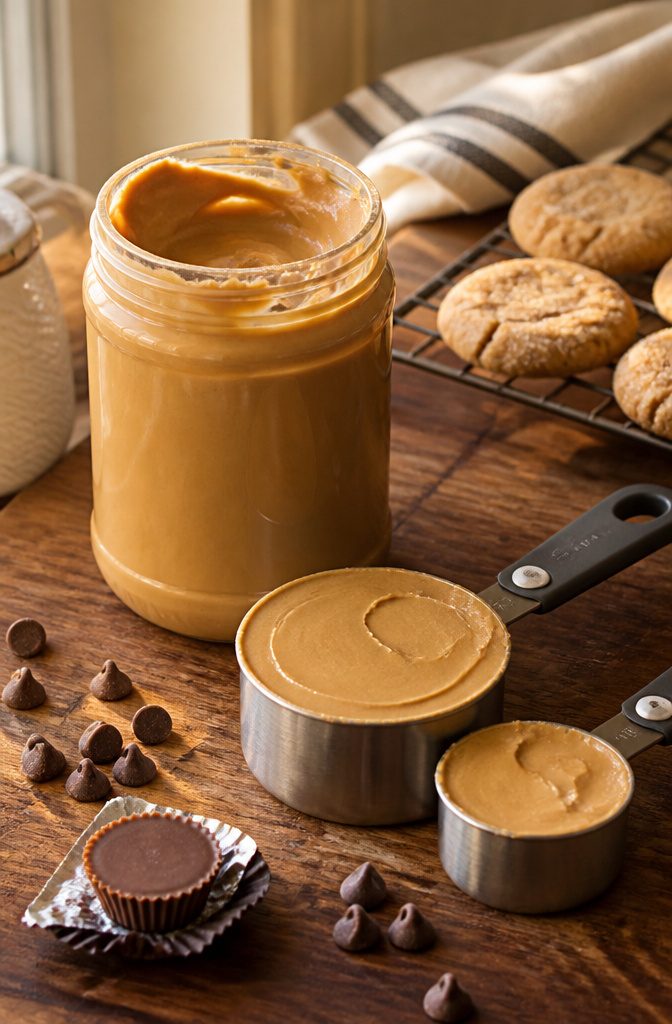
Creamy peanut butter is the flavor the whole cookie hangs on, not just the base.
The sources split on whether crunchy works, but for a spider cookie that needs to hold a truffle or peanut butter cup on top without crumbling apart, creamy is the safer bet.
It binds the dough more evenly and gives that smooth, dense chew people expect from a peanut butter cookie.
Measuring matters more here than with most ingredients. Peanut butter is dense, and an extra spoonful can tip the dough from soft to heavy.
The ¾ cup (201g) called for in one of the top versions is a useful benchmark; if you’re scooping from a jar, level it flat rather than packing it in.
Too much and the cookies turn out crumbly and dry, too little and they spread thin and lose the richness that carries the whole spider concept.

REESE'S PEANUT BUTTER: Refrigerated cookie dough made with real REESE'S Peanut Butter brings out smiles any day of the week; You can even eat the refrigerated cookie dough uncooked (look for the “safe to eat raw” seal!)

CLASSIC COOKIE MIX: Peanut butter cookies for the family to enjoy; each 7.2-oz. bag makes twelve 2-inch cookies

QUICK AND CONVENIENT: Betty Crocker makes it easy to bake up a batch of soft peanut butter chocolate chip cookies; Perfect for the whole family; Do not eat raw cookie dough
Mini Reese’s Peanut Butter Cups
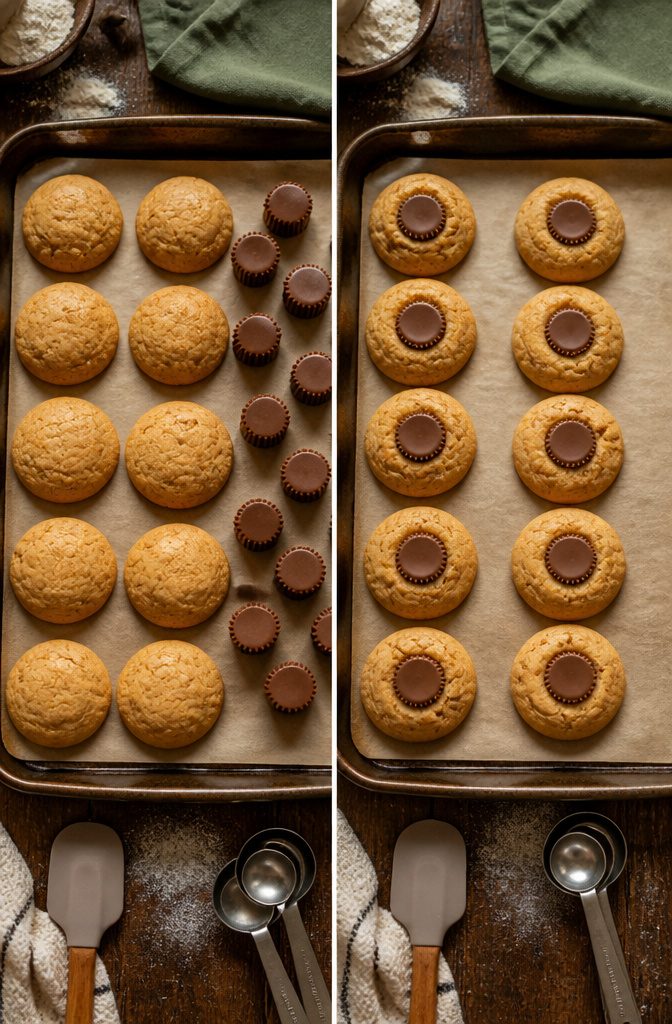
Frozen mini Reese’s cups make the spider body in this cookie, and the timing matters more than the brand.
The cookies come out of the oven soft and warm, and you press an unwrapped cup into the center of each one immediately.
The residual heat softens the chocolate just enough to grip the legs and eyes you add next, but the cup still holds its shape.
Most recipes call for 36 to 48 cups depending on how generously you want to stock the batch. The smaller count works if you make larger cookies; the larger count suits a standard two-bite size that stretches further at a party.
If Reese’s are hard to find or you want a different texture, Whoppers malted milk balls work as a substitute. They are rounder and lighter, with a crunch that some people prefer to the dense peanut butter center.
Either way, freeze whatever you choose. Room-temperature candy melts into the cookie instead of sitting on top of it, and a soft body collapses under the weight of pretzel legs and chocolate piped in eight directions.

Package includes: Total 12Pcs. 4Pcs Halloween Pumpkins, 4Pcs Halloween Bats, 4Pcs Halloween Spiders. Good idea for your Halloween baking decoration

Halloween Black Spiders Sprinkles: Each bottle weighs 3.17oz (90 g).

Makes Decorating Fun And Easy - it can be used as a cake decoration during Easter, Christmas, Halloween, Enjoy these sweet sprinkles.
Chocolate Chips
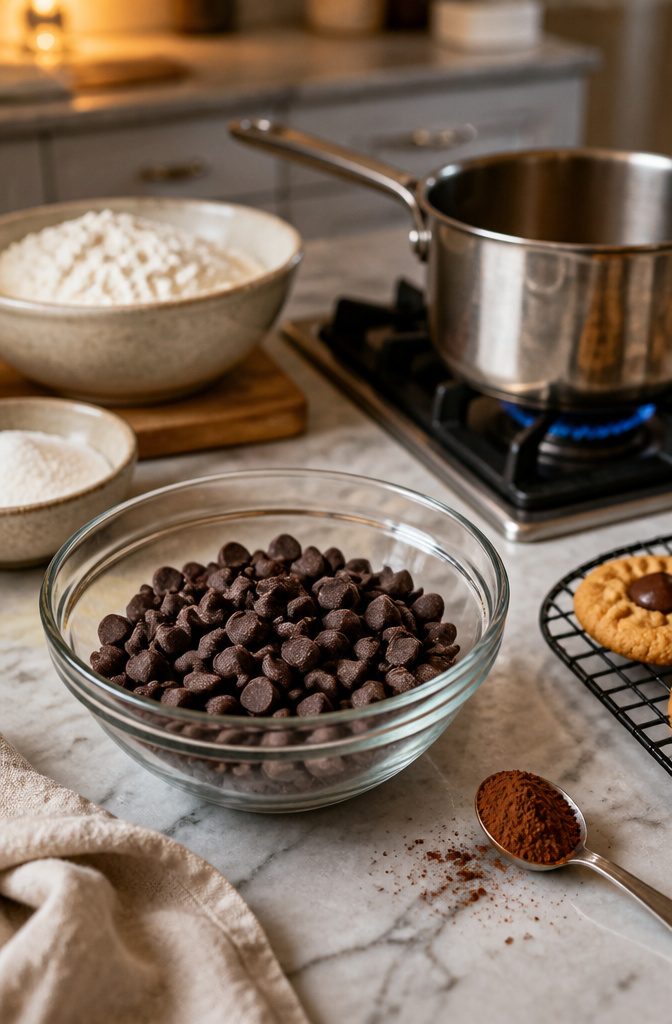
Melted chocolate chips are what turn a peanut butter cup into a spider with legs. A quarter cup to half a cup of semi-sweet chips gives you enough to pipe eight legs onto a full batch without stopping to remelt.
The chocolate seizes fast if you rush it. I set the chips in a heatproof bowl over barely simmering water, stirring now and then until they just lose their shape.
Some bakers add a small spoonful of neutral oil or coconut oil to keep the mixture loose enough for a pastry bag; without it, the chocolate can thicken into a paste that fights through the tip.
A decorating pen, the small rubber syringe kind with changeable tips, also handles thicker chocolate better than a standard piping bag.
Once melted, the real enemy is time.
The bowl sets up as it sits. One reader keeps hers nested in hot water while she works, which buys enough minutes to finish all the legs before the chocolate turns grainy.
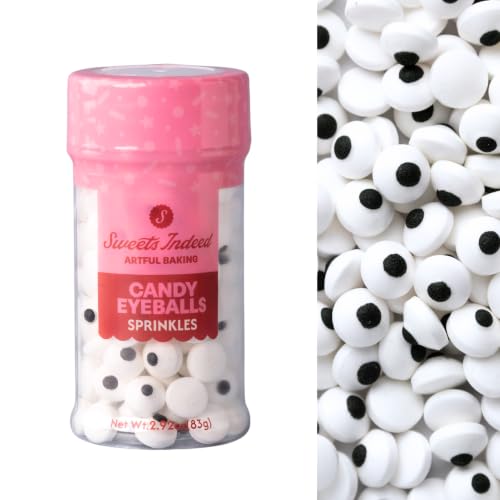
Halloween Candy Eyeballs: Edible eye sprinkles instantly add a spooky finishing touch to Halloween cookies, cupcakes, cakes, brownies, cake pops, and party desserts.

Use Date: You can see Production Date and Expiration date at the bottom of the bottle/ After open the seal of the bottle, its better to use them in 1 month/ Store in cool dry place

Playful Candy Eyes: Add a mischievous touch to your treats with our eyeball mix sprinkles in assorted sizes, resembling quirky eye motifs, perfect for adding a spooky yet fun twist to your Halloween or prank-themed creations
Candy Eyes
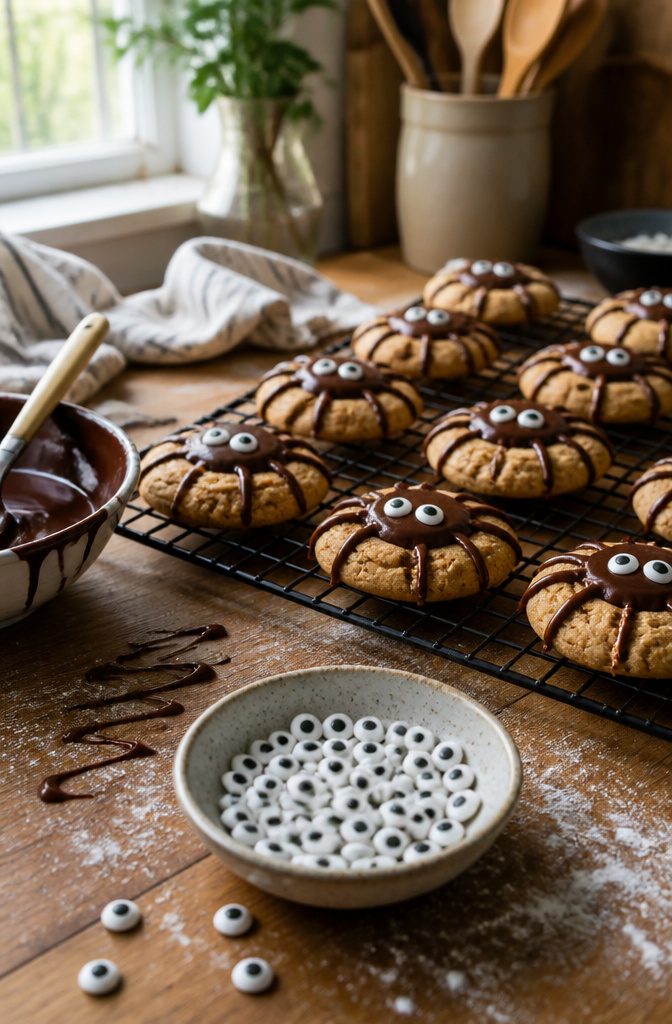
Candy eyes are the detail that turns a chocolate-dipped cookie into something that actually reads as a spider on the platter.
Most recipes call for 72 to 96 candy eyes, which sounds like a lot until you remember each spider needs two and you’re baking three dozen cookies.
The lower number covers a batch with one eye knocked loose; the higher number gives you a small buffer for the ones that roll under the fridge.
The attachment is the part where timing matters.
A small dab of melted chocolate on the back of each eye, pressed onto the Reese’s cup while the chocolate is still wet, sets up firm enough to move in about ten minutes.
Trying to transfer the cookies to a platter before that chocolate hardens means eyes sliding down the peanut butter cup and landing in odd places, so I build that wait into the workflow: decorate in batches, then circle back to plate the ones that have had time to set.

Riccle Piping Bags and Tips Set, 11.8 Inch 100 Anti Burst Piping Bags, 124 Pcs Cake Decorating Kit with 16 Piping Tips, 1 Reusable Pastry Bags, 3 Cake Scrapers
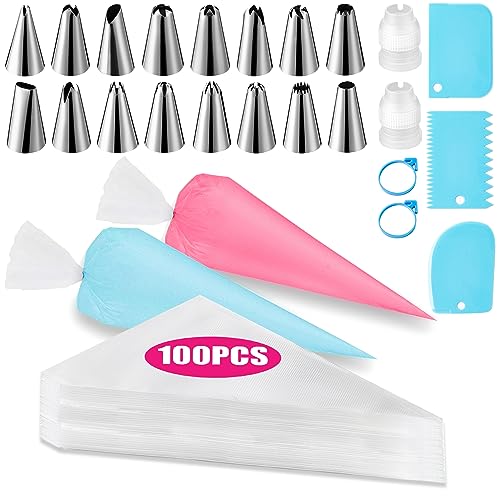
Cake Decorating Supplies: 100 pcs 12-inch large piping bags, 16 pcs stainless steel frosting piping tips set, 2 pcs couplers for piping bags, 2 pcs piping bag ties, 3 x plastic scrapers. You will have all the necessary tools to decorate delectable cakes

【What you will get?】:Packing including 100 pieces 14Inch Disposable Piping Pastry Bag , 10 pieces silicone pastry bag ties, 10 Piesces Scriber Needle and 2 Tip Clips , with which you can create all types of patterns on cake.
Butter and Sugar
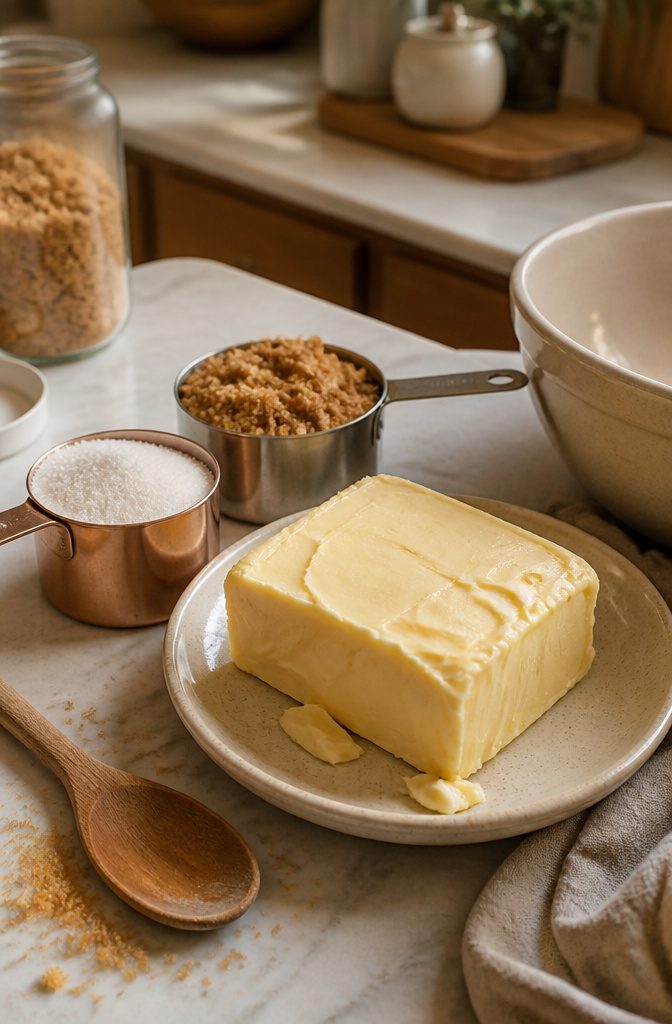
Room-temperature butter creams faster and more evenly than cold, so pull a stick from the fridge about 30 minutes before you start.
Beat the butter with ½ cup brown sugar and ⅓ cup granulated sugar until the mixture turns light and fluffy, not just mixed.
This usually takes 2 to 3 minutes with an electric mixer on medium speed. The brown sugar keeps the cookies chewy, while the granulated sugar gives them the crackly top that holds sugar well.
Set aside ¼ cup granulated sugar in a shallow bowl for rolling the dough later.
The coating bakes into a thin, sparkly crust that also helps the Reese’s cup grip the surface after baking. Skip powdered sugar here; it melts in and disappears, and the cookies lose that slight crunch.

Organic Chocolate

Contains twenty-five (25) 0.55-ounce REESE'S Milk Chocolate Snack Size Peanut Butter Cups Candy in a pantry pack

Contains one (1) 7.6-ounce resealable bag of REESE'S Minis Milk Chocolate Unwrapped Peanut Butter Cups Candy
Egg and Vanilla
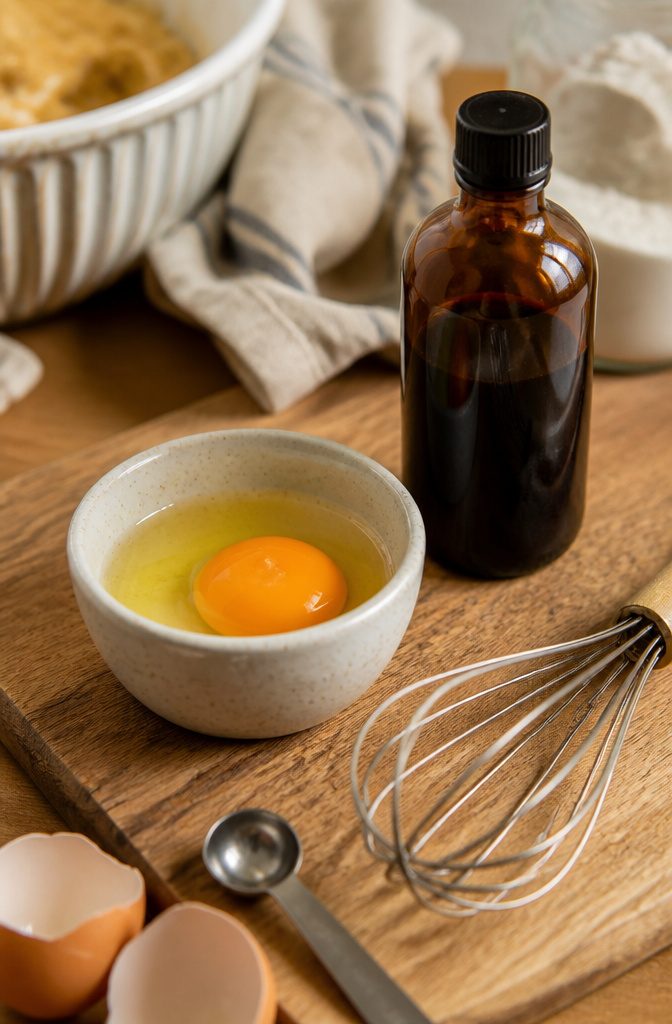
One large egg holds the peanut butter dough together once the fats and sugars are creamed, and it keeps the baked cookie from crumbling when you press that Reese’s cup into the center later.
I stir it in right after the sugars have lightened, before the dry ingredients go in.
Pure vanilla extract rounds out the flavor in a way that reads as "cookie" rather than just "peanut butter."
The sources split on quantity, but they agree on quality: the imitation stuff leaves a flat, chemical edge that stands out against the boldness of the peanut butter.
A full teaspoon is standard, and it goes in with the egg so the liquids emulsify evenly into the butter mixture. Skip this step and the dough tastes one-dimensional even before baking.


BAKING ESSENTIAL: Superior extract for baking alternative among baking essentials for your kitchen, taking your baking experience to a whole new level.

BETTY, REESE'S & HERSHEY’S: This Betty Crocker No Bake Mix combines an irresistible REESE’S Peanut Butter base and rich HERSHEY’S Milk Chocolate frosting for a sweet dessert sensation
Flour and Leavening
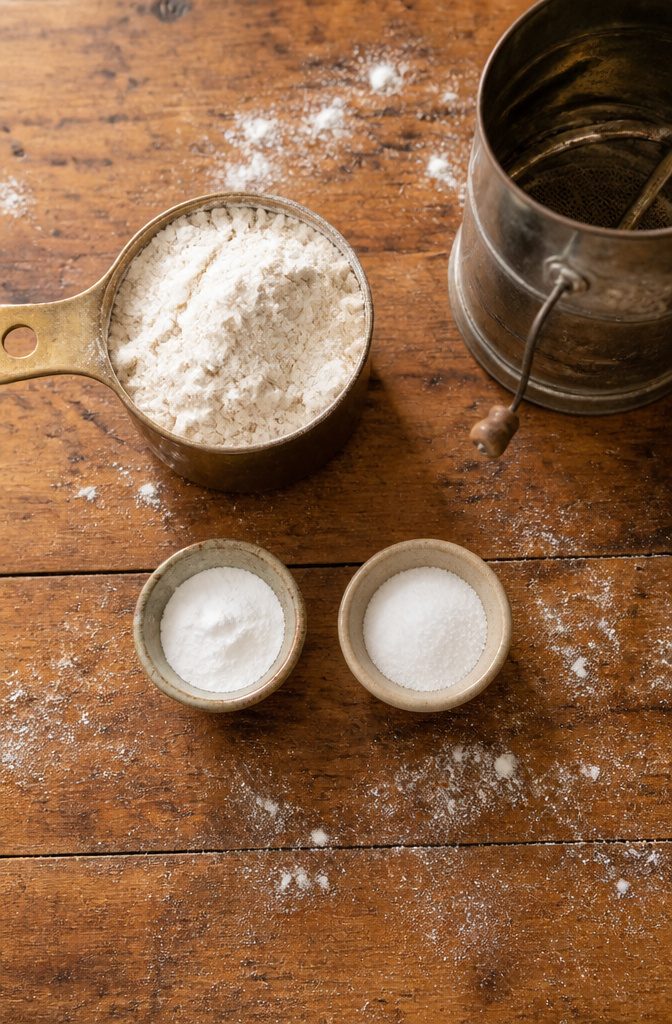
All-purpose flour gives these cookies their structure, and the amount matters more than you might expect.
Most recipes call for 1 1/2 to 1 3/4 cups, a range that looks small but changes everything. Too much flour and the dough turns crumbly; too little and the cookies spread flat under their peanut butter cups.
I measure with the spoon-and-level method rather than scooping straight from the bag, since packed flour can add nearly a quarter cup by accident.
Baking powder and baking soda handle the lift.
The two work together here, not as substitutes for each other. Baking soda reacts with the peanut butter’s acidity to start the rise early; baking powder kicks in later to keep the cookies from collapsing once that heat hits.
Without both, you get dense rounds that barely dome, which makes pressing in the truffle cavities harder than it needs to be.
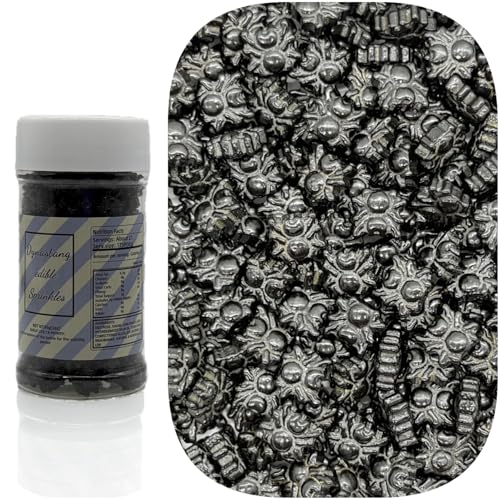
Sprinkles Makes Decorating Fun And Easy - it can be used as a cake decoration during Halloween, Christmas, National Flag Day, Enjoy these sweet sprinkles.

💕 Spider Backpack: This spider backpack has a plush appearance, with a smooth surface and a soft and comfortable feel. It feels like a real spider touch. The unique design of the spider's legs and eyes gives it a realistic visual effect, creating a more terrifying atmosphere.

FOOD GRADE and RELIABLE INGREDIENTS: These candy spiders sprinkles are made from safety ingredients, Gmo-Free, Gluten-Free, Nut-Free, Egg-Free and Dairy-Free. Vegetarians also eat with confidence. Our sprinkles also meet American food standard, guard for the health of you and your family
Shortening
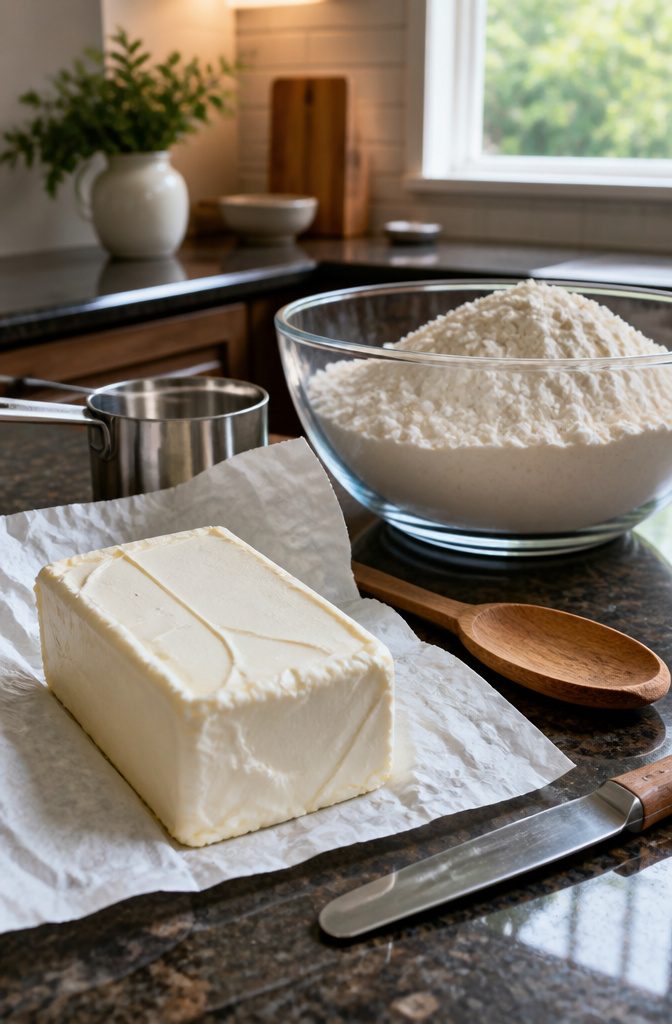
A half-cup of shortening replaces butter cleanly in this dough, and two approaches back it as a workable fat source.
The swap matters most if dairy is off the table; shortening removes the milk solids entirely and keeps the cookie tender without any allergen workarounds.
Butter brings more flavor, no question, but shortening spreads less in the oven, which helps when you are pressing legs into warm cookies and need the base to hold its shape.
I have seen both called for in equal measure, and the choice comes down to whether you want that richer bite or a sturdier platform for the peanut butter cup body and piped chocolate limbs.
Either fat gets you to the same spider, just with slightly different texture underneath the decoration.

Three Sizes for Spooky Creativity: This set includes edible eye sprinkles in three sizes, allowing you to create everything from subtle details to dramatic accents on Halloween desserts.

Includes small candy eyeballs to decorate 24 to 36 desserts

Comes with 1 bottle of Mini Edible Candy Eyeballs Sprinkles, 80g / 2.8 oz. The diameter of each Eyeball Cake Cupcake Cookie Decorations is about 7mm
Bake the Cookies
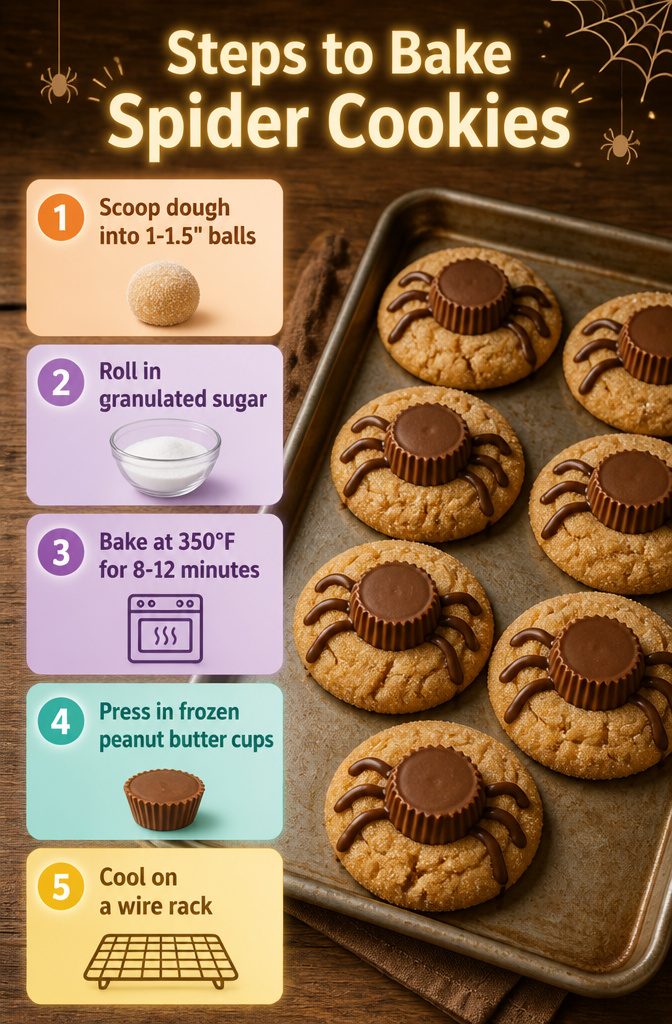
- Scoop dough into balls about 1 to 1.5 inches across, then roll each one in granulated sugar so the whole surface catches a thin, even coat. The sugar gives the baked cookie a faint crackle and keeps the peanut butter from reading too soft on the palate.
- Bake at 350°F for 8 to 12 minutes, until the edges turn golden and the centers still look slightly underdone. They will finish setting on the hot sheet. Pull them at 8 minutes if your oven runs hot or you want a chewier base; let them go the full 12 if you prefer more snap.
- The moment the tray comes out, press a frozen mini peanut butter cup into the center of each cookie. The residual heat melts the cup’s base just enough to glue it in place as it cools. Work fast, the cups soften quickly once they hit the warm dough.
- Let the cookies cool on a wire rack. The peanut butter cup needs to firm back up before you try to move or decorate them, otherwise the body of your spider slides right off.

This complete set includes 10 icing bottles in assorted sizes (1 oz, 2 oz, and 4 oz) plus 2 funnels and 2 cleaning brushes. Use as a drizzle bottle for melted chocolate to create fine details on cookies, pastries, or donuts. The ABS material is lightweight (120g total) and easy to squeeze for both kids and adults
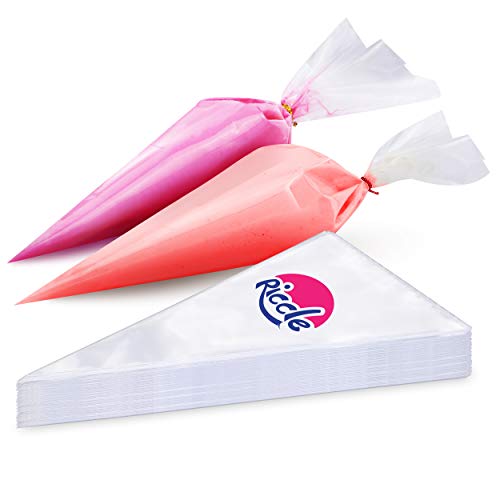
Thick Pastry Bags: Did your previous bags leaked? Are you afraid to squeeze them? Not now! Made of durable, anti-burst, non-slip and food grade plastic that is flexible, strong, reliable and thick enough to bear pressure of squeezing and frosting without any burst or leakage

1. Eco-Friendly & Extremely Durable Silicone Say goodbye to single-use plastics. Crafted from premium, food-grade silicone, these reusable piping bags are engineered to withstand over 500 heavy-duty squeezes without stretching, tearing, or blowing out. It is a sustainable choice that significantly reduces kitchen waste while providing professional-grade reliability for your thickest doughs and buttercreams.
Decorate the Spiders
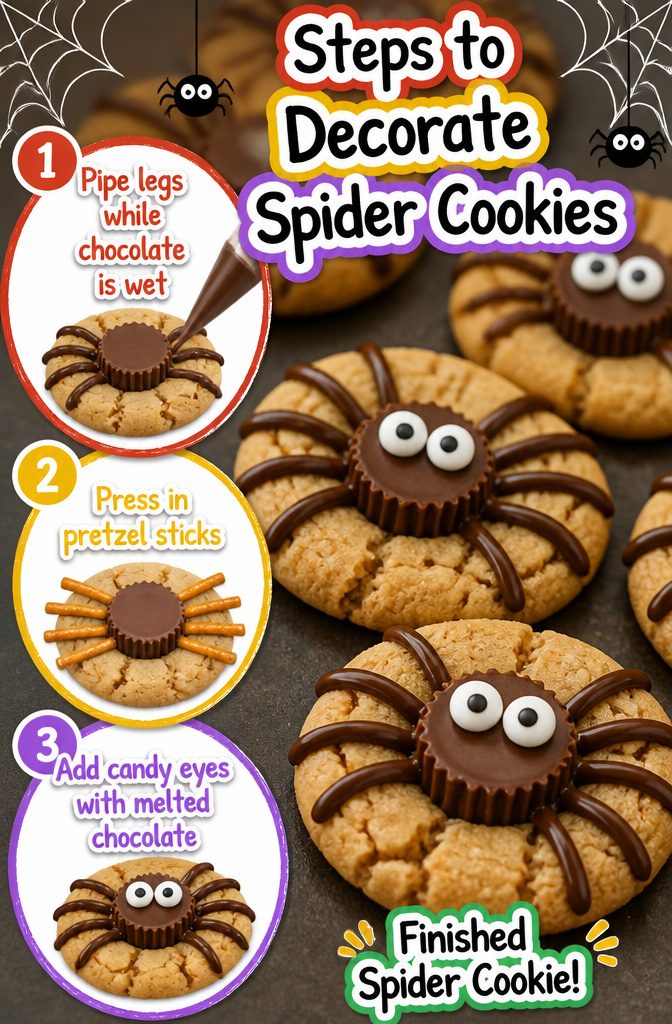
- Pipe the legs while the chocolate is still wet on top of the cookie. Eight legs per spider, four on each side, pulled outward from the center. The chocolate sets fast, so move cookie to cookie without stopping to check your work.
- Pretzel sticks are the faster option. Press them into the warm cookie right after baking, eight per spider, and they stay put without any piping. The downside is the texture: you get a crunch that fights the soft peanut butter cookie, and the straight lines look more like tick marks than bent spider legs. Piped chocolate curves naturally and stays soft enough to bite through.
- Candy eyes go on last, pressed into the same melted chocolate before it firms. Two eyes sit right on top of the peanut butter cup body. If the chocolate has already set, a fresh dot from the piping bag acts as glue.
350°F vs. 375°F
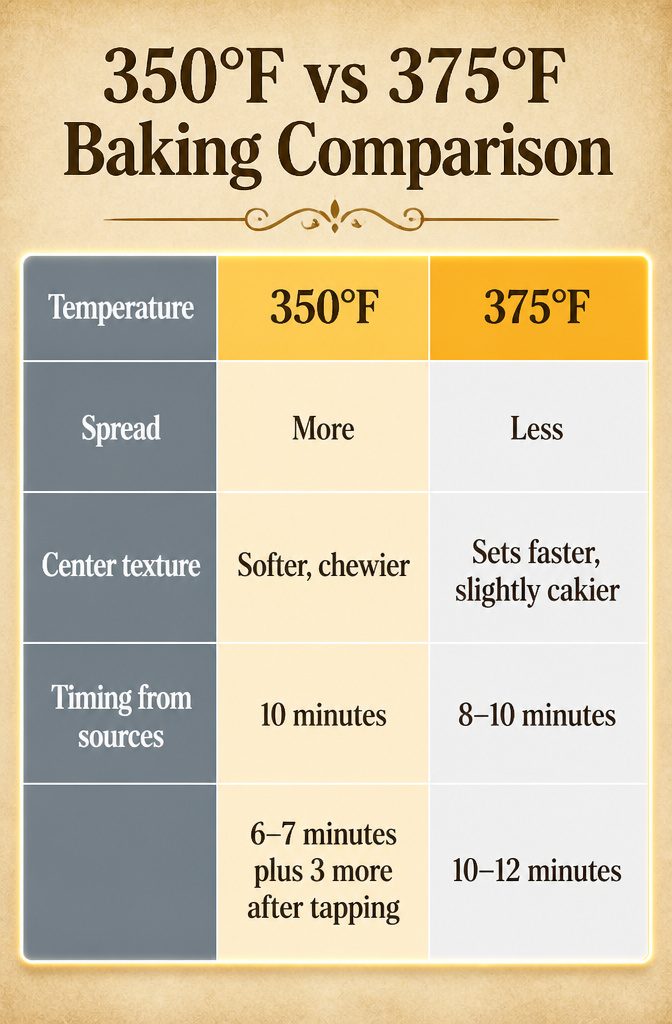
Most recipes for peanut butter spider cookies call for 350°F, though a few go hotter at 375°F. The cooler oven gives the dough more time to spread before the edges set, so you end up with a wider, softer cookie that still holds a peanut butter cup without cracking.
At 375°F the outside firms faster, which can leave the center taller and slightly cakier; that works fine for a sturdier spider body, but the window between done and overbaked shrinks.
| Temperature | Spread | Center texture | Timing from sources |
|---|---|---|---|
| 350°F | More | Softer, chewier | 10 minutes; 6–7 minutes plus 3 more after tapping |
| 375°F | Less | Sets faster, slightly cakier | 8–10 minutes; 10–12 minutes |
For these cookies specifically, the lower temperature has the edge.
You need enough surface area to anchor all eight chocolate legs and two candy eyes, and a softer center helps the peanut butter cup sink in cleanly while the cookie is still hot from the oven.
Butter vs. Shortening
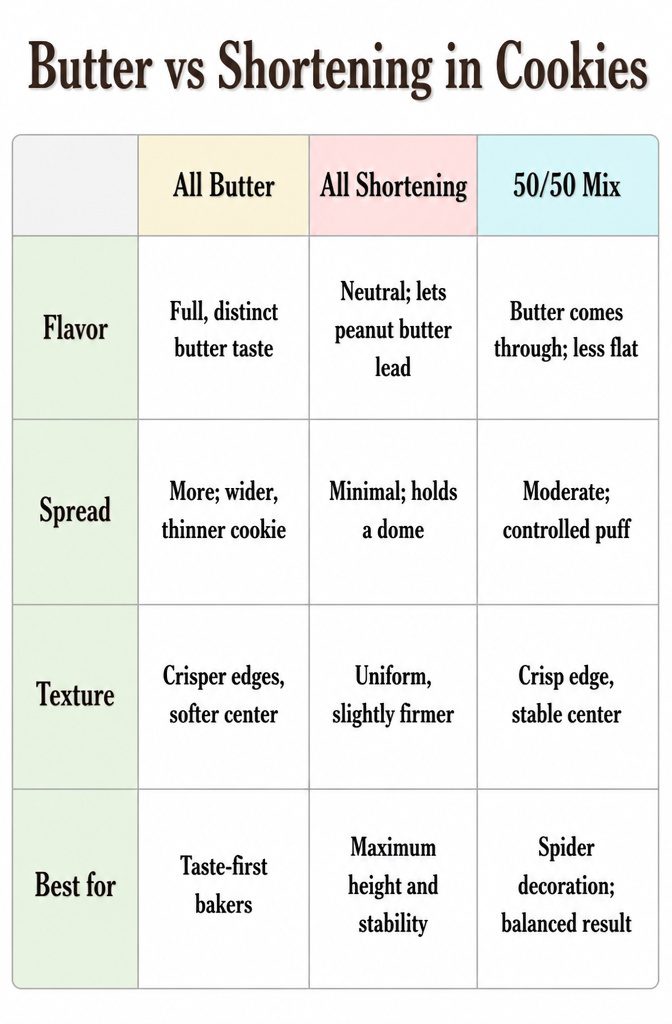
The fat in peanut butter spider cookies does more than carry flavor.
It decides whether the legs you pipe later sit on a flat disc or a rounded dome, and whether the cookie holds together when you press a peanut butter cup into the center.
Butter gives the flavor everyone expects from a peanut butter cookie, but it melts fast and spreads.
Shortening keeps its shape, so the cookie stays thicker and the peanut butter cup sits level instead of tilting. A mix of both gets you the butter taste with enough structure to hold the decoration.
| All butter | All shortening | 50/50 mix | |
|---|---|---|---|
| Flavor | Full, distinct butter taste | Neutral; lets peanut butter lead | Butter comes through; less flat |
| Spread | More; wider, thinner cookie | Minimal; holds a dome | Moderate; controlled puff |
| Texture | Crisper edges, softer center | Uniform, slightly firmer | Crisp edge, stable center |
| Best for | Taste-first bakers | Maximum height and stability | Spider decoration; balanced result |
I use the mix for these cookies. The shortening percentage is small enough that the butter still reads as butter, but the cookie doesn’t slump under the weight of the peanut butter cup and chocolate legs.
If you need the batch fully dairy-free, all shortening works; just expect a slightly paler, softer bite.
Storage and Freezing
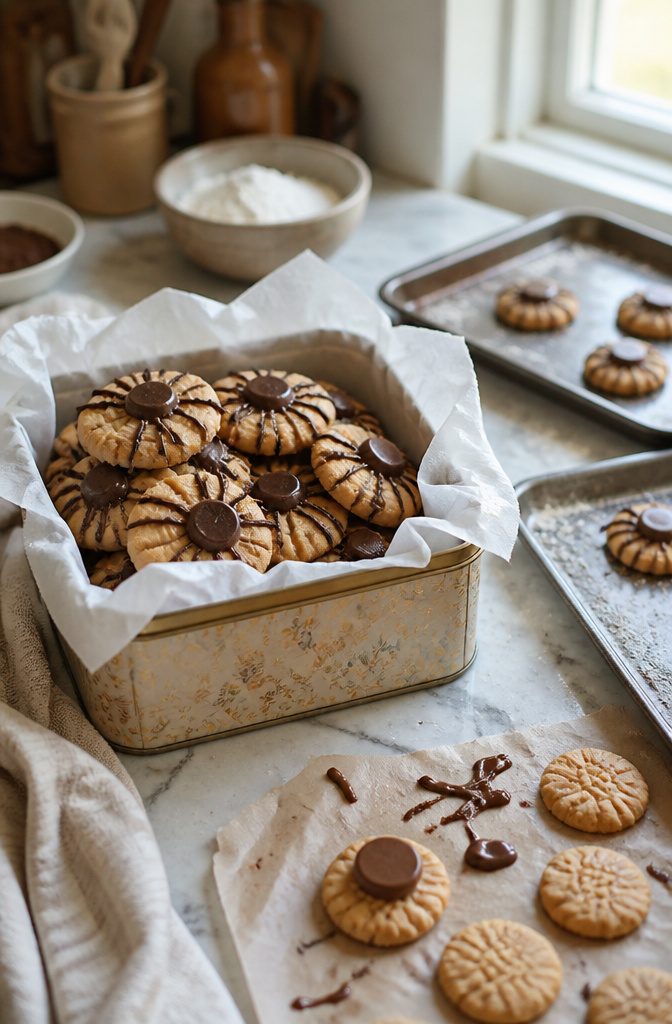
Airtight storage keeps these cookies at room temperature for 4 to 5 days, though the legs stay crispest in the first two. I skip the refrigerator entirely; the cold air pulls moisture from the peanut butter dough and leaves the pretzels stale.
Both the dough and the baked cookies freeze well for up to 3 months. For dough, shape the balls but hold off on the sugar coating.
Flash freeze them on a baking sheet, then transfer to a freezer bag. Baked cookies need to cool completely before they go into an airtight container.
Decorated cookies are a different call. The candy eyes do not freeze gracefully; they can crack or weep when thawed, and the whole spider looks worse for it.
If you need to work ahead, freeze the baked cookies plain and add the eyes after defrosting, or freeze the dough balls and decorate fresh on bake day.
Substitutions and Dietary Changes
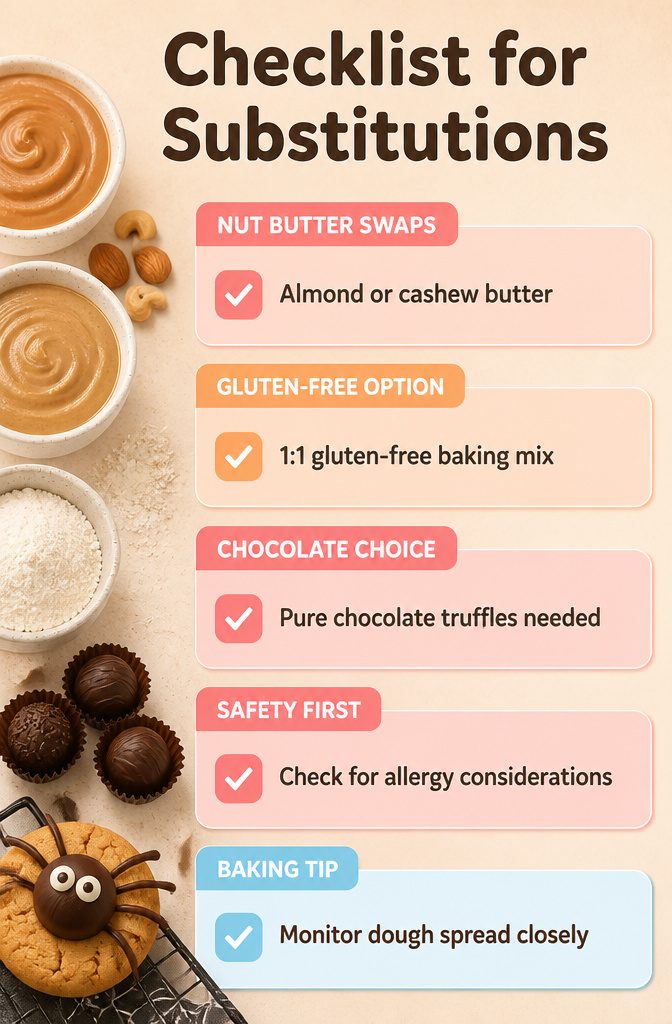
Not every household keeps peanut butter on hand, and some need to work around allergies. A few swaps keep the spider cookie idea intact.
- Almond butter or cashew butter both work in place of peanut butter. The dough spreads a little differently, so the first tray is worth watching closely.
- A 1-to-1 gluten-free baking mix replaces all-purpose flour without much taste difference. The cookies stay chewy and hold the candy legs fine.
- Pure chocolate truffles keep the recipe gluten free from top to bottom; if you use them, check that the label says pure chocolate, not wafer-filled.
These options come up less often in the usual Halloween cookie posts, but they get the same result on the plate.
What Goes Wrong
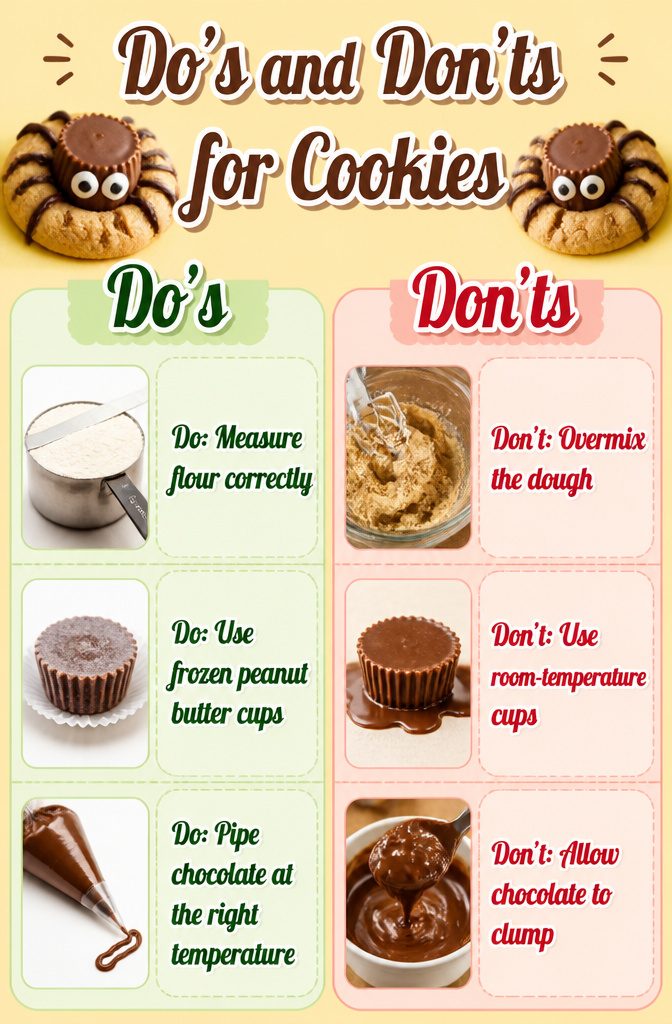
Most problems with peanut butter spider cookies show up in three places: the cookie base, the peanut butter cup body, and the chocolate legs.
- Crumbling usually means too much flour or overmixing. The dough needs enough fat to hold together, and shortening or butter both do the job better than substitutes. Measure flour by leveling it off with the back of a knife; packed or heaping cups dry the dough out fast. Mix just until the dry ingredients disappear.
- Peanut butter cups melt too much or slide off when they are not frozen solid first. The sources all specify frozen mini cups, and the timing matters: press them into the cookie immediately after baking while the surface is still hot and soft, but pull the pan from the oven first. Room-temperature cups turn to puddles.
- Chocolate legs break or look messy when the chocolate is too thick or too hot. Melt the chips until smooth, then let the chocolate cool slightly so it pipes a thin line that sets quickly. A sandwich bag with a tiny corner snipped off gives more control than a spoon. If the line spreads, the chocolate was still too warm; if it clumps, it cooled too long and needs a few seconds back in the microwave.
Frequently Asked Questions
Can I freeze peanut butter spider cookies?
Yes, both the dough and baked cookies freeze well for up to 3 months. Shape dough balls without the sugar coating, flash freeze on a baking sheet, then transfer to a freezer bag.
Baked cookies should cool completely before going into an airtight container. Skip freezing decorated cookies, though; candy eyes crack or weep when thawed.
How do I keep my peanut butter cookies from crumbling?
Measure flour with the spoon-and-level method rather than scooping straight from the bag, since packed flour adds nearly a quarter cup by accident and dries the dough out fast.
Mix just until the dry ingredients disappear, and avoid overbaking; the cookies should look slightly underdone when you pull them.
What can I use instead of peanut butter?
Almond butter or cashew butter both work in place of peanut butter.
The dough spreads a little differently, so watch the first tray closely and adjust bake time if needed. The flavor shifts but the spider cookie structure stays intact.
How do I store peanut butter spider cookies?
Keep them in an airtight container at room temperature for 4 to 5 days.
The chocolate legs stay crispest in the first two days. Skip the refrigerator; cold air pulls moisture from the peanut butter dough and stales any pretzel legs.