
These spider cookies taste like classic peanut butter blossoms with a Halloween twist: a crackled sugar shell, a melted peanut butter cup body, and chocolate legs that set crisp in about twenty minutes.
The whole project runs under an hour, but only if you freeze the candy first.
Room-temperature cups slump before you can pipe the legs, and that waiting step trips up most first attempts. Aldi’s unwrapped mini cups save real time when you’re making four dozen for a classroom party.
Prepare the Dough
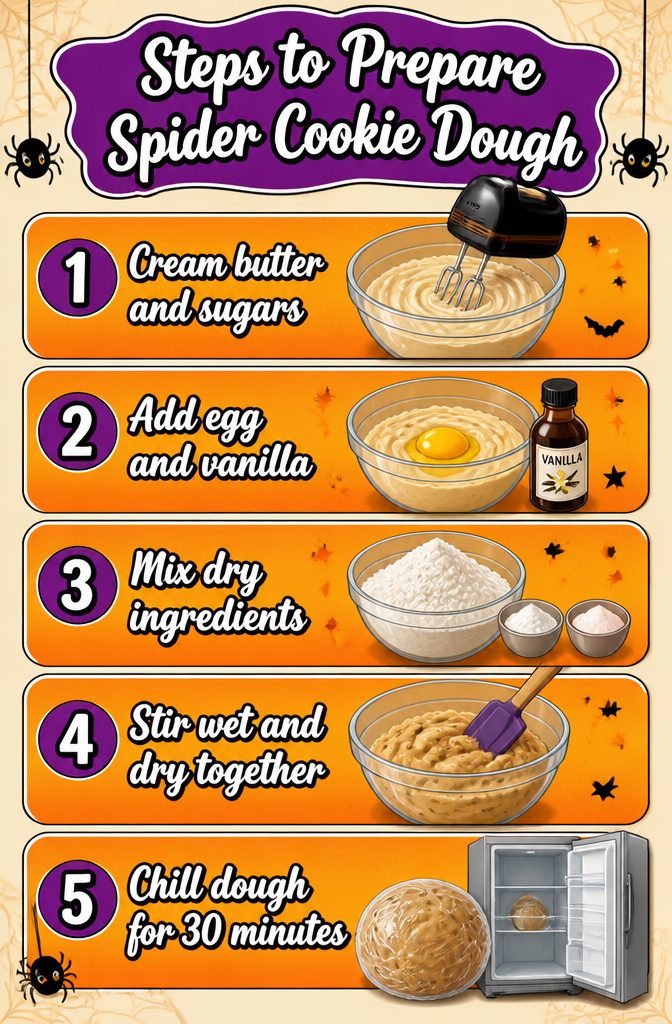
- Cream the butter, sugars, and peanut butter until the mixture turns light and fluffy, about 3 minutes with an electric mixer. The air you beat in here is what gives the cookies their structure, so don’t rush it.
- Add the egg and vanilla, then beat until fully incorporated. The dough should look smooth and cohesive before you move on.
- In a separate bowl, mix the flour, baking soda, and salt. Some recipes add baking powder too; either approach works, though the simpler blend of flour, soda, and salt keeps the flavor cleaner against the peanut butter.
- Stir the dry ingredients into the wet just until the dough comes together. Overmixing at this stage turns the cookies tough, so stop as soon as you don’t see streaks of flour.
- Chill the dough for 30 minutes in the fridge. This firms it up enough to roll into balls that hold their shape, and it keeps the cookies from spreading too thin in the oven.

Size:6.5 inch*6.5 inch* 0.6 inch, Cup size: 1.77 inch* 0.6 inch.

Our chocolate molds silicone decorative trays are made from high-grade materials. They are very flexible, waterproof, and have an easy-to-release surface.

Suitable Size: 3pcs 12-cavity blue peanut butter cup molds measure 11.06 x 8.31 x 0.79 inches, with each cavity measuring 02.44 x 1.3 x 0.79 inches, making 36pcs peanut butter cup at a time.
Shape the Cookies
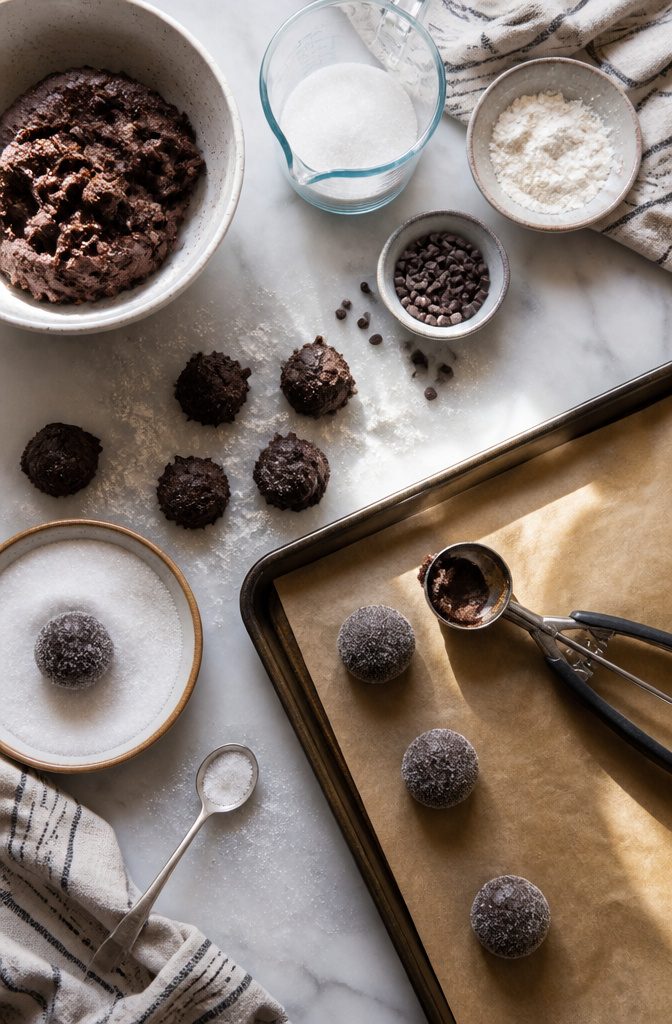
- Scoop the dough with a 2 tablespoon measure or a small spoon, then roll it between your palms into a ball. The sources call for 1-inch balls, though a 2-tablespoon scoop lands closer to 1½ inches, which bakes up thicker and holds the spider body better.
- Roll each ball in granulated sugar before it hits the pan. This gives the baked cookie a faint crunch and a little sparkle that reads more festive than plain dough.
- Space the sugared balls a couple of inches apart on the baking sheet. The cookies spread modestly, and that gap leaves room for the peanut butter cup you’ll press in later without the edges merging. Parchment paper keeps cleanup quick; an ungreased sheet works too if that’s what you have on hand.

10 cookies to a kit

Small Halloween Gingerbread Cookie House Kit- Finished product measures approximately 2.75 L x 2.75 W x 3 H inches

Choose from many festive options!
Bake the Cookies
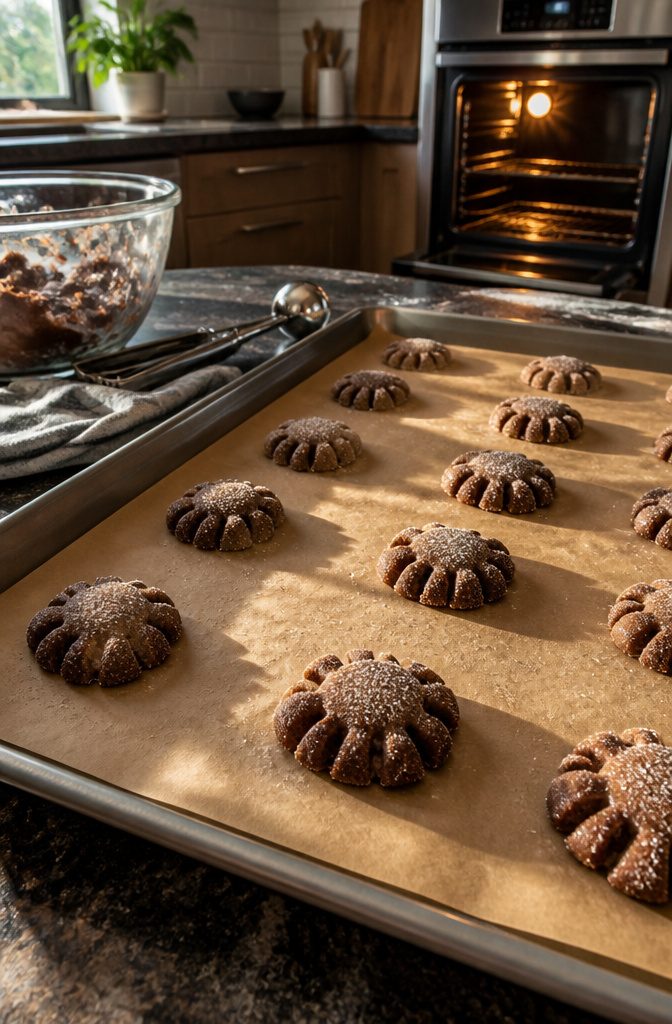
- Line the baking sheet with parchment paper and space the dough balls a couple of inches apart. An ungreased sheet works too, but parchment makes cleanup faster.
- Bake at 375°F for 8–12 minutes, until the edges turn golden. The range matters here. In my experience reading through these recipes, 8–10 minutes leaves the centers soft enough to press a peanut butter cup into right after, while 10–12 minutes gives you a firmer base that holds up better if you’re adding heavier candy.
- Pull the tray when the cookies look slightly underdone. They keep baking on the hot sheet after you remove them, and taking them out when they already look fully set means overbaked, crumbly results. The surface should look dry, the base just starting to golden.
- Work quickly once they’re out. Press your peanut butter cups or other toppings in immediately while the cookies are still hot and pliable, then transfer to a wire rack to cool.

BUTTERY VANILLA SWEETNESS: Indulge in the nostalgic notes of buttery vanilla sweetness and iconic holiday flavor that evoke the whimsy of cookies for Santa and the magic of the most wonderful time of the year.
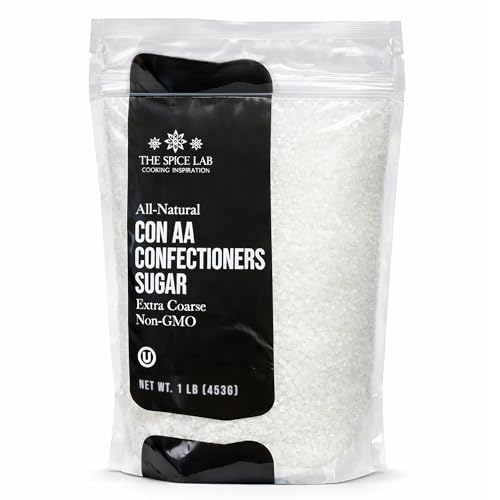
TYPE: Confectioners’ sugar is a type of Sanding sugar with a visibly larger, uniform particle size. This granulated sugar is also more heat resistant compared to other sugars, making it ideal for bakers. White Sparkling Sanding Sugar Crystals in a 1 Lb Bag, Extra Coarse Grain, add a Sweet Crunch to Baked Goods, Bright White, High Sparkle When Baked, Holds up under Heat, Non-GMO, Gluten Free, Premium Quality Pure Cane Sugar No Confectioners Wax.

AUTHENTIC CINNAMON ROLL FLAVOR: Sweet, warm cinnamon roll taste enhances every baked good, beverage, and dessert. Adds cozy bakery-style flavor to cookies, cupcakes, coffee, pancakes, and French toast—perfect for fall and holiday baking.
Add Toppings
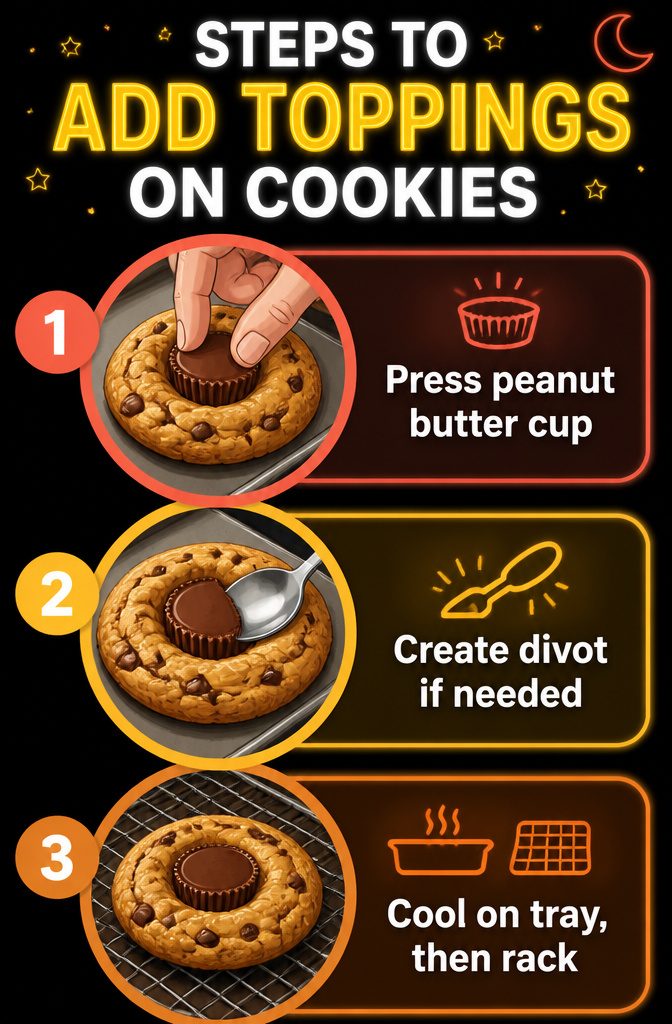
- Pull the cookies from the oven and immediately press an unwrapped mini peanut butter cup into the center of each one while the surface is still soft and hot from the bake. The residual heat will slightly melt the bottom of the cup so it grips the cookie as it sets.
- Use the bottom of a teaspoon to press the divot if the cookies haven’t already spread enough to cradle the cup. The cookies will be hot, so work quickly and carefully.
- Let the topped cookies cool on the tray for a few minutes, then transfer them to a wire rack. The peanut butter cup needs to firm back up before you pipe on the chocolate legs, or it will smudge and lose its shape.

Contains one (1) 7.6-ounce resealable bag of REESE'S Minis Milk Chocolate Unwrapped Peanut Butter Cups Candy

Mini peanut butter cups in premium milk chocolate

Contains one (1) 30-ounce party pack of REESE'S Miniatures Milk Chocolate Peanut Butter Cups Candy
Decorate
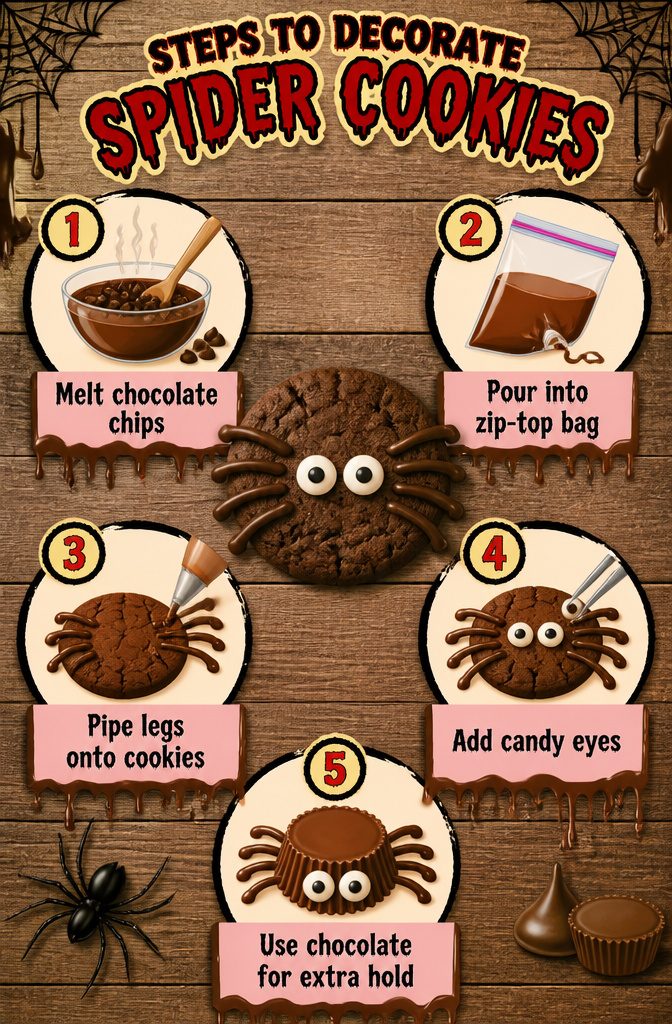
- Melt semi-sweet chocolate chips slowly, stirring every 30 seconds in the microwave on low or over a double boiler, until smooth enough to pipe.
- Pour the melted chocolate into a small zip-top bag and snip a tiny corner. The hole should be small enough that the chocolate comes out in a thin, controlled line.
- Pipe four legs on each side of the cookie, radiating outward from the center. Most designs use eight legs total, though some stop at six for a simpler look.
- Attach two candy eyes per cookie with a dab of the same melted chocolate. Press them gently into place and let the chocolate set before moving the cookies.
- If the spider body is a peanut butter cup or a Hershey’s Kiss turned on its side, pipe the legs directly against that candy and use extra chocolate to glue the eyes onto the cup itself rather than the cookie surface.

#40 COOKIE SCOOP, 2 Tbsp SCOOP – The medium cookie scoop is 1 25/32 inches (45mm) diameter, the capacity is 2 tablespoons/ 30 ml/ 1 oz. Many sizes cookie scoopers are available, we can choose the right size according to our needs

[Non-Slip Handle, 18/8 Stainless Steel]The cookie scoop is made of food-grade 18/8 stainless steel. As a result, it is both durability and safe, ensuring reliability. It is corrosion-resistant and sturdy. These premium material cookie scoops contain absolutely no harmful chemicals or other residues. The handle is soft, thick, and non-slip, making it easy to grip.

This Cookie Scooper gives consistently sized cookies each time with minimal effort. Designed with an easy squeeze and quick release cog and ratchet mechanism that relieves pressure off of the wrist and hand.
Set and Serve
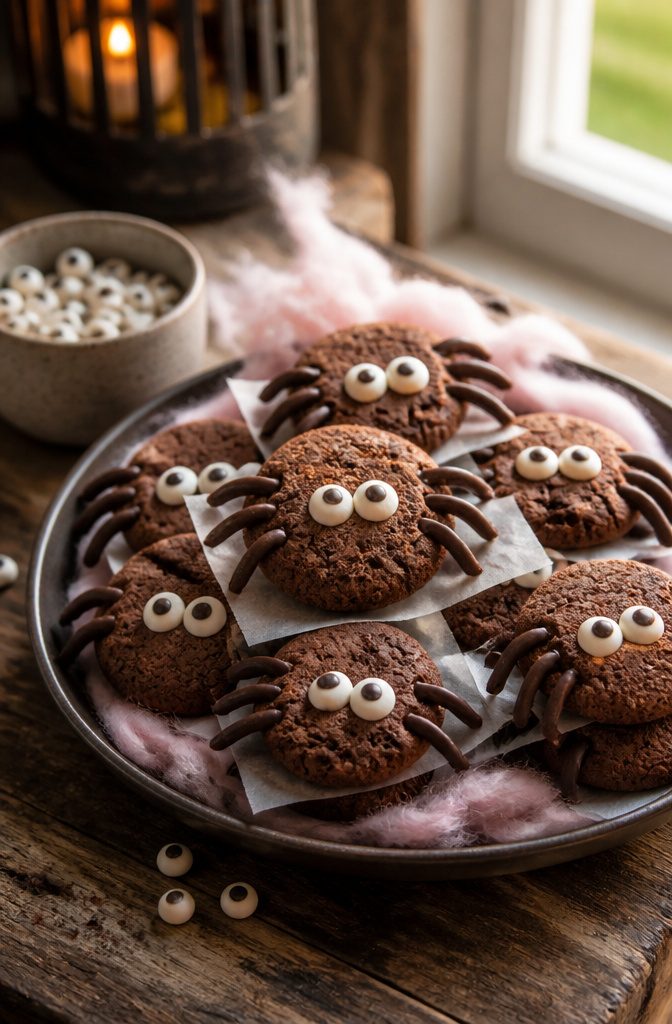
- Let the assembled cookies sit at room temperature until the chocolate hardens completely. About 20 minutes is usually enough for candy melts to set firm, though humidity in your kitchen can stretch that to 30.
- Once the legs and eyes hold solid, the batch is ready. Yield is about 20 cookies per recipe, which fills one standard half-sheet tray with room to spread.
- Stack leftovers in an airtight container with wax paper between layers. They’ll keep for three days without the chocolate blooming or the cookie going stale.

Good Quality: This silicone Peanut Butter Cup mold adopting 100% premium BPA Free silicone material, Non-stick, easy to pop out; ,non-toxic,flexible, reusable and durable. temperature resistant from -40 to 230 degrees Celsius (-40℉to 440℉)

It is -friendly, for time saving and convenient to use and clean with exquisite workmanship.

Premium Food Grade Silicone Material: Made of 100% premium food grade silicone material which possesses non-stick polished surface for each cavity, easy to pop out, with temperature resistance from -40 to 230 degrees Celsius (-40F to 440F)
Peanut Butter Spider Cookies
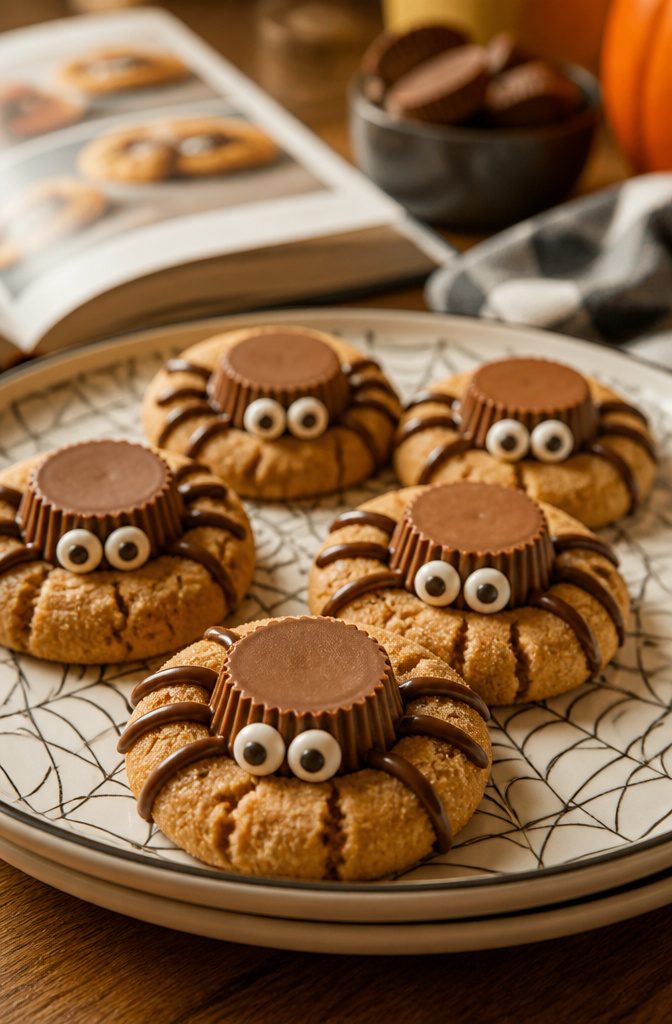
Peanut butter spider cookies start with the same dough that won the 9th Pillsbury Bake-Off in 1957.
That classic base, half a cup each of shortening and peanut butter, gets rolled in sugar for the crackled surface everyone recognizes. The spider part is where the fun comes in.
A miniature peanut butter cup, frozen solid so it doesn’t melt, presses into the warm cookie right out of the oven.
Two candy eyes get glued on with melted chocolate, and eight more chocolate lines draw the legs. Some versions use a Hershey’s Kiss turned on its side; others swap in Whoppers for a rounder body.
The frozen candy matters more than which brand. Room-temperature peanut butter cups soften and slump before the legs go on.
Aldi peanut butter cups come already unwrapped, which saves real time when you’re making four dozen. The whole project runs about 20 minutes of prep, 8 minutes in the oven, and another 20 minutes of waiting while the chocolate sets.
That waiting step trips people up. The legs smudge if you rush them.

Halloween Cookie Decorating Kit: All-in-one Halloween activity includes 8 premade cookies plus frosting, icing, sprinkles, and candy eyeballs for decorating spooky treats.

COMPLETE HALLOWEEN DECORATING KIT – Everything you need to create spooky Halloween treats in one convenient set! Includes 3 tubes of decorating frosting, 4 frosting tips, 3 Halloween-shaped cookie cutters and 1 bag of colorful Halloween sprinkles.

11.31 oz Complete Decorating Kit – Everything you need in one box: 3 squeeze frosting tubes (3 oz each in Orange, Black, White), 4 decorating nozzles, and a 2 oz Halloween sprinkle mix with candy eyeballs.
Chocolate Spider Cookies
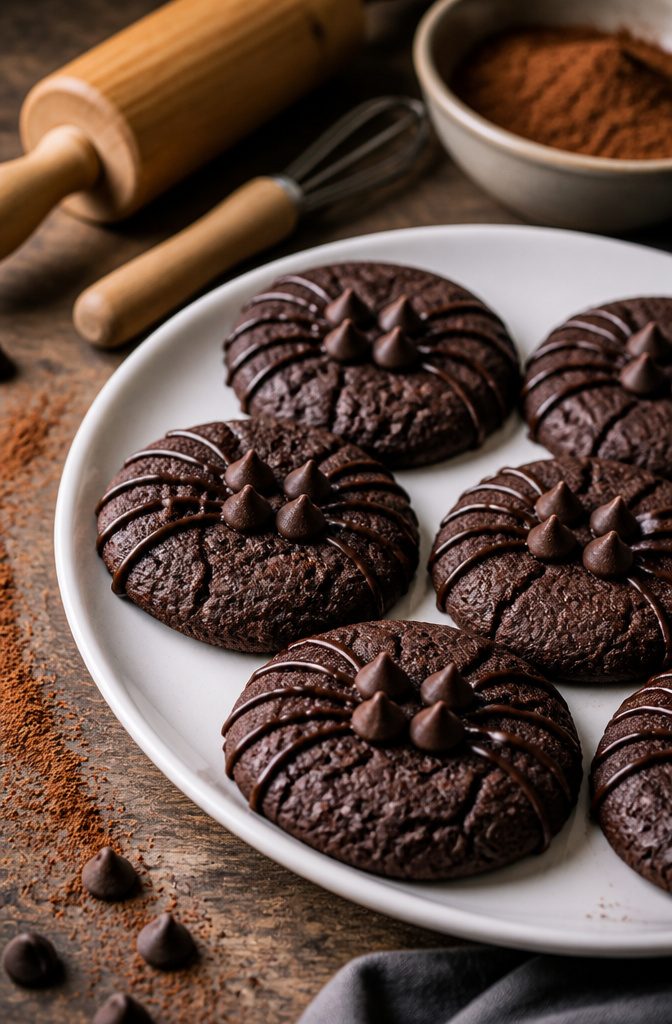
A dark chocolate base gives spider cookies real Halloween presence, something the classic peanut butter version never quite achieves.
I build these from a standard chocolate chip cookie dough, then press three or four chocolate chips point-up into each cookie the moment it leaves the oven. Those chips become the spider bodies.
For the legs, melted chocolate goes into a zip-top bag with a snipped corner.
Pipe eight thin lines outward from each chip cluster, four per side, and the spider takes shape in about thirty seconds of work. Semi-sweet chocolate works here; milk chocolate tends to bleed together and lose the leg definition.
The timing matters. Cookies need to be warm enough that the chip bodies settle in slightly, but not so hot that the piped legs melt into smears.
I pull the tray, place the bodies immediately, then wait two minutes before piping. That pause is the difference between spiders and chocolate blobs.
Some bakers add candy eyes with extra chocolate as glue.
The effect is cute, though I skip them when I want the cookies to read as elegant rather than crafty. Either way, the darker base makes every detail stand out against the pale leg lines.

Effortlessly Gourmet: Bake soft, tender sugar cookies that hold their shape when baked.

Make your baked creations sparkle: Create dazzling desserts with a professional-quality finish from the comfort of your home.

TYPE: Confectioners Con AA Sugar is a type of Sanding sugar with a visibly larger, uniform particle size. This granulated sugar is also more heat resistant compared to other sugars, making it ideal for bakers. White Sparkling Sanding Sugar Crystals, Extra Coarse Grain, add a Sweet Crunch to Baked Goods, Bright White, High Sparkle When Baked, Holds up under Heat, Non-GMO, Gluten Free, Premium Quality Pure Cane Sugar No Confectioners Wax.
Oreo Spider Cookies
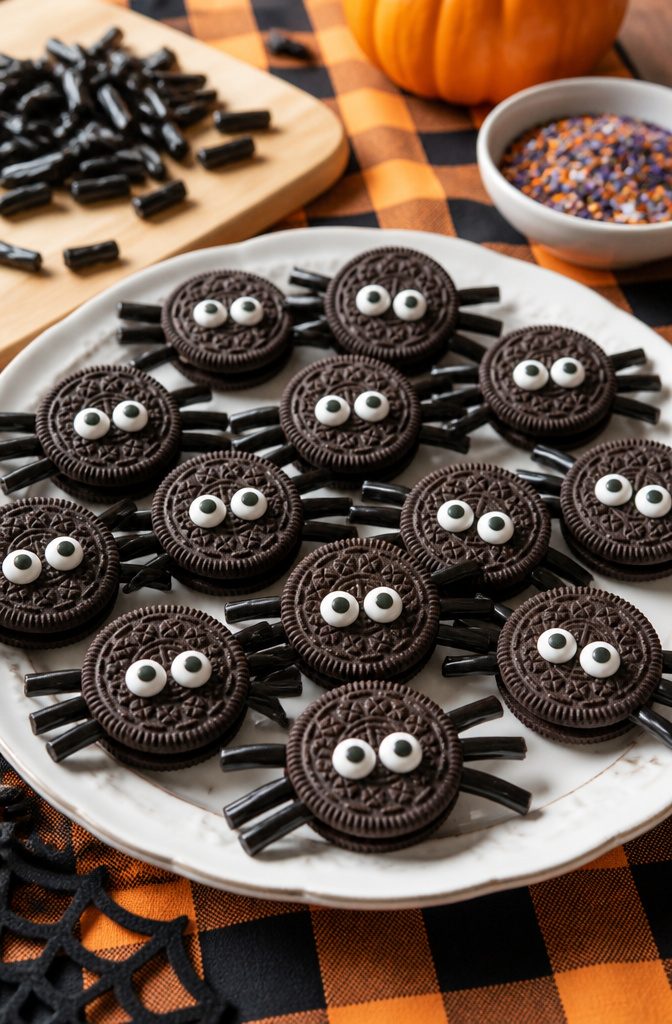
Oreo spider cookies are the fastest route to a Halloween dessert that actually looks like what it’s supposed to.
A whole Oreo forms the body, with licorice string or black licorice twists cut into thin strips for eight legs, and a pair of candy eyes pressed into the filling.
The Betty Crocker version needs only four ingredients and makes twenty cookies, which is plenty for a classroom or a party tray.
These fun, kid-friendly Halloween spider cookies are where spooky meets tasty… Our Spooky Spider Cookies help peak kids’ creativity in a wildly delicious way with only four simple ingredients.
That four-ingredient count matters if you’re assembling these after dinner on a weeknight. Kitchen scissors handle the licorice cleanly; blunt-tipped scissors work fine if kids are helping, provided they’ve been washed in warm soapy water first.
Can’t find the orange creme-filled Oreos? The vanilla-filled ones work the same.
The real shortcut is skipping the oven entirely. Store-bought cookies or pre-made refrigerated dough drop the active time under fifteen minutes, and peanut butter cookies make a sturdy base if you want something homemade without the full bake.
Press the legs into soft filling or a dab of frosting, add the eyes, and the spiders hold together well enough to transport to school.
For a full themed spread, a bed of cotton candy underneath reads as an edible web, though that part is optional if you’re already managing enough sugar.

IRRESISTIBLE CHOCOLATE & PEANUT BUTTER: Experience the timeless, mouthwatering combination of smooth, rich milk chocolate and a creamy peanut butter center. Every single mini peanut butter cup is perfectly bite-sized, unwrapped, and crafted to deliver the ultimate sweet flavor profile that kids and adults love.

CHR REESE'S PB Unwrapped Mini Trees SUP, 7 oz., 16 ct., DRC

MINI DARK CHOCOLATE PEANUT BUTTER CUPS: Our mini dark chocolate peanut butter cups are a delightful fusion of rich, smooth dark chocolate and creamy peanut butter, offering a perfect bite-sized indulgence. Each cup features a crisp dark chocolate shell that encases a luscious, melt-in-your-mouth peanut butter center, balancing sweetness with the smooth dark chocolate.
Whopper Spider Cookies
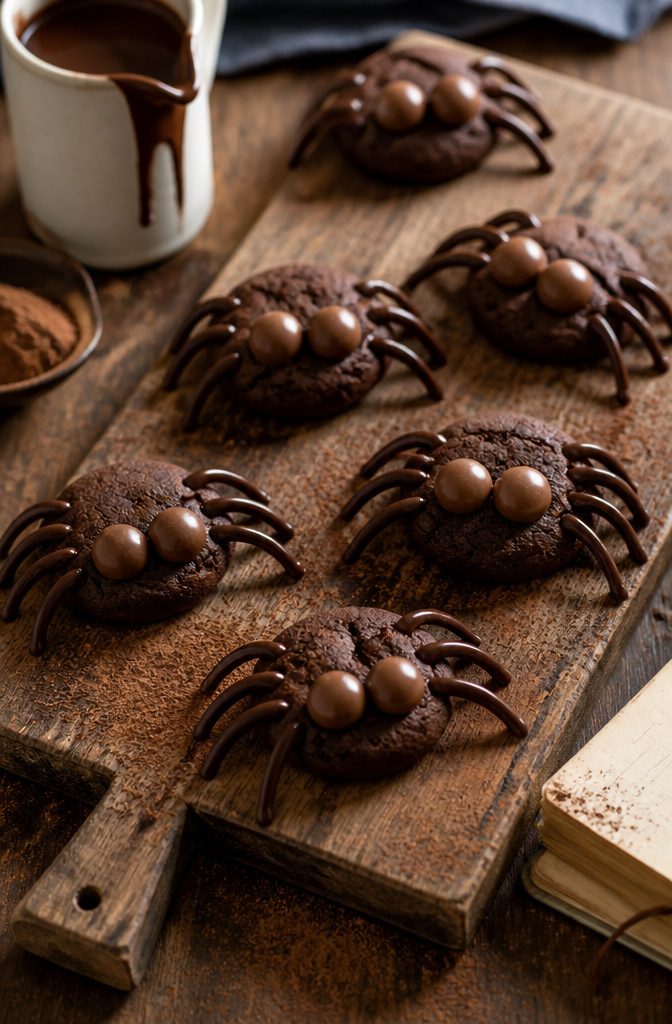
Whopper spider cookies trade the usual peanut butter cup base for a malted milk ball body, which changes both the texture and the flavor.
The Whopper gives a lighter crunch and that distinct malted note against the cookie, and the ganache legs some recipes use instead of frosting set up cleaner and hold their shape longer in a lunchbox or on a party tray.
Two Whoppers per cookie is the standard count, stacked or side by side, with chocolate piped on for legs and candy eyes pressed in while the ganache is still soft.
The cookie underneath is typically a peanut butter blossom style, the same 20-minute prep and 8-minute bake you would expect from that base, though the cooling time matters more here because warm cookies will melt the chocolate legs.
Malted milk balls keep this version nut-free on top, which matters if you are packing them for a classroom with allergy rules, though the peanut butter cookie base still carries its own warning.
For a fully nut-free version you would need a different dough, and that is a separate project. These store well for a couple of days layered between parchment, and the ganache legs do not weep the way frosting can.

#16 COOKIE SCOOP, 2 OZ SCOOP – The large cookie scoop is 2.3 inches diameter, the capacity is 4 tablespoons/ 60 ml/ 2 oz. Many sizes cookie scoopers are available, we can choose the right size according to our needs.

#16 (2 oz), RIGHT SIZE - The cookie dough scoop can hold 2 oz/ 60ml/ 4 tablespoon, and with blue handle.

【MULTI USES】 #40 cookie scooper for baking, is about 2 Tbsp / 30ml / 1 oz. Diameter is 1.72 inch/44 mm. You can use it as ice cream scooper, cookie scooper, cookie dough scoop, cupcake scoop, meatball scoop, melon baller scoop, food ball maker, sorbet scoop, even as measure spoon to satisfy kinds of different needs.
Cake Mix Spider Cookies
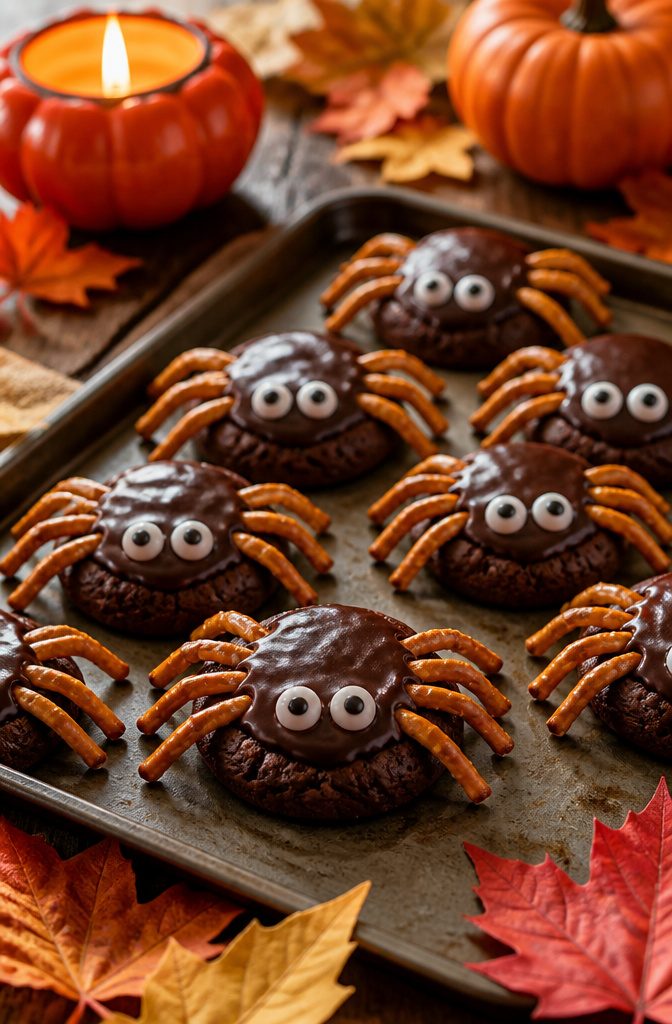
Cake mix spider cookies are the fastest route to a Halloween tray when the afternoon has already slipped away.
Three ingredients and fifteen minutes gets you a batch ready to decorate, which is the part most kids actually want to handle anyway.
Store-bought cookies or refrigerated dough work if even that feels like too much; the candy legs and eyes do the heavy lifting on theme.
I keep a box of devil’s food mix on the shelf from October 1st for exactly this reason. The dough comes together stiff enough to hold shape but soft enough that pressing in pretzel-stick legs doesn’t crack the surface.
Dark cookies hide any unevenness, and the chocolate base pairs with peanut butter or vanilla frosting for the spider bodies without tasting like a chemistry experiment.
For school parties, this is the practical choice.
No mixer to clean, no chilling, no specialty cutters. The Betty Crocker-style shortcut trades some homemade depth for actually getting out the door on time, and on a weeknight with costumes to finish, that trade is worth making.
Ingredients
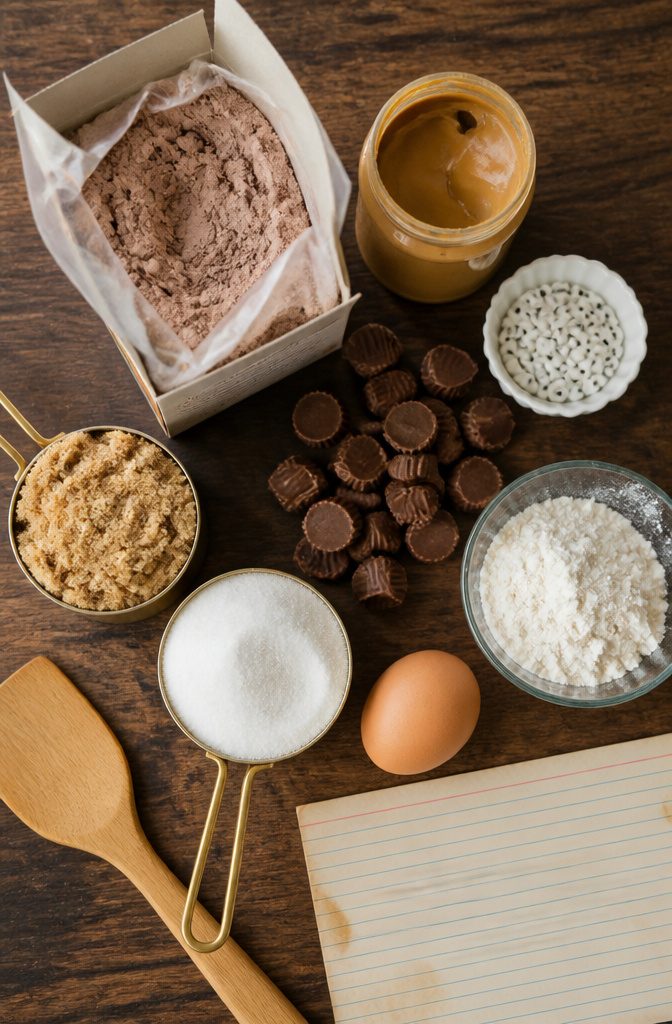
Most Halloween spider cookies build from the same pantry staples you’d use for any drop cookie. Here’s what actually shows up across the recipes that work:
- Butter or shortening as the fat base. Some recipes use half a cup of softened butter; others swap in shortening for a dairy-free batch. The choice changes the spread more than the flavor.
- Peanut butter, and the no-stir kind matters. Separated natural peanut butter throws off the crumb, so reach for the shelf-stable creamy style.
- Two sugars: brown and white, usually in equal parts. The brown sugar runs light or dark depending on the recipe; either works.
- One egg, room temperature, plus a splash of milk and a teaspoon of vanilla for moisture and rounding.
- All-purpose flour, between 1¼ and 1¾ cups depending on how thick the dough needs to be for the shaping step later. Baking soda and salt finish the dry mix.
- The spider parts: frozen miniature peanut butter cups pressed into the hot cookies, candy eyes, and melted chocolate chips piped for legs. One source notes Aldi’s unwrapped peanut butter cups save a step and taste great.
Decoration Tips
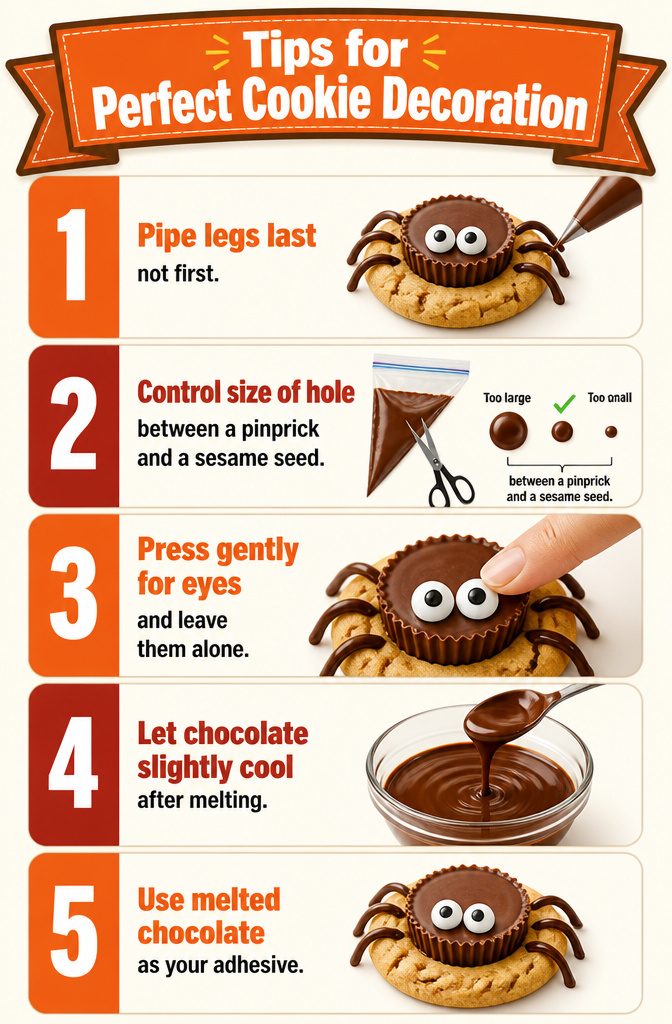
Melted chocolate is the only adhesive you need, and it buys you a few seconds of wiggle room before it sets.
- Pipe the legs last, not first. The chocolate cools quickly, and legs drawn onto still-warm cookie surfaces spread and lose their sharp bend. Let the base layer firm up, then come back with a fresh bag.
- A ziplock with the corner snipped works, but the hole matters. Too large and the leg comes out thick and wobbly; too small and the chocolate seizes from the pressure. I aim for something between a pinprick and a sesame seed.
- For eyes, two dabs of chocolate on the peanut butter cup or cookie top hold the candy in place. Press gently and leave them alone. The urge to adjust is strong, and the smudge it leaves is permanent.
- Chocolate candy melts pipe cleaner than bar chocolate, but either sets fine if you let it cool slightly after melting. Scalding liquid runs; barely warm chocolate keeps its shape.
Baking Tips
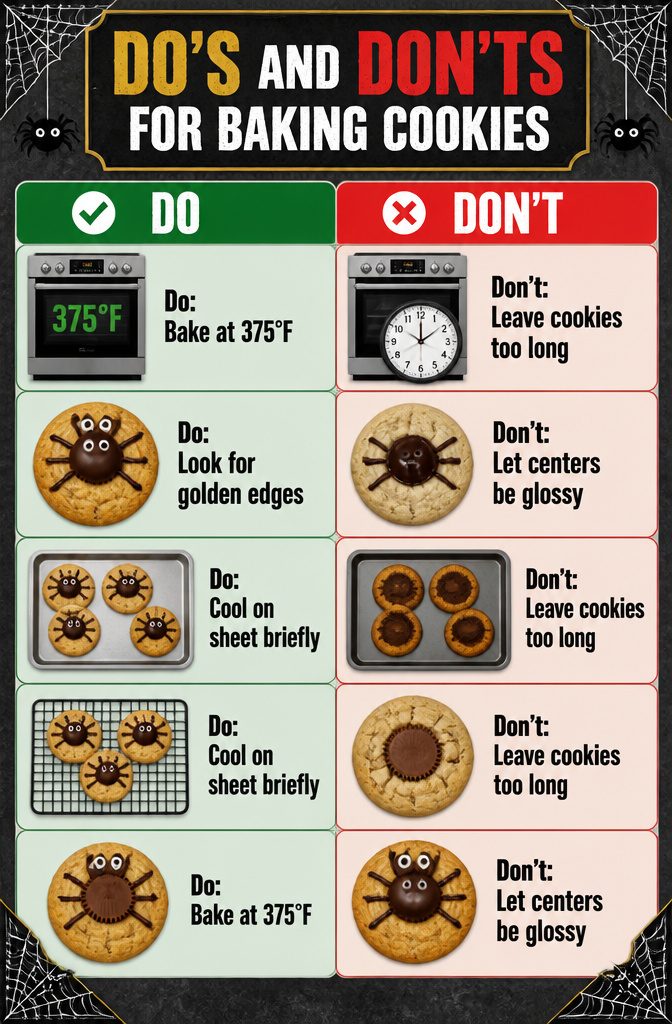
Most recipes for Halloween spider cookies call for 375°F, and that temperature is fast enough to set the shape without drying the centers. The real skill is knowing when to pull the tray.
- The edges turn golden while the centers still look slightly underdone, around 8 to 10 minutes. The cookies finish baking on the hot sheet once they are out.
- A set center will look matte and puffed rather than glossy and wet. If you wait until it looks fully baked in the oven, you have already overbaked.
- For the peanut butter cup version, that slight softness right out of the oven is what lets you press the candy in cleanly without cracking the cookie.
- Cooling on the sheet for a minute or two before moving to a rack keeps the base from collapsing, but do not leave them there so long that the bottoms darken past golden.
Gluten-Free and Peanut-Free Options
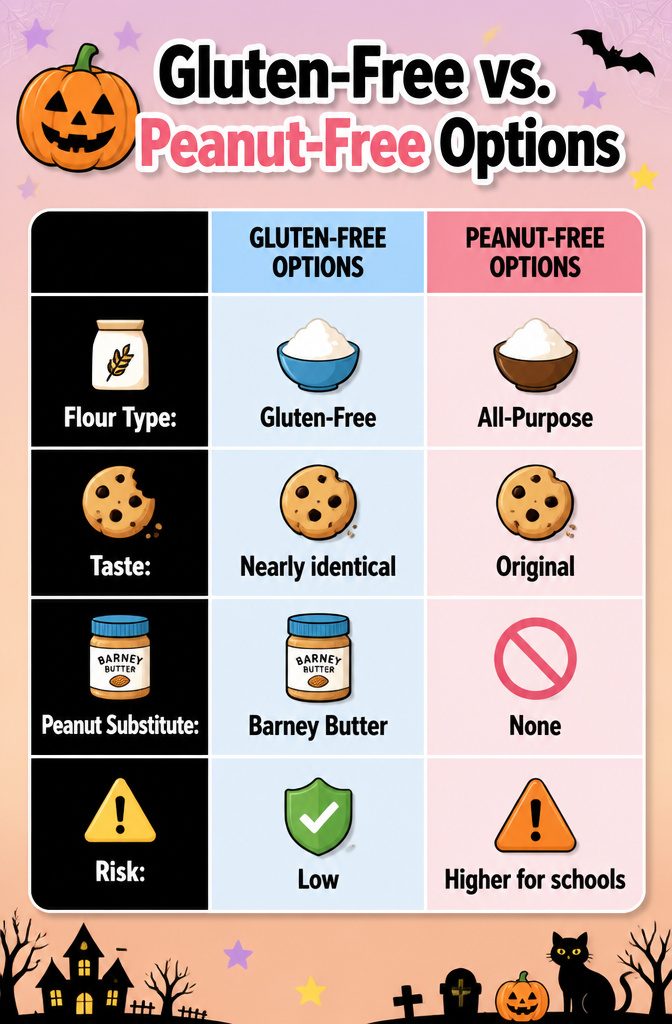
Gluten-free flour swaps straight into these recipes without much drama.
One baker who tested the switch said the finished cookies taste nearly identical to the all-purpose version, and I’d trust that read: peanut butter blossoms have enough fat and sugar to mask the small textural differences most blends leave behind.
Barney Butter Bare Smooth Almond Butter is the workaround if peanuts are the problem, since it’s produced in a peanut-free facility.
That matters for classroom trays where cross-contamination rules are strict. Rolos come up in comments too, though they shift the cookie from nutty to caramel-centered, which is a different thing entirely.
I haven’t baked these specific allergy swaps myself.
The gluten-free note is well-supported, but the nut-free path rests on what a few commenters have tried and reported back on. If you’re sending these to school, read the facility label yourself; "peanut-free" means different things on different jars.
Frequently Asked Questions
Can I make Halloween spider cookies gluten free?
Yes, simply swap in gluten-free flour for the all-purpose flour. The finished cookies taste nearly identical to the standard version because the peanut butter and high fat content mask the small textural differences most blends leave behind.
How do I keep my Halloween spider cookies from crumbling?
Measure your flour accurately with the spoon-and-level method rather than scooping straight from the bag, and pull the cookies when the centers still look slightly underdone. Overmeasuring flour and overbaking are the two main causes of crumbly results.
What can I use instead of peanut butter in spider cookies?
Barney Butter Bare Smooth Almond Butter works well and is produced in a peanut-free facility, which matters for strict classroom allergy rules.
If you need a completely nut-free option, Rolos replace the peanut butter cup with a caramel-centered body, though that shifts the flavor profile.