

Easy Christmas decor DIY runs from a fifteen-minute cinnamon candle to a planked snowflake sign that needs a sawtooth hanger.
The deciding factor is how much mess you can tolerate tonight, because some of these projects glue and dry overnight while others finish before the oven preheats.
The cinnamon sticks stay outside the flame, scorching slowly so they smell like the holiday instead of a campfire.
1. DIY Vintage Bells Christmas Swag
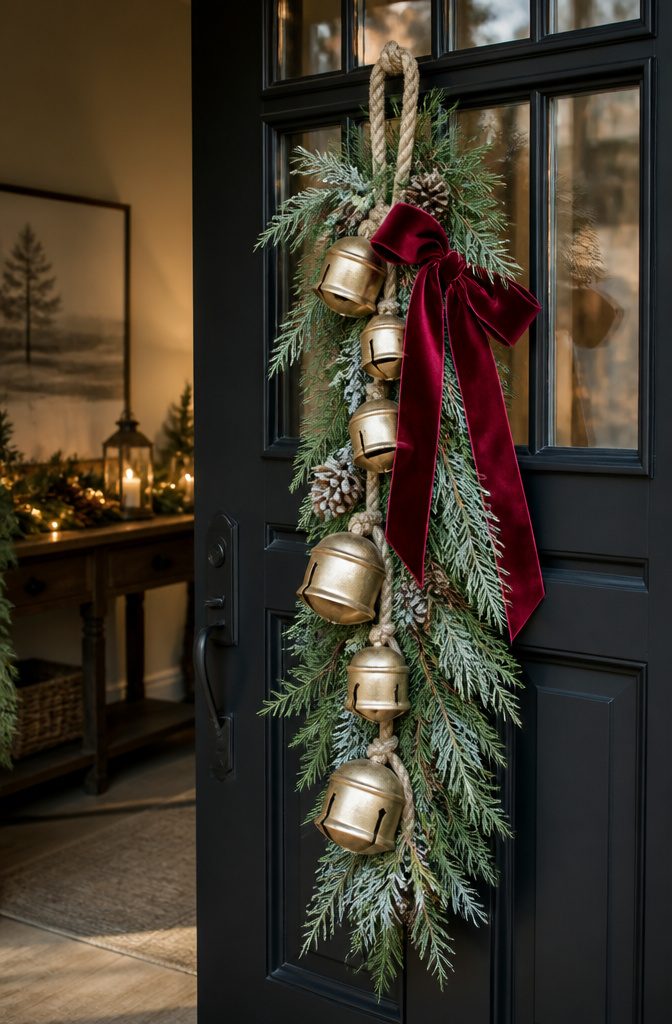
A swag made with hanging bells on a rope, faux winter green stems, and a big ribbon bow comes together in minutes and reads as vintage without hunting actual antiques.
The rope carries the bells as the weight and sound; the greens fill the gaps between them so the line stays full from every angle.
Tie the bow at center or off-center depending on where the swag will hang, since a door knocker or a hook placement will shift what reads as balanced.
Faux winter green stems let the piece stay up through January without browning or dropping needles, which matters more than it sounds when the last thing anyone wants in early January is another task.
The rope should be substantial enough to hold shape but not so stiff it fights the curve of the swag.
Hang it on a front door where the bells catch motion, or drape it above a mantel where the bow sits at eye level.
I would keep it away from spots where people brush past; the bells tangle in sleeves and the greens flatten.
The rope length depends on your hook spacing, but the overall span should feel generous rather than skimpy, since a thin swag on a wide door looks like a mistake in scale.
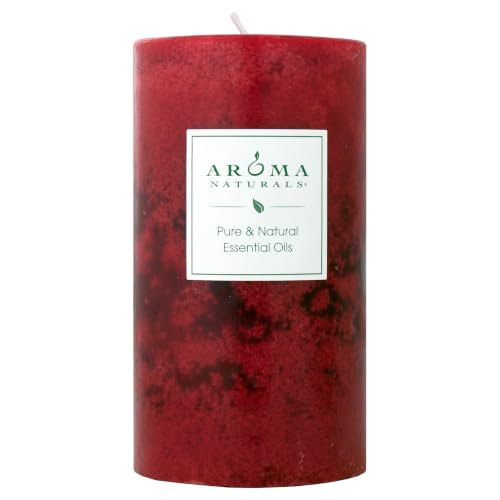
Contains 1, ruby Warm Spice Orange, Clove & Cinnamon 2.75x5 Naturally Blended Holiday pillar candle

Contains one 3 inch x 3.5 inch pillar candle

Contains one 2.5 inch x 4 inch pillar candle
2. Cinnamon Candle
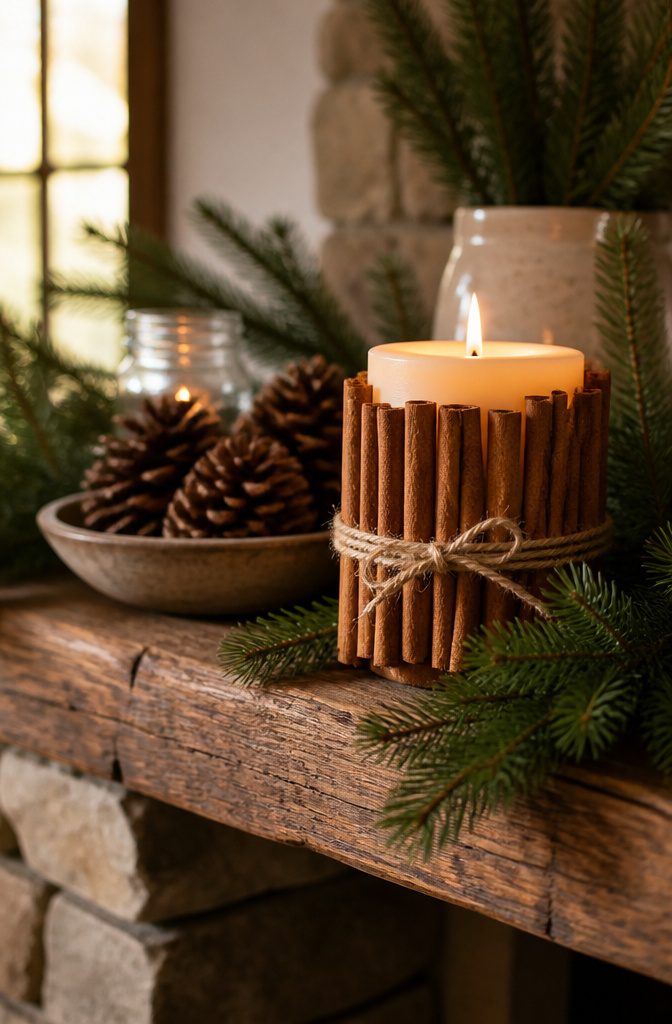
A plain pillar candle becomes something worth putting on the mantel once the cinnamon sticks go on. Hot glue works fast, though tacky craft glue gives you time to adjust if the first stick lands crooked.
I lay them vertically, tight enough that the waxy base barely shows, and wrap twine or a thin ribbon around the middle to hide any gaps.
The scent warms up the room even unlit, which is part of the point.
Once you do burn it, the cinnamon stays outside the flame; the sticks themselves are far enough from the wick that they scorch slowly and smell like Christmas instead of a campfire.
Still, never leave one burning unattended, and keep it on a plate or tray since the glue softens slightly as the wax pool widens.
A three-inch candle takes maybe fifteen minutes to dress, and the sticks come off clean afterward if you want to reuse the holder.

Ready-to-Use Integrated Decoration: this Christmas mirror garland arrives fully assembled and measures about 3.94 ft/120 cm, allowing for immediate placement without additional setup; the package includes 1 dark green velvet bow and 1 string of 4 metal bells for personalized arrangements; simply drape the mirror garland to create a festive accent for mirrors, doors, or other areas, making holiday decorating both efficient and visually appealing

Lifelike Norfolk Pine Design – Crafted with premium PE material, each swag features a natural deep-green gradient and soft, realistic needles that mimic fresh foliage adding vibrant beauty to your holiday décor without any upkeep

Package Include: come with 4 pack Christmas Teardrop Swag with Bell Velvet Bow for holiday outdoor decorating; Featuring with rustic style design, our Christmas swags for front door are a nice decor for creating a chic festive atmosphere during the holiday season
3. Vintage Candle Centerpiece
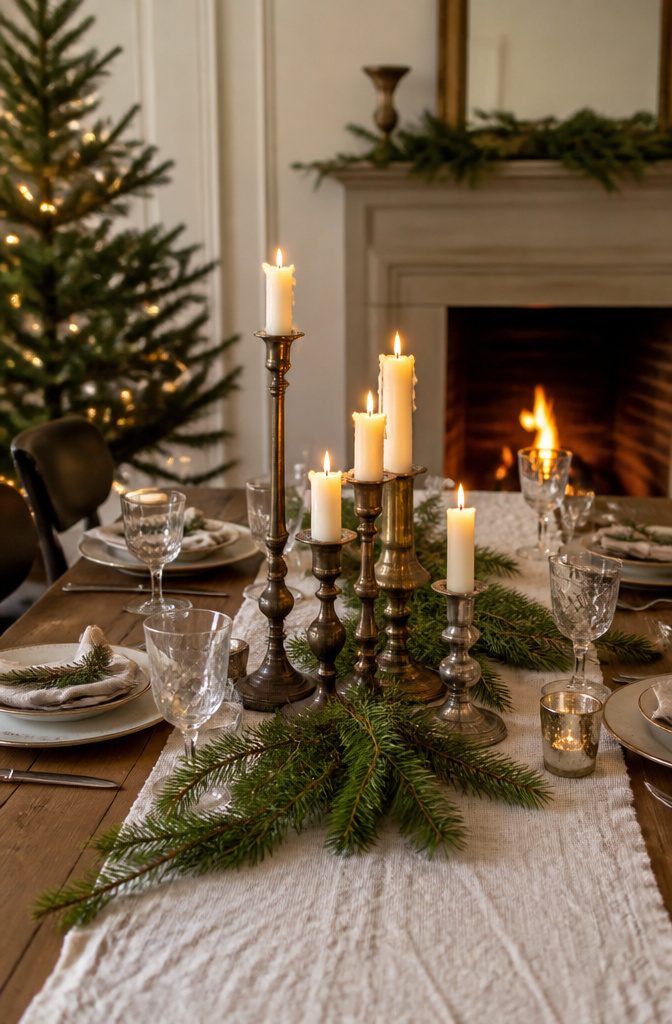
A cluster of tarnished brass or silver candleholders does more of the heavy lifting than any fresh arrangement you could buy.
The patina reads as instant history, and the weight of old metal keeps a long table from looking like a craft project.
I find these pieces in two places: antique shops, where you can test that the base sits flat before you pay, and Etsy, where sellers usually photograph the wear honestly.
Expect to hunt. A single matching set is rare; the look builds from three or four mismatched holders united by finish, not era.
Arrange them on a round dining table in a loose triangle, heights staggered so no flame lines up with another.
Tuck fresh evergreen branches around the feet after the candles are lit and the wax has just started to soften; the needles grip the metal and the slight warmth releases the scent.
On a long table, break the group into two smaller clusters, each with its own low and high point, rather than stretching one line that goes flat from the ends.
Advent candleholders work here too, though four candles in a fixed row can read as rigid.
Turn the holder crosswise on the table or let it overlap a runner at an angle so the form feels accidental. The evergreen does the softening either way.

PACKAGE INCLUDES: 2× 5.9"(15cm) & 2× 7.3"(18.5cm) & 2 × 9.3"(23.5cm) height centerpieces candlestick holder. The base diameter is 2.68"/6.8cm wide. Candles are not included.

Hurricane Candle Holder: This set includes two gold candle holders: larger, 21.5 cm (8.46") tall with a base diameter 11.8 cm (4.65"); smaller, 17.5 cm (6.89") tall with diameter 6 cm (2.3"). Together, they offer a layered visual appeal and bring a sense of harmony to any setting.

Vintage Gold Nutcracker King Design: this vintage nutcracker candle holder features an exquisitely detailed golden nutcracker king figure, adding elegant retro festive ambiance to your Christmas and holiday decorations
4. Christmas DIY Hanger Frame
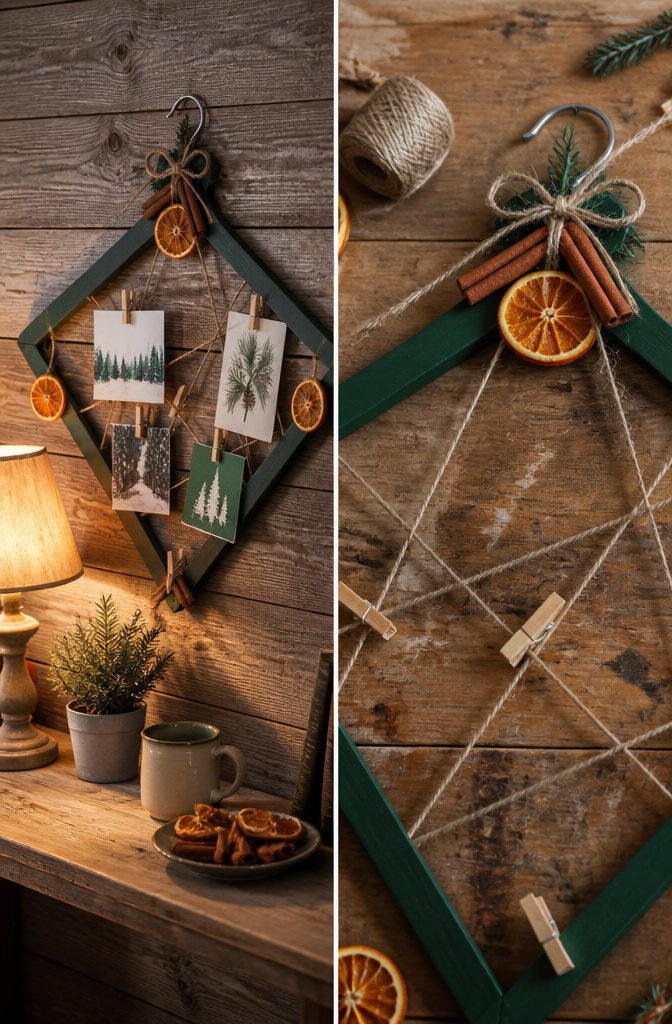
A wire hanger bent into a diamond or circle gives you the bones of a display frame that costs nothing and stores flat come January.
A wooden hanger holds more weight and looks finished on its own, but the cheap wire kind shapes easier and takes spray paint without complaint.
Bend the straight bottom bar upward to form a peak, or work the whole triangle into a circle using the hook as your top point.
Pliers help, though I have flattened the last inch of wire with the back of a spoon in a pinch.
Finish it with a quick coat of matte white or forest green spray paint, then loop twine or thin ribbon across the open frame for clipping cards.
Small clothespins do the holding, and a cluster of dried orange slices or cinnamon sticks wired to the hook dresses it up further.
The whole thing hangs on a nail you already have, and when the season ends, it bends back into a drawer with no guilt.

Quality Material: immerse yourself in the holiday spirit with our Christmas snowflake decor, made from wooden material; Sure to bring reliable and lasting appeal, these wooden snowflakes add a rustic charm to your holiday display

Sufficient Quantity: you get 6 pieces of snowflake wall hangings, which are enough for you to decorate room or wall and can meet your family decoration needs, to brighten up your house

Versatile Decorations: you will get 3 pack wooden snowflake wall decorations, each measuring about 11.81 inches/ 30 cm; The classic color and style adapt perfectly to various Christmas themes; Ideal for sharing, they infuse any space with a cozy winter ambiance, making your holiday season truly magical
5. Farmhouse Planked Wood Snowflake Sign
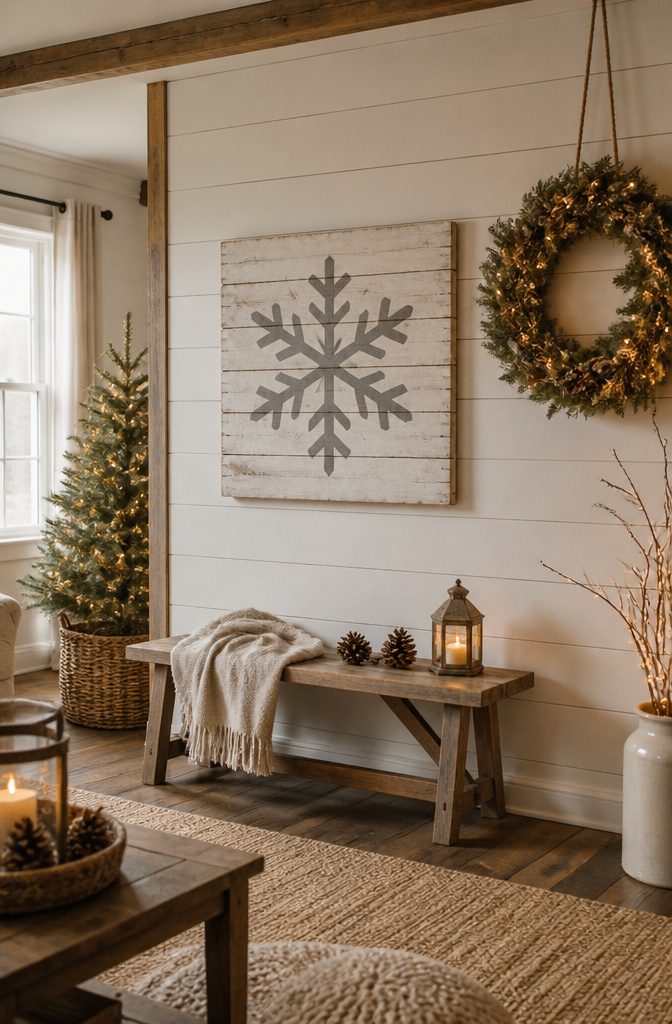
Scrap wood planks from a pallet or fence pickets work best for this sign; the more uneven the edges, the better the farmhouse look.
Sand them just enough to remove splinters, then arrange five or six boards face-down and run two perpendicular braces across the back with wood glue and brad nails.
Flip it over and trace a snowflake pattern with a straightedge; painter’s tape helps keep the lines crisp where the arms cross.
For paint, stick to two colors: a warm white like Alabaster or Swiss Coffee for the base, and a soft charcoal or weathered blue for the snowflake itself.
One coat on each is plenty if you let some wood grain show through. A dry brush of the darker color around the edges ages the whole piece in about two minutes.
Hanging hardware depends on weight. A sawtooth hanger centered on the top brace handles most signs under three feet; anything larger needs two D-rings and picture wire so it stays level on the nail.
The braces sit proud of the planks by design, so the sign hangs flat against the wall without wobbling.

Christmas Velvet Bow Set: you will receive 4 burgundy Christmas velvet bow decorations, all handmade, soft and smooth, with uniform luster; Sufficient quantity to meet your home decoration and sharing needs

【VALUE 2-PACK DIY SET (ASSEMBLY REQUIRED)】 — Includes two 36" (90 cm) Norfolk pine swags, 2 warm white LED string lights, 6 vintage bells with jute rope, and a 14.7 ft red ribbon roll. Arrives loose as an easy-to-style craft set to prevent transit crushing, allowing you to hand-weave the lights and custom-tie bows for a personalized holiday look.

Festive Door Accent: this Christmas door bow swag bring cheerful charm to your holiday entryway with a rich burgundy look, featuring a plush bow, bright berry accents, faux pine sprigs, and pinecones that create a cute and inviting display for doors, walls, and cozy seasonal decorating throughout your home
6. DIY Winter Sweater Jar Vase
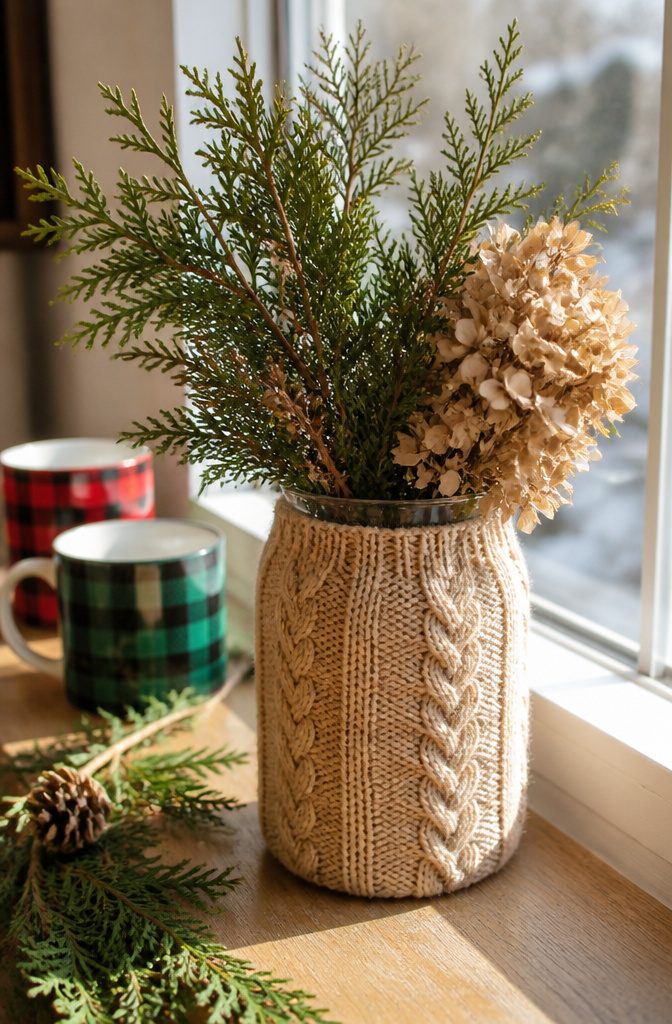
A mason jar wrapped in old sweater fabric looks like something that belongs on a windowsill next to a stack of plaid mugs. The texture catches low winter light in a way glass alone never manages.
Start with the sleeve of a sweater you were already going to donate.
Lay the jar on its side and roll it once to measure how much fabric you need, then cut a rectangle that wraps around with about an inch of overlap.
Cut the fabric slightly taller than the jar so you can fold the top edge down for a clean rim that does not look like a craft project gone wrong.
For the bottom, trace the jar’s base onto the fabric and cut a circle.
Sew or glue this to the lower edge of your rectangle before wrapping, or skip it entirely and let the base stay bare glass. Most of the visual weight sits at the sides anyway.
Attach the fabric with hot glue in thin lines at the overlap and the base. Fabric glue works too, though it needs overnight drying before you move the jar.
Do not glue the fabric directly to the glass all the way around; the jar will look stiffer and the glue ridges will show through the knit.
A single vertical seam and a circle at the bottom hold everything in place without fighting the material’s natural give.
Fill with cedar branches, dried hydrangea, or nothing at all. The jar stands on its own as a quiet winter thing.

3-Wick Design: the botanical scented candle 4 x 2.75 inches/ 10.16 x 6.99 cm with embedded real orange slices cinnamon clove features 3 wicks for a cleaner, brighter burn and stronger scent throw; The triple-flame design melts evenly and quickly fills your room with a warm spicy aroma

Sparkling Cinnamon: Twinkling lights, glittery decorations, and the buzz of warm conversation — it's a holiday party you never want to end. Sparkling aromas of cinnamon sticks, spicy clove, and just a hint of bay leaf make this cozy fragrance a wintertime classic.

Artistic Dripping Wax Design: experience an exceptional visual masterpiece featuring a unique external oil-drip effect; This handcrafted pillar cinnamon clove candle serves as a stunning centerpiece for any room
7. DIY Pine Cone Garland
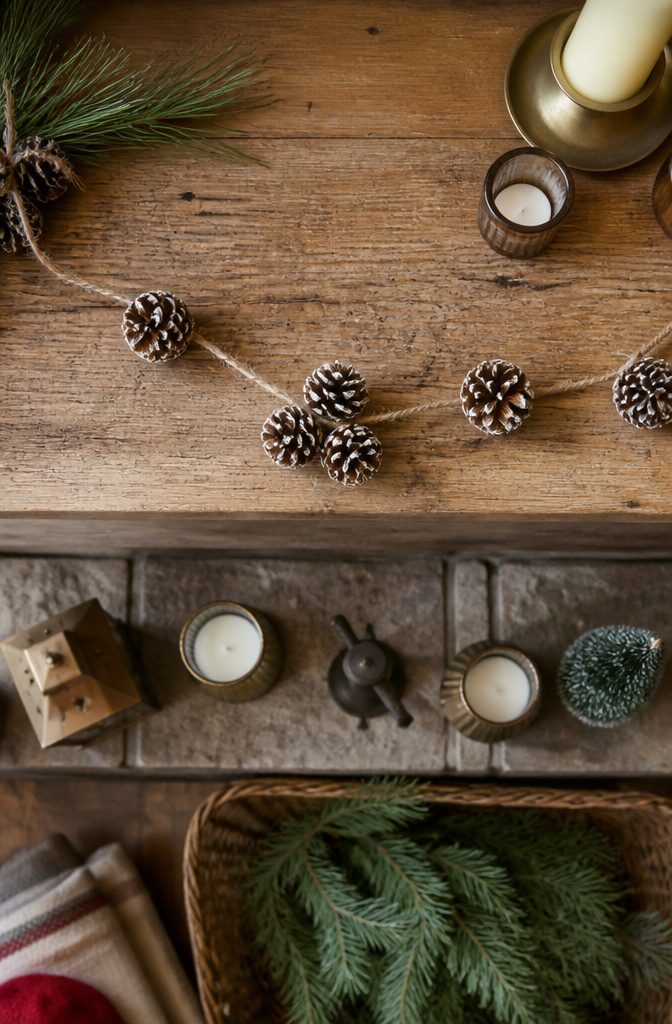
Pine cones work best when they have opened fully, so if you gathered them closed and tight, lay them on a baking sheet in a low oven until the scales relax.
That dry heat also kills any insects still hiding inside, which is not the detail anyone wants to discover after the garland is hung.
Once they are cool, a quick scrub with an old toothbrush removes dirt and the thin papery bits that flake off later.
For stringing, drill or poke a small hole near the base of each cone, angled slightly upward so the cone hangs point-down rather than tilting forward.
Twine looks warmer on a mantel; wire holds its shape if you want the garland to dip and swoop across a wide doorway. Space them about a hand’s width apart, or cluster three together and leave longer gaps between clusters.
A bit of white paint dry-brushed on the scale tips reads as frost from across the room; glitter reads as glitter, which is its own honest thing.
I would skip the spray sealant unless you have toddlers who cannot resist touching, because the matte surface looks more like something found in the woods and less like a craft project.

Rich Decoration Set: you will receive 2 highly-realistic faux cedar teardrop swags adorned with natural-looking pine cones, along with 8 large golden bells each with jute rope, 2 green velvet bows, and 2 strands of warm white LED lights (batteries not included) to illuminate your holiday display; this thoughtfully curated set offers a countryside festive style, suitable for creating a warm and inviting Christmas atmosphere either indoors or outdoors

Christmas Mirror Garland : our Christmas garland for mirror features an ideal size of 28 inches/70 cm, seamlessly fitting various mirrors in your home; It instantly infuses a rich and festive Christmas atmosphere, ensuring your spaces are beautifully adorned for the holidays

Package Includes: this Christmas swag set includes 2 teardrop cedar swags, 3 strands of red artificial berries, 2 dark green velvet bows, 2 metal bells and 2 light strings. The dark green hue presents a luxurious and romantic festive style for Christmas decoration
8. String Dried Orange Garland
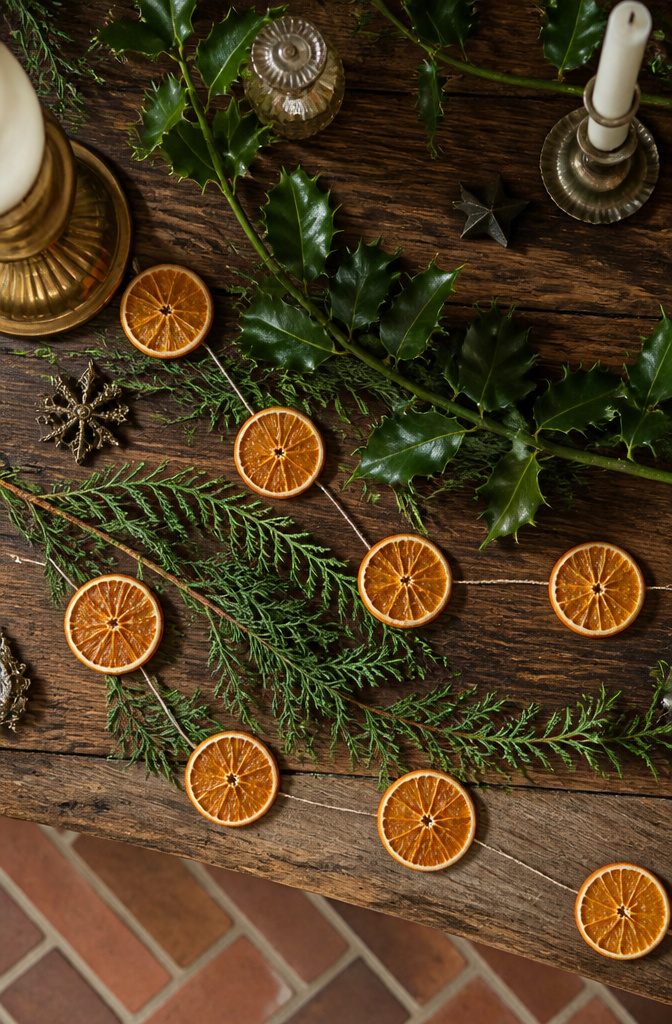
Dried orange garlands smell like the holidays before you even plug in the lights. I slice the fruit thin, about an eighth of an inch, and lay the wheels on a wire rack so air can reach both sides.
The oven stays low, around 200°F, for two to three hours until the centers are stiff and the rind has darkened to a deep amber. Flip them once halfway through so they dry flat instead of curling into cups.
A needle and cotton twine do the rest. I space the slices two to three inches apart, which keeps the garland from bunching when you drape it and leaves room for the pattern to read.
Knot the twine at each slice so nothing slides if a draft catches it.
The whole strand weighs almost nothing, so a thumbtack or a draped nail holds it anywhere you want the color: a window frame, a mantel edge, the top of a bookshelf where the heat won’t reach.

【Charming Design】 This Christmas decoration features a gold resin antler with a clear glass tealight holder. Perfect as a Christmas candle holder or taper candle holder, measuring 4.72 x 3.74 inches, fitting tealight or votive candles up to 2.8in

Complete Set of 4 Gold Candle Holders: this Christmas pinecone candle holder package includes 4 pieces of 3.1 inches/ 8 cm metal pinecone taper holders with a vintage distressed finish; Each features a 0.91 inch/ 2.31 cm inner diameter that fits most standard taper candles, making them practical for daily and holiday use with a stable base to prevent tipping

🏺 【【Elegant Vintage Design with Brass-Tone Cast Iron Base】 This set includes two pillar candle holders featuring beautifully crafted vintage brass-tone cast iron bases paired with clear glass hurricane shades. The timeless design adds warmth and character to dining tables, mantels, shelves, console tables, or wedding centerpieces – blending seamlessly into farmhouse, rustic, French country, or modern classic interiors.
9. Pomanders
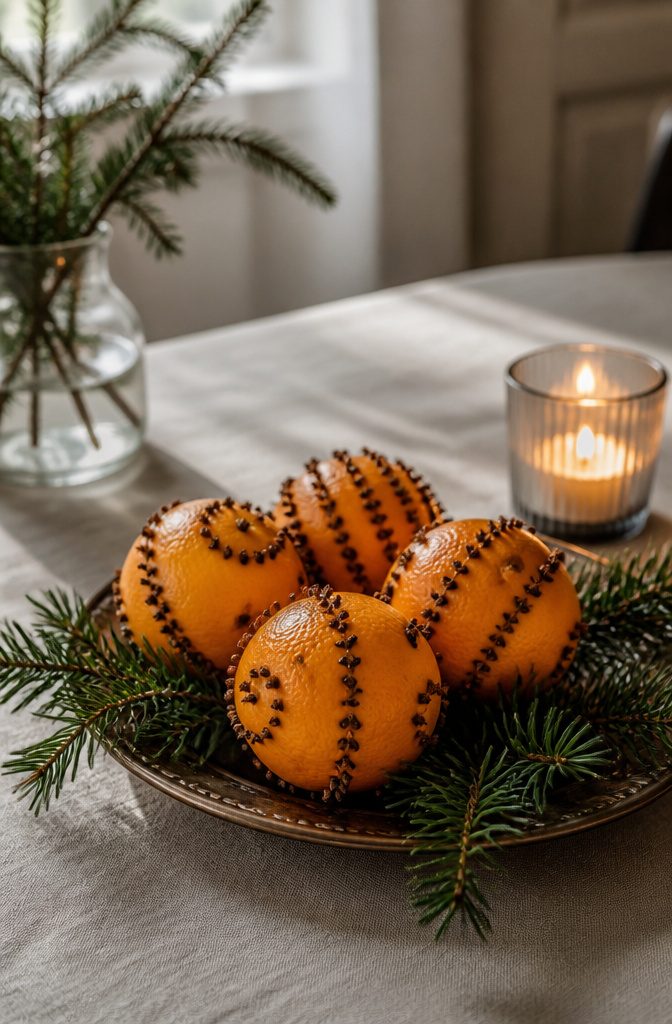
Oranges and whole cloves are the only ingredients, and the work takes maybe ten minutes once you settle on a pattern.
Poke holes with a pin or the straight end of a paper clip, spacing them close enough that the cloves will hold, then press a whole clove into each opening.
A random scatter is forgiving, but stripes or a spiral ribbon around the fruit looks deliberate without requiring precision.
Some people wrap the orange in ribbon first, running it from the navel to the top and crossing it again at a 45-degree angle; the cloves then fill the gaps between the bands, and the knot at the top gives you a loop for hanging.
The drying method is what determines how long they last. Left out on a counter, a pomander stays fragrant for a couple of weeks before it softens.
For a longer-lived version, set the studded oranges in a paper bag somewhere warm and dry for several weeks until they harden and darken.
The Victorian-era practice was to let them cure for a full month or more, after which they keep for years, though the scent mellows into something earthier and less sharp than the first week.
Either way, the cloves themselves are doing the preserving, so skimping on them shortens the life of the whole thing.

What you receive: the package contains 3 pieces of snowflake wooden signs, which have the quality material and 3 different sizes, you can use them to decorate your home and other places, they will add more charming to your home

What You Will Get: The package contains 6 pcs snowflake wooden wall decor with different sizes, ideal for your home or Christmas decorations

Suitable for Christmas: immerse yourself in the festive atmosphere with our 5-piece set of wooden Christmas ornaments made from quality wood, not only exude a charming atmosphere but also double up as photography props; Aesthetically pleasing addition to your Christmas party backdrop
10. Dried Orange Slice Ornaments

Dried orange slices for ornaments need to be cut thinner than the rounds you’d thread into a garland, about an eighth of an inch, so they dry fully flat and hold their shape on a single twine loop.
Thicker slices stay bendy in the center and can droop on the tree.
I dry mine until the flesh turns almost translucent and the peel edges curl slightly inward, a different finish from the leathery bend you want for garland pieces that get draped and handled.
A plain twine hanger is all you need. Thread it through the flesh near the top of the slice, knot it, and leave a loop long enough to slip over a branch.
No sealant or varnish is necessary if the slices are dried completely; the natural oils in the peel hold the color for a season.
If you want something more elaborate, a little off-white acrylic paint and a few whiskers cut from faux pine turn a slice into a fox face, with ears glued to the back.
The basic version takes maybe ten minutes of actual work, most of it waiting for the oven timer.

Package Contents Size: You will receive a Christmas satin bow garland includes 1 satin swag main body with 2 attached bows and back ties for a complete ready to hang display; Main body length measures 2m/ 6.56ft without the bows, while the extended ribbon tails drape softly for fuller coverage

【Abundant Festive Decorations】Make your festive period shine with our pack of 6 mini Christmas kitchen cabinet wreaths; These small Christmas wreaths boast a delicate silver glitter bow design, artificial pine and cedar greenery, white berry clusters, silver ball ornaments and metallic silver leaves, working together to accentuate your Christmas decoration with an elegant silver and green winter touch, and it also comes with 1 roll of 3cm ×25 yards silver glitter ribbon for your extra DIY holiday crafts

Double Sided Door Decoration Design: The Christmas bow wreath decorations include 2 artificial pine wreaths connected by one long red hanging ribbon. Simply secure the ribbon at the top of the door frame, allowing one wreath to hang on the outside of the door and the other on the inside for a complete double sided holiday display that creates a cohesive look
11. DIY Fabric Wreath
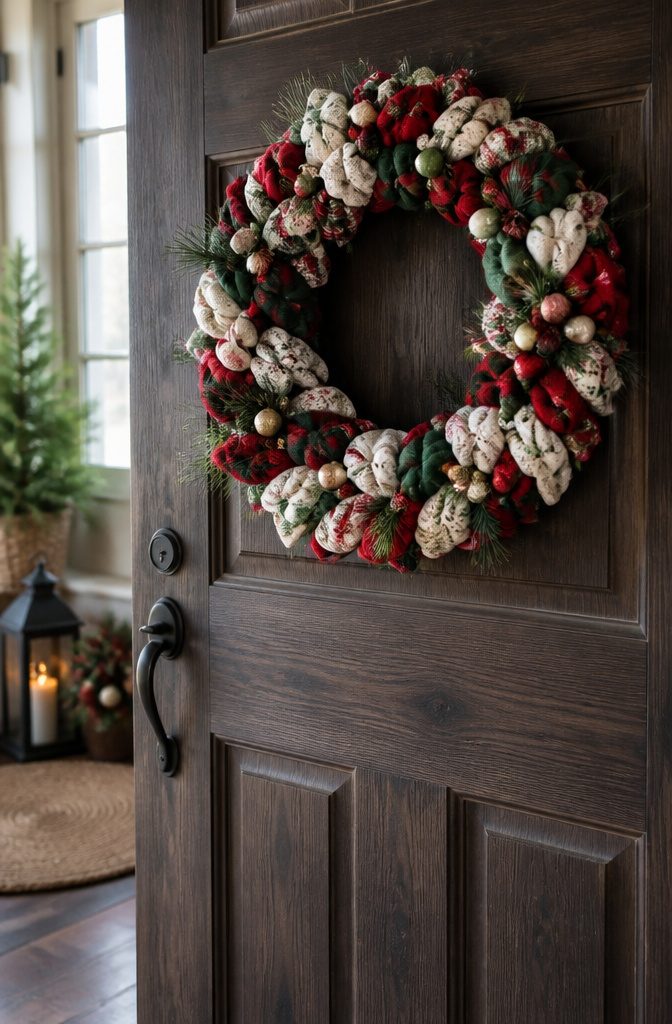
A fabric wreath is the project that finally emptied my scrap bin.
Cotton, linen, and wool work best because they actually hold a knot instead of slipping loose. Polyester satins and stiff quilting cotton will fight you.
I cut my scraps into strips about 10 inches long and 2.5 inches wide — a size that wraps cleanly around a standard ring and leaves enough tail to knot.
You will need roughly 80 to 100 strips for a 10- or 12-inch wreath form. Foam rings are lighter for doors; wire holds up better if you already own one.
The knot itself is just a simple overhand, tied around both the outer and inner wires so the fabric sits upright. Bunch them tight as you go; the fluff comes from density, not from any special technique.
If your strips are irregular, tie two thin ones together and treat them as one. The finished look is intentionally uneven, which means mistakes read as texture.
The only real pitfall is spacing.
Gaps show bare frame through the gaps, and widening appears once the fabric settles overnight. Pack it tighter than looks right.
12. DIY Paper Christmas Trees
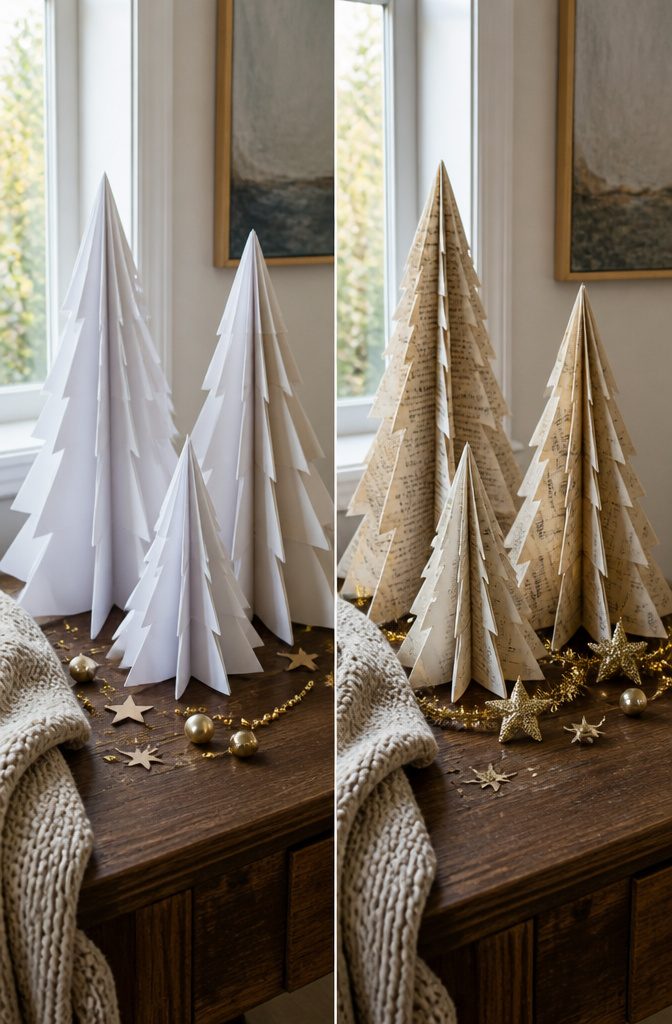
Old book pages, magazine spreads, or sheet music all work for these folded trees, though thinner paper behaves better than heavy stock.
The method is straightforward: strip off the covers, then fold each page twice toward the spine, tucking the excess so the page forms a clean triangle.
A YouTube tutorial will walk you through the hand positions if the written description stalls out.
Height is entirely up to how many pages the binding holds. A slim magazine yields a tabletop tree around six inches.
A thick paperback novel pushes toward twelve or more. For stability, the spine itself becomes the trunk, so the base sits flat only if your folds are tight and uniform.
A dot of hot glue on the first and last pages, pressed to the spine, keeps the fan from springing open.
Sheet music gives the palest, most graphic look; magazines add blocks of color where the folds catch the light.
What convinced me, reading through a half-dozen versions of this project, is that the spine must stay intact; a cracked binding means the tree leans and the base skids. If your source book is already falling apart, choose another.
13. DIY Christmas Signs
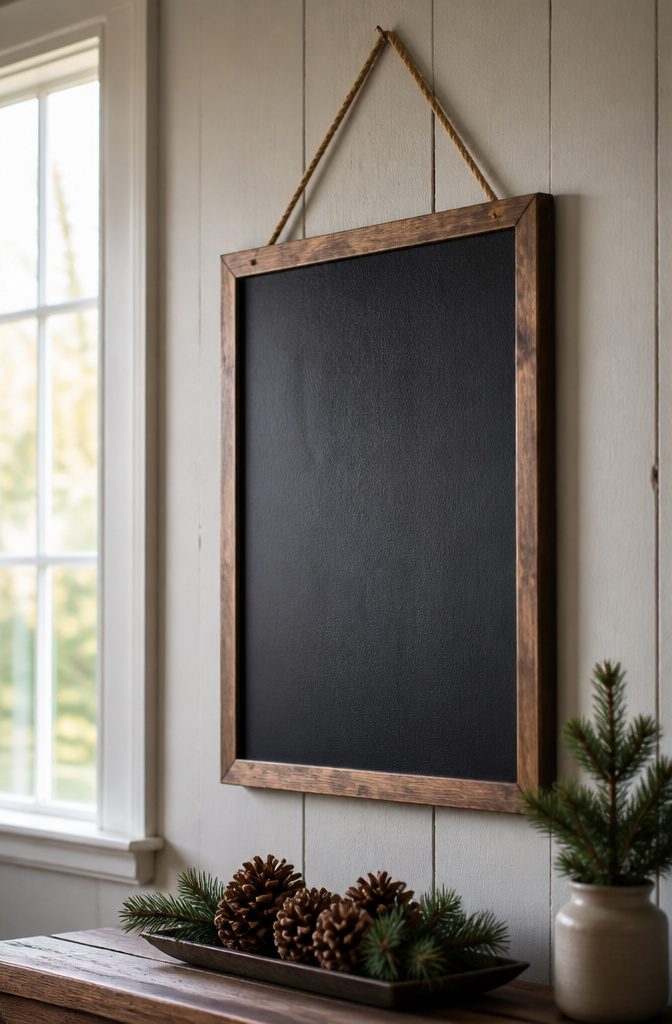
A half-inch plywood panel from the hardware store gives you a surface that stays flat once sealed, and a couple of pine boards ripped down for the frame keep the whole thing from warping in dry winter heat.
Sand to 120 grit before you do anything else; paint will telegraph every splinter you leave behind.
For the lettering itself, vinyl cutouts or even sturdy stickers work as stencils you peel away once the paint is touch-dry, which is how I finally got edges clean enough to hang near the front door without cringing.
Black acrylic over the whole face reads as chalkboard from across the room, and a white paint pen through the stencil holes gives you that hand-lettered look without the smudging that ruins real chalk the first time someone brushes past.
Seal with a clear acrylic spray in two thin coats, not one heavy one that pools at the edges and dries milky.
The finished sign runs about the size of a cabinet door, big enough to matter on a wall but still light enough to hang with a single nail.
14. DIY Christmas Garland
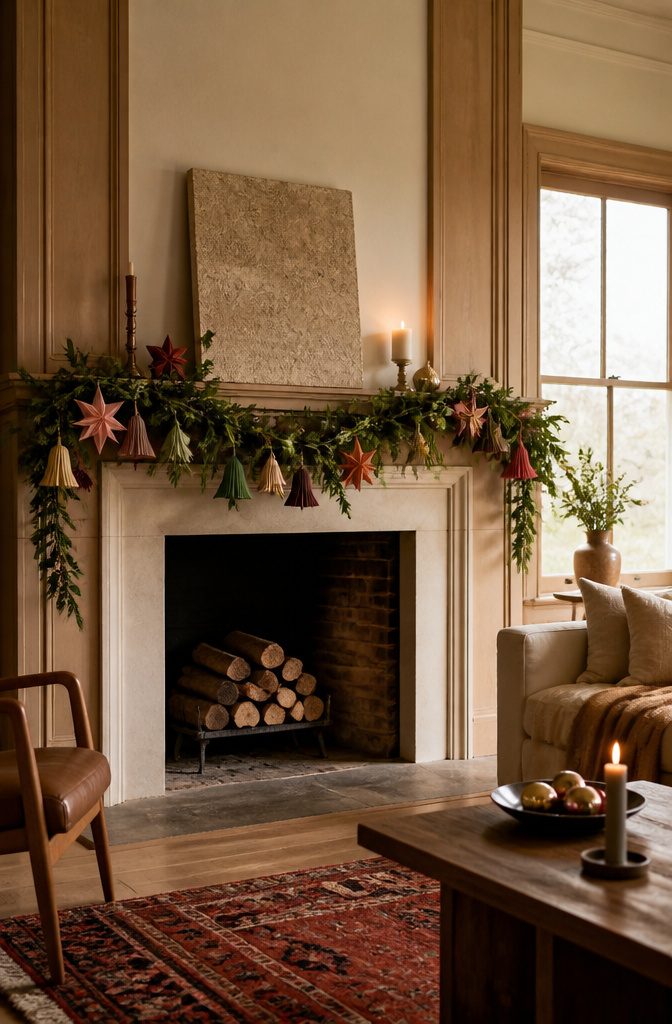
A basic garland method starts with whatever material you have in volume and a length of twine or thin rope.
Last year I strung together clipped boxwood from a neighbor’s overgrown hedge after she offered, and the fresh green held up through New Year’s on my mantel.
Tie bundles with florist wire every six inches or so, letting them overlap to hide the mechanics.
Paper works the same way: fold accordion pleats, snip shapes through the layers, and thread them onto cord with a darning needle. The trick is keeping the spacing loose enough that the garland drapes rather than stiffens into a rod.
For a fuller look, alternate two materials, greenery and paper bells or felt stars, so the eye travels. Store-bought garlands run thirty dollars and up; this version costs the price of wire and whatever you already have on hand.
Weight matters more than you think: wet greenery on a painted mantel can leave marks, so lay a runner underneath or keep the swag light.
15. DIY Wooden Christmas JOY Sign
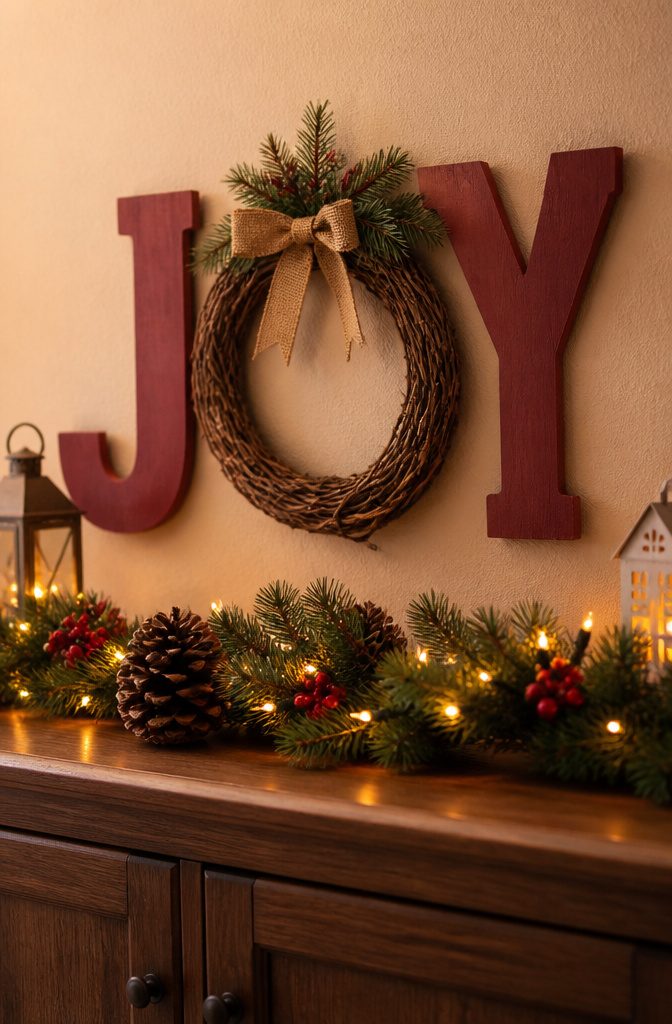
A JOY sign built from three separate wood pieces reads clean from across a room and takes less wall space than a full wreath.
I cut the J and Y from a 1×6 board and the O from a slightly wider 1×8 so the circle holds visual weight against the straight letters.
Keep the O between 8 and 10 inches across; smaller and it disappears, larger and the word goes lopsided.
Paint or stain the J and Y in one tone and the O in another so the wreath shape pops. A muted sage or deep red for the circle against natural wood works for most living rooms.
For the O itself, a simple grapevine wreath hot-glued at four points suffices, or loop a wide velvet ribbon through the center and tie it top and bottom for an ornament effect that reads flatter against the wall.
Hanging this without the letters drifting apart means attaching picture wire to the back of each piece and running a single horizontal wire or thin dowel behind all three.
Space the letters with roughly two inches between each stem so the word breathes. Command strips work for lightweight pine under five pounds; anything heavier needs a stud or proper anchor.
16. DIY Christmas Coasters
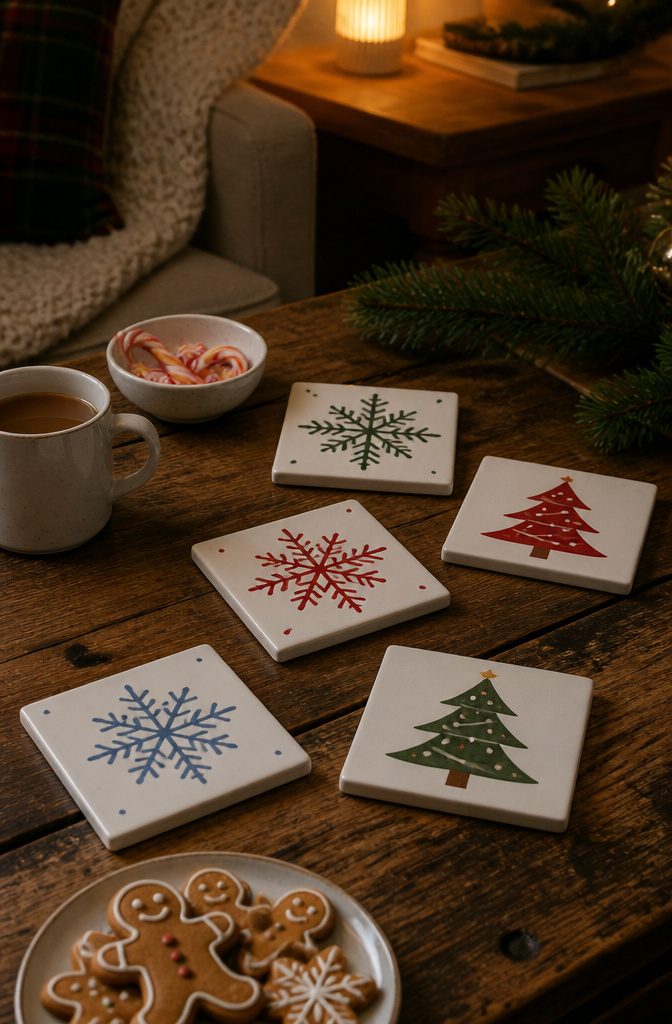
Cork squares, thin wood rounds, or leftover ceramic tile all make decent coaster blanks without a special order.
I have seen the tile option work best for anyone already painting ornaments or signs: buy one extra matte white square and the same acrylics cover both projects.
The holiday part is quick once the base coat dries. Small stencils of trees, snowflakes, or a simple candy cane stripe keep the design readable at four inches across.
A couple of coats of polycrylic or another water-based sealer keep the surface from turning sticky the first time a guest sets down a warm mug.
Oil-based polyurethane will yellow light colors over time, so I would skip it for whites and pale blues.
These stack well and ship flat, which makes them the rare handmade gift that does not cost a fortune to mail.
17. DIY Yarn Christmas Trees
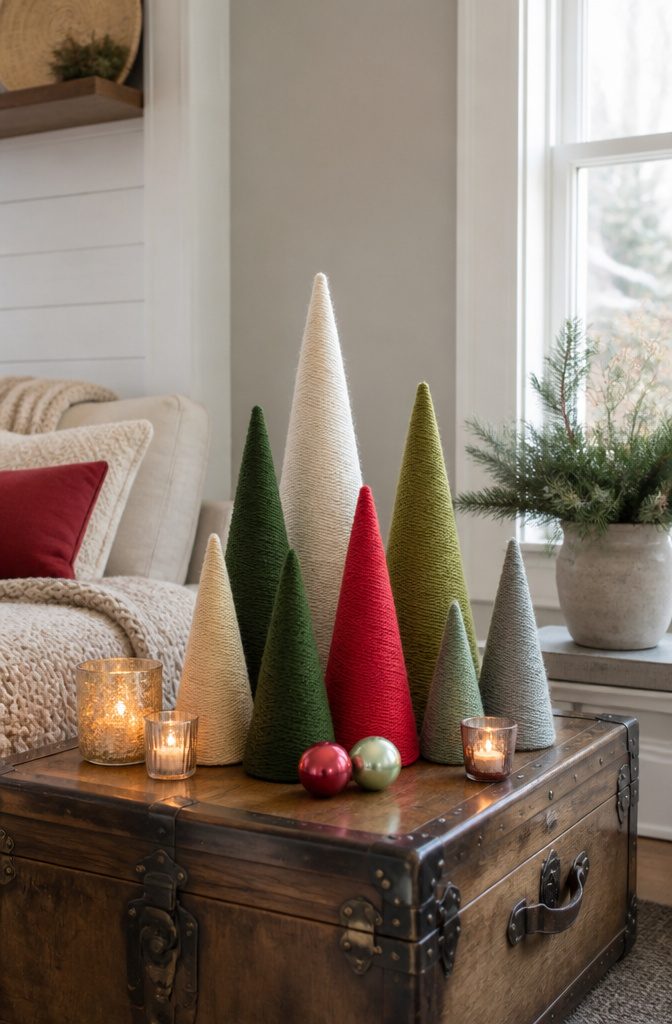
Yarn-wrapped cone trees take up almost no storage space after the holidays, which is reason enough to make a few.
The base shape matters more than you might expect. A poster-board cone keeps the whole thing light and costs next to nothing, though it takes patience to roll evenly and tape shut.
Styrofoam cones from the craft aisle hold their shape without any fuss, but the yarn slips more and you will need glue dots or tacky adhesive every few inches to keep it from sliding.
I have seen people use cardboard shipping tubes cut at an angle, and that works fine for a narrow, modern silhouette.
Yarn weight changes the whole look without changing the technique. A bulky wool fills in gaps fast and hides the cone completely in two or three passes around, but the finished tree reads rustic and a little fuzzy.
Fine cotton or acrylic takes longer to wrap and shows every layer, which gives you a smoother, almost corded texture that looks more polished on a mantel.
Either way, start at the bottom and work up, tucking the tail under the first wrap so it disappears. Hot glue the end at the top, or leave a long tail to tie into a loop for hanging.
Embellishments are optional and easy to overdo. A single wood bead glued to the tip reads Scandinavian; pom-pom garlands wound around the middle look like something from a preschool craft table.
Small bells or felt stars work best on the fine-yarn trees where the surface is flat enough to hold them.
18. DIY Advent Calendar Village
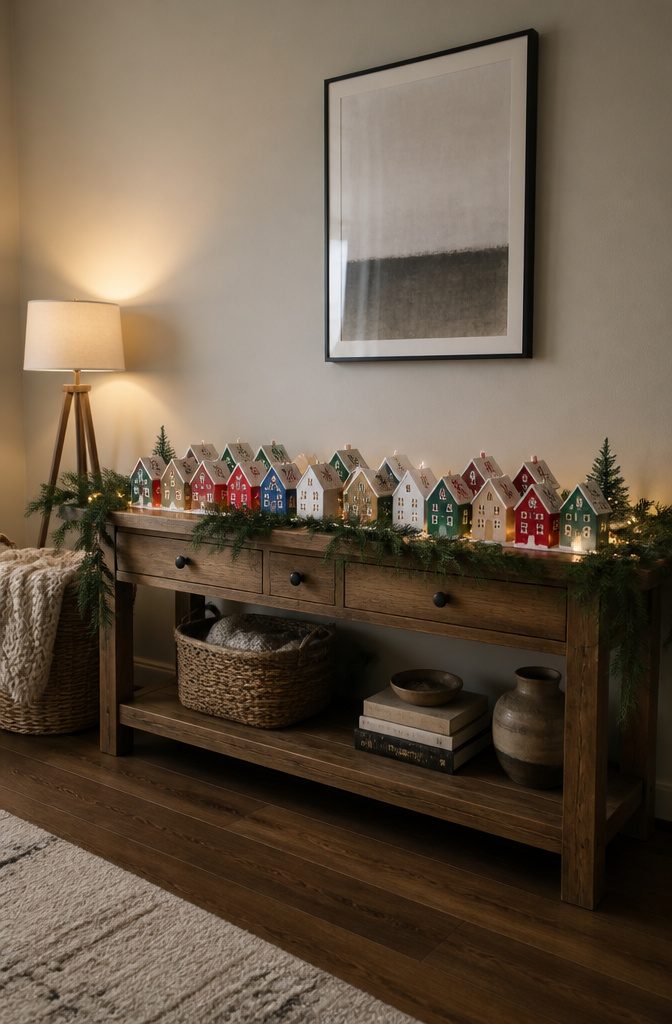
A paper advent calendar village turns a countdown into something the kids can help build. Brown paper houses numbered 1 through 25 get folded from a printed template: cut the outer lines, score the folds, then tape or glue the edges.
The finished boxes need to fit a standard foil-wrapped chocolate, so check your template scale before you print; most free downloads run about 2–3 inches tall, which is tight for anything bigger than a single square.
Fill the houses before you seal the rooftops.
String loops let them hang on the tree, or line them up along a mantel as a miniature village. Different shapes and sizes keep the row from looking too uniform.
19. DIY Stockings
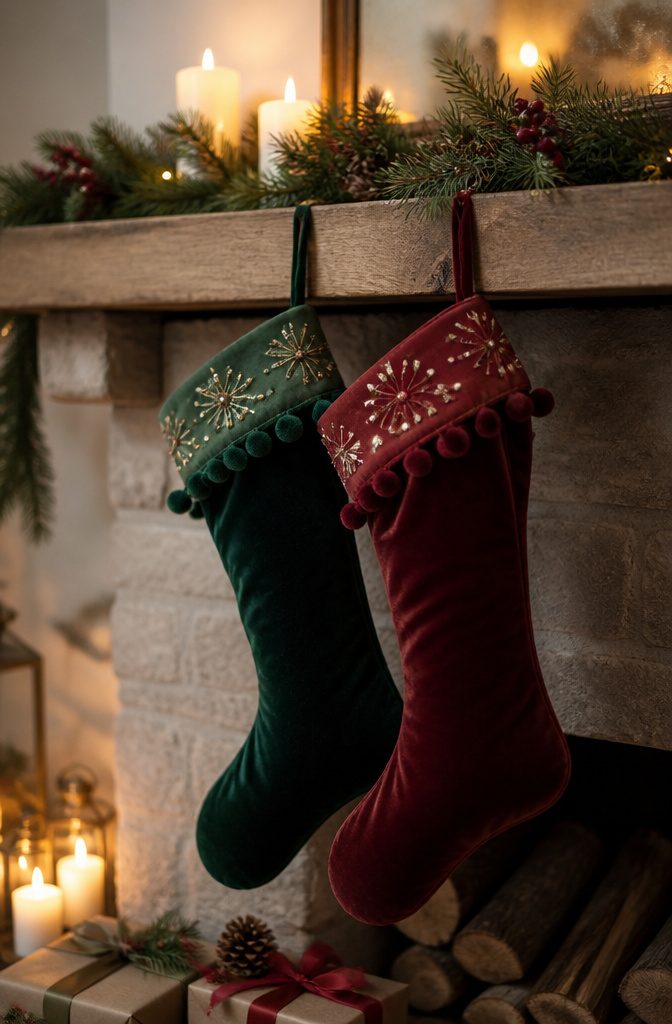
A stocking starts with a simple shape: trace your hand flat on paper, then widen the forearm into a cuff and round the heel and toe.
Cut two from your outer fabric and two from lining. Velvet off-cuts or heavy cotton tea towels both work; the weight keeps the shape from collapsing against the mantel.
Sew the outer pieces right sides together, then the lining the same way, but leave the lining’s top edge open a few inches for turning.
Turn the outer shell right-side out, slip it inside the lining so the right sides face each other, and stitch around the top raw edge.
Pull everything through that lining gap, press the top seam flat, and stitch the gap closed with the loop tucked inside at the back corner.
A doubled strip of the same fabric, four inches long, makes a loop that lies flat and holds up over years of use.
Embellish after assembly: wooden letters, small tassels, or vintage baubles stitched on last so they do not catch in the seam.
The lining hides the raw edges and gives the stocking body; without it, the toe and heel pucker where the curves fight the bulk.
20. DIY Christmas Centerpieces
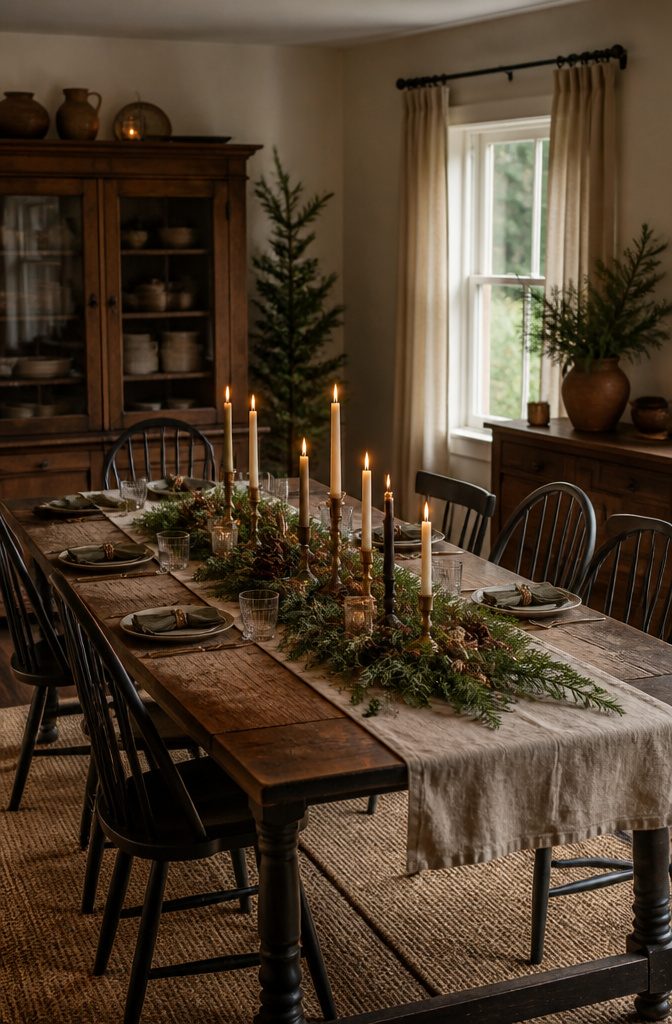
A low centerpiece keeps conversation flowing without the bob-and-weave of taller arrangements. Keep the total height under 14 inches, or guests end up playing peek-a-boo across the gravy boat.
Vintage Advent candleholders, the kind with graduated slots for taper candles, work beautifully on round tables.
Wrap fresh evergreen branches around the base and let the greenery spill just past the rim. The candles themselves give you vertical interest that stays narrow enough to see through.
Old glass bottles take on a second life as tree-shaped candle holders with a coat of shimmering paint and a modern silhouette cut from paper or vinyl.
Group three at staggered heights, or run a line of five down a long farm table. The paint catches candlelight and throws it back across the plates.
Found objects fill the gaps without adding cost. A walk through the yard yields pine cones, bare branches with good structure, or holly if you’re lucky and the birds haven’t stripped it.
Tuck these between the candles, not piled high. The rule stays the same: if someone seated across from you has to shift to make eye contact, it’s too tall.
Frequently Asked Questions
How do you make a DIY Christmas wreath?
You can make a wreath by tying fabric scraps around a foam or wire wreath form, using strips about 10 inches long and 2.5 inches wide.
Cotton, linen, and wool work best because they hold knots without slipping. Pack the knots tighter than looks right at first, since gaps show bare frame after the fabric settles overnight.
What are some easy DIY Christmas decorations?
Easy decorations include fabric wreaths, cinnamon candles, pine cone garlands, dried orange garlands, and yarn-wrapped cone trees.
Most take under an hour and use materials like scraps, natural items, or basic craft supplies you likely already have. The article covers twenty specific projects ranging from swags and centerpieces to stockings and advent calendars.
How can I decorate for Christmas on a budget?
Use thrifted items like tarnished brass candleholders, forage greenery from your yard or a neighbor’s hedge, and repurpose scraps like old sweater sleeves or book pages.
Many projects cost only the price of glue and wire, since the materials are things you already own or can gather for free.