
Halloween Rice Krispie treats are the same three-ingredient bars you already know, pressed into a 9×13 inch pan and shaped into monsters instead of squares. The catch is the 30-minute cooling window; cut too early and they smudge, sag, and ruin whatever candy eyes you press on next. Fresh marshmallas matter more than most people expect, and a half tablespoon of coconut oil per batch keeps melted coatings thin enough to dip clean.
What Halloween Rice Krispie Treats Are and Why They Work
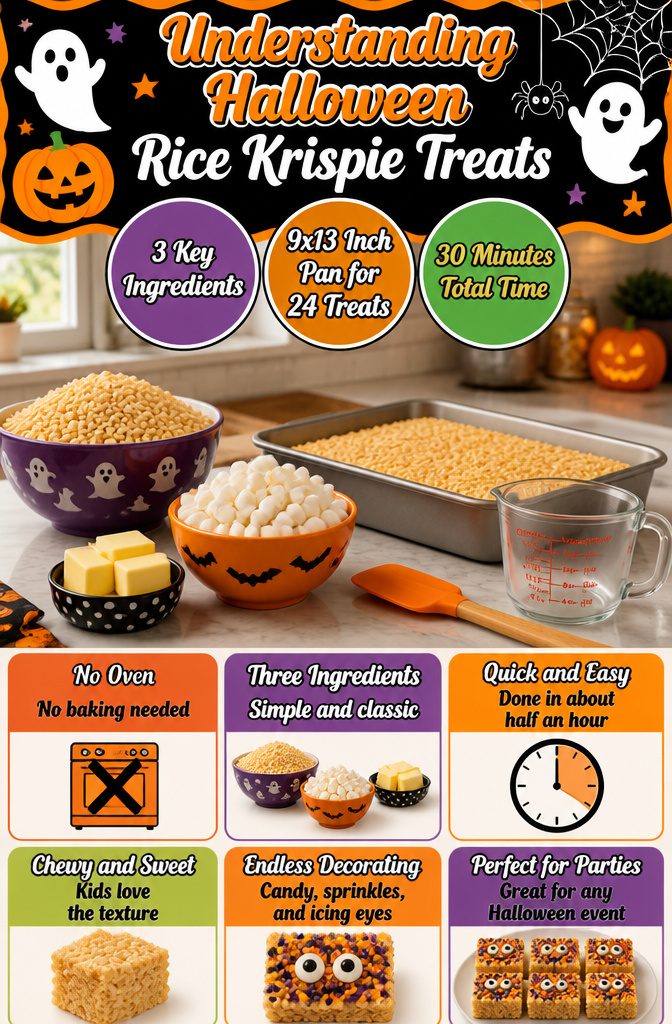
Halloween Rice Krispie treats start with the same three ingredients the box calls for: Rice Krispies cereal, mini marshmallows, and butter. Melted together and pressed into a 9×13 inch pan, the mixture sets into a slab you can slice and shape however the holiday demands. No oven, no mixer, no waiting for butter to soften. The whole project, cooling included, wraps up in about half an hour, which matters when a weeknight evening is all the time you’ve got between work and costume panic.
The cereal gives you a neutral, lightly sweet base that takes color and candy without fighting back. Marshmallows provide the glue and that particular chewy texture kids recognize immediately. Butter keeps the batch from turning rubbery and adds the richness that makes a homemade version worth the small effort over the bagged alternative.
A 9×13 inch pan yields roughly two dozen rectangles, enough for a classroom party or a pumpkin-carving spread without doubling the recipe. The 30-minute cooling window is non-negotiable; cut too early and the treats smudge, sag, and stick to the knife. Once firm, though, the surface holds melted candy, sprinkles, and icing eyes well enough that even impatient decorators get clean results.

Pre-cut Baking Parchment Paper Sheets: Are you tired of cutting curly parchment paper? Our pre-cut parchment sheets can let you get rid of cutting parchment anymore. The sheets lay flat on the baking tray and will not curl

EXTRA STRONG - 200pcs pre-cut parchment paper sheets made of extra thicker 45gsm paper vs commonly used 35gsm or 40gsm paper, it's about 12% thicker than others'. We define it as heavy duty parchment paper.

【PERFECT AFTER-SALES SERVICE】If for any reason you are not completely satisfied with your purchase, or encounter any problems during use,you can click the "contact seller" button to send an email to us, and We will provide you with a satisfactory solution within 12 hours.
1. Prepare the Pan
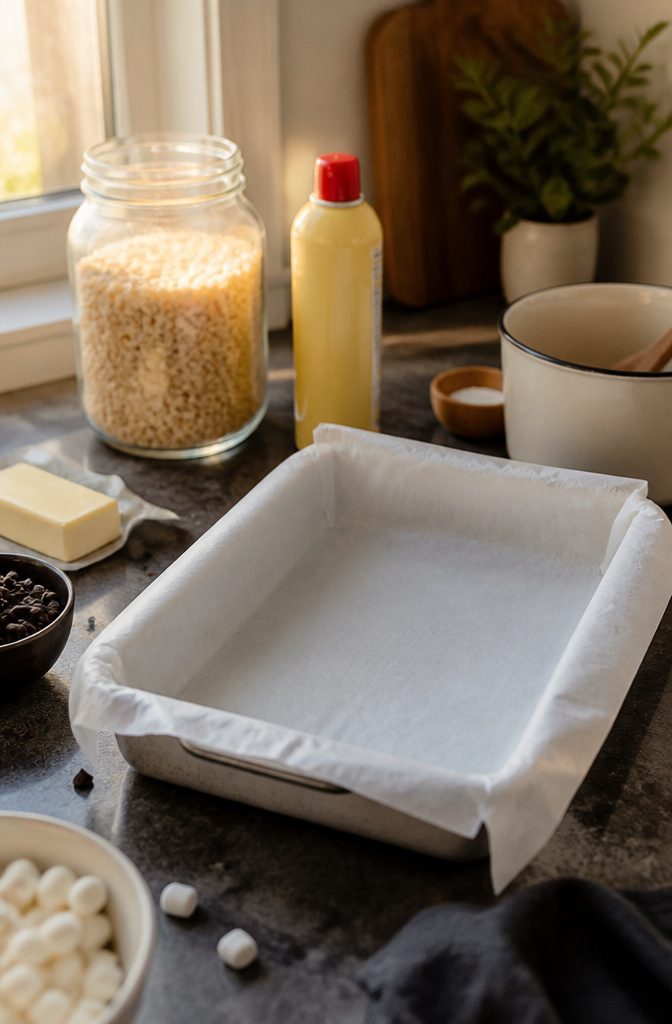
A 9×13 inch baking dish is the standard size for a full batch, and lining it matters more than you might think. Parchment paper or foil with a couple inches of overhang on the sides gives you handles to lift the whole slab out cleanly. Without that overhang, you are left prying at the edges with a knife and hoping the corners survive intact.
Cooking spray goes on after the liner is in place, and it needs to hit both the liner and any exposed pan surface the marshmallow mixture could touch. The sources split on whether parchment or foil wins; foil molds tighter to the corners, while parchment releases more reliably for dipped treats. I keep both on hand and reach for parchment when I know the batch is heading toward a chocolate coating later.
The spray layer serves two jobs. It keeps the sticky marshmallow from gluing itself to the liner, and it stops the liner from gluing itself to the pan. Skip either step and you will be peeling foil off the bottom of your treats in fragments, or worse, watching the decorated top crack as you wrestle the slab free.

Soft, chewy, and delicious homestyle crispy marshmallow squares; Write a special note on the wrapper and share a sweet snack option for every occasion

More than 1.5 times larger than our Original bars (62g Bar, 182% bigger than our 22g Bar); Delicious snack for everyday family moments

Rice Krispies Treats Squares Original Confetti Cake 6.2oz
2. Melt Butter and Marshmallows
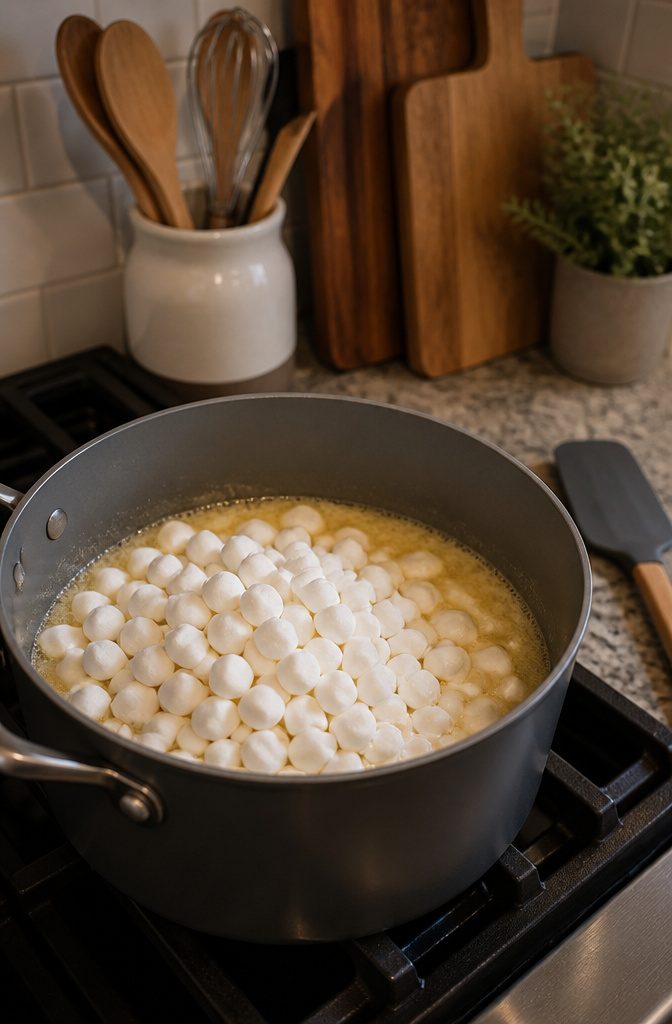
The butter goes in first: 8 tablespoons, one full stick, melted over medium-low heat in a large pot. I keep the flame lower than I think I need, because browned butter makes for bars that taste off. Once the butter is fully liquid, the marshmallows go in. I use 15 ounces, about one and a half standard bags, and I stir constantly while they soften.
Fresh marshmallows matter more than most people expect. Older bags lose moisture sitting in the pantry, and once that happens they resist melting, then teeter on the edge of overcooking and turning the whole batch tough. The ones I grabbed this week melted into a smooth, even pull in under two minutes. When the mixture looks glossy and no lumps remain, it’s ready for the cereal.

Fruity Flavored Bloody Gummy Eye Balls Candy: Bring the Fun, Unique, and Tasty to any Halloween Party, Classroom Celebration, Movie Night Marathon and More

Spooky & Fun Edible Eyes: These 1cm candy eyeballs add a playfultouch to your desserts, perfect for Halloween parties, and fun baking projects.

👁️ Fun Eyeball-Shaped Gummies-4D eyeball-shaped gummy candies with a playful Halloween design, featuring assorted colors and detailed textures.
3. Mix in Cereal
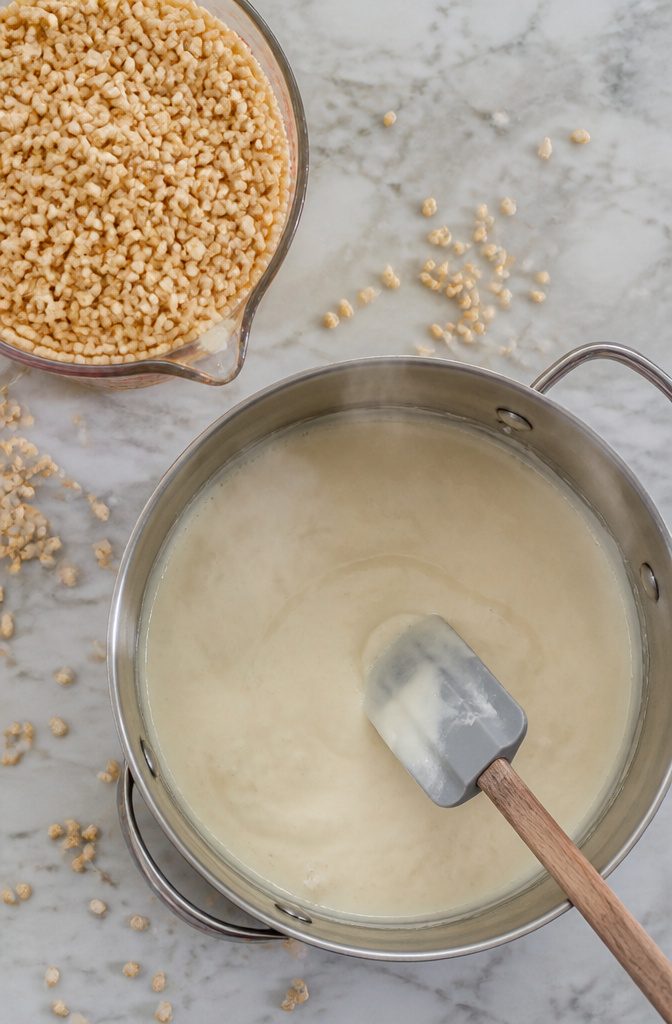
Remove the pot from the heat the moment the marshmallows finish melting. The residual warmth will keep the mixture workable, but the clock starts now. You have roughly sixty seconds before the sugar begins to stiffen and the cereal refuses to coat evenly.
Pour in 6 cups of Rice Krispies cereal. Six cups is the standard measure that fills a 9-by-13-inch pan to the right thickness, though one recipe I trust bumps to 8 cups for a denser bar. I stick with six; it gives more marshmallow per bite and stays softer longer.
Stir fast and thoroughly. The mixture thickens as you fold, clumping at the edges of the pot and sticking to the spoon. A silicone spatula scrapes cleaner than wood here. Every pale flake should disappear under the sticky coating; uncoated cereal means dry pockets in the finished treat.
If the mass starts to seize before you are ready to press it out, you have waited too long. The next batch, work quicker.

Sweet & Indulgent Marshmallow Crispies Scent: Delight your senses with the delicious aroma of gooey melted marshmallows, warm vanilla, and crispy toasted rice cereal hot out of the kitchen.

Sweet & Indulgent Marshmallow Crispies Scent: Delight your senses with the delicious aroma of gooey melted marshmallows, warm vanilla, and crispy toasted rice cereal hot out of the kitchen.

ORANGE, LEMON, & MARSHMALLOW - Relive the carefree joy of simpler days with a rush of zesty orange, lemon, and lime, sweetened by a swirl of sugary vanilla, reminiscent of a favorite childhood treat.
4. Press Into Pan
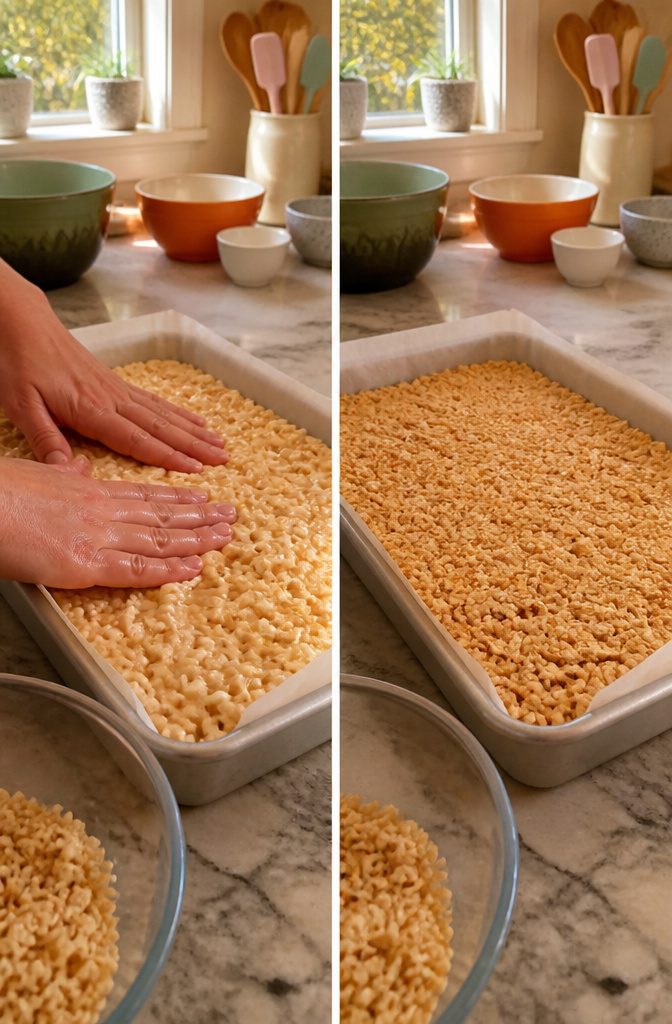
The mixture goes into an 8×8 parchment-lined pan still warm and pliable. Press it gently with your fingers so the surface is level and the corners reach the edges, then stop. Dense packing squeezes out the air pockets that give Rice Krispie treats their light, yielding texture, and the result is a pan of hard, dense blocks that crack instead of bend. This is the single most common way a batch goes wrong, and most recipes skip saying so outright.
Water, butter, or oil on your fingertips keeps the marshmallow from gluing itself to your hands. I dip mine in water, press lightly once across the surface, and leave it alone. The layer will settle as it cools; any extra force just compacts what should stay airy.

About this Item: Coconut oil in solid form will transform to liquid at temperatures above 75F

One 15-fluid-ounce container of Organic Refined Coconut Oil

Nutiva’s all-natural steam refining process yields a pure, taste and odor free, nutrient-rich oil containing 63% medium-chain triglycerides and 50% lauric acid without the use of dangerous and harmful chemicals or hexane
5. Cool and Cut
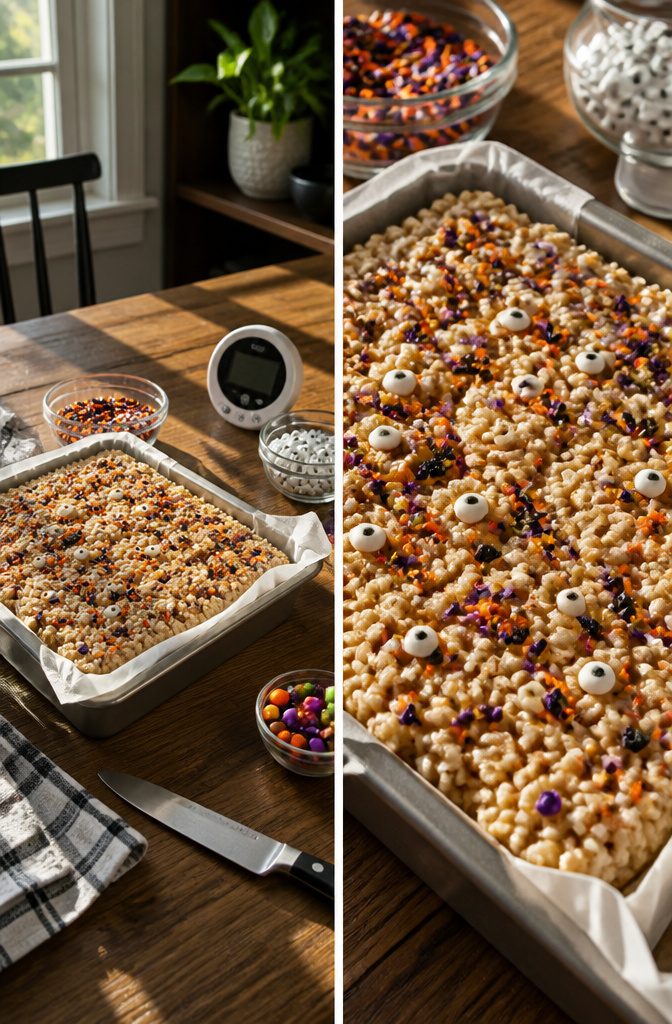
The treats need at least 30 minutes to cool and set before you try cutting them. Warm marshmallow stays sticky and will gum up the knife, leaving ragged edges that make decorating harder than it already is. I usually set the timer, walk away, and start pulling out whatever candy melts and sprinkles the design calls for.
A 9 by 13 pan will give you 24 squares if you cut in a strict grid, but I shave each one slightly smaller than the finished look I want. That quarter-inch of margin on every side becomes the ledge where candy eyes sit or where melted chocolate drips over the edge without sliding straight off onto the counter. The treats will still read as full-sized once the decoration goes on, and the overhang is what makes them look like something from a bakery case rather than a pan of after-school snacks.
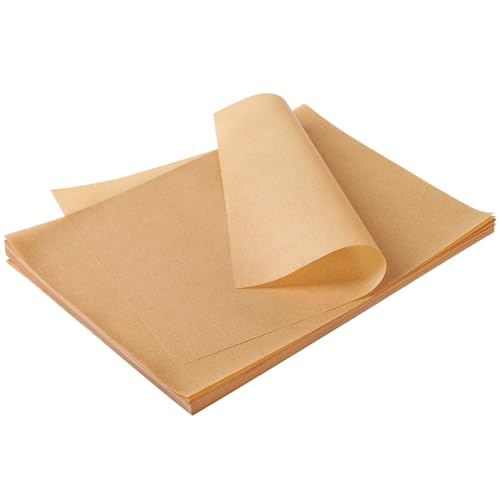
Cost-Effective: 200 sheets of 9" x 13" parchment paper, perfect for everyday gatherings and home use, the perfect size makes the cooking and baking experience in the kitchen easier and more convenient, no more curly edges.

EXTRA STRONG - 200pcs pre-cut parchment paper sheets made of extra thicker 45gsm paper vs commonly used 35gsm or 40gsm paper, it's about 12% thicker than others'. We define it as heavy duty parchment paper.

Perfect Size: 9x13 inches of 350 count unbleached parchment paper, which is about 22.9x33.0cm, not only is it pre-cut baking paper, but also it can give you a lot of help in baking! Baking paper sheets are great for retaining your moisture and flavor.
6. Decorate
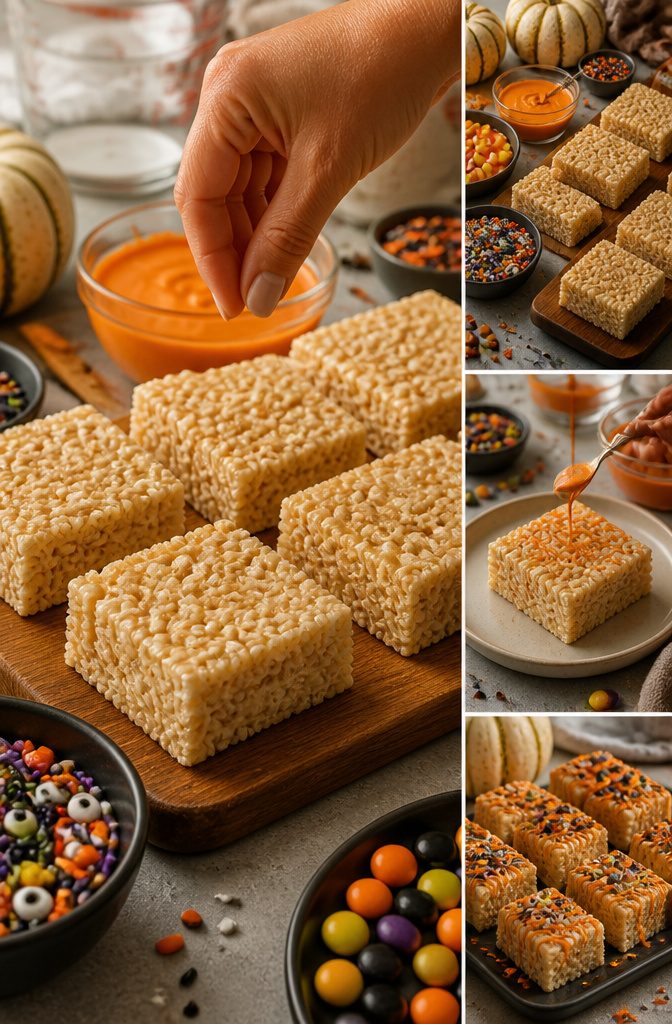
Candy melts set the fastest, cleanest coating for these treats, though melted chocolate chips work if that is what the pantry holds. Either way, 1 teaspoon of coconut oil per batch smooths the melt and keeps the coating thin enough to dip or drizzle without clumping.
A quarter cup of candy melts is the right starting point for drizzling across a full batch; scale up from there if you plan to dip the treats completely. I melt in short bursts at half power, stirring between each go, because scorched candy seizes and turns grainy past saving. Dip one broad side, or hold the treat over the bowl and drizzle back and forth with a spoon. The coating stays wet long enough to press in candy eyes, sprinkles, jimmies, or whatever small decorations fit the design, but it skins over faster than you expect, so work in batches of two or three treats at a time.
The coated treats need 30–45 minutes on parchment to set hard. Rushing them into the fridge can whiten the surface or leave them tacky. Room temperature, out of the way, is the better wait.
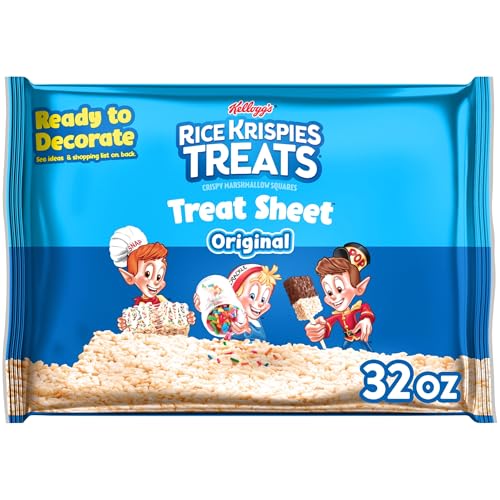
Great for decorating; Pre-made treat sheet that is ready to serve; Cut into different sizes, portions, shapes, and designs

Food-Grade Safe Material: Crafted from food grade plastic, these clear boxes ensure the safe storage and display of your delectable treats while maintaining their freshness and flavor. Their transparent design allows the contents to shine through, enticing customers or your guests with a clear view of your delicious creations

Food-Grade Safe Material: Crafted from food grade plastic, these clear bags ensure the safe storage and display of your delectable treats while maintaining their freshness and flavor. Their transparent design allows the contents to shine through, enticing customers or your guests with a clear view of your delicious creations
7. Mummy Rice Krispie Treats
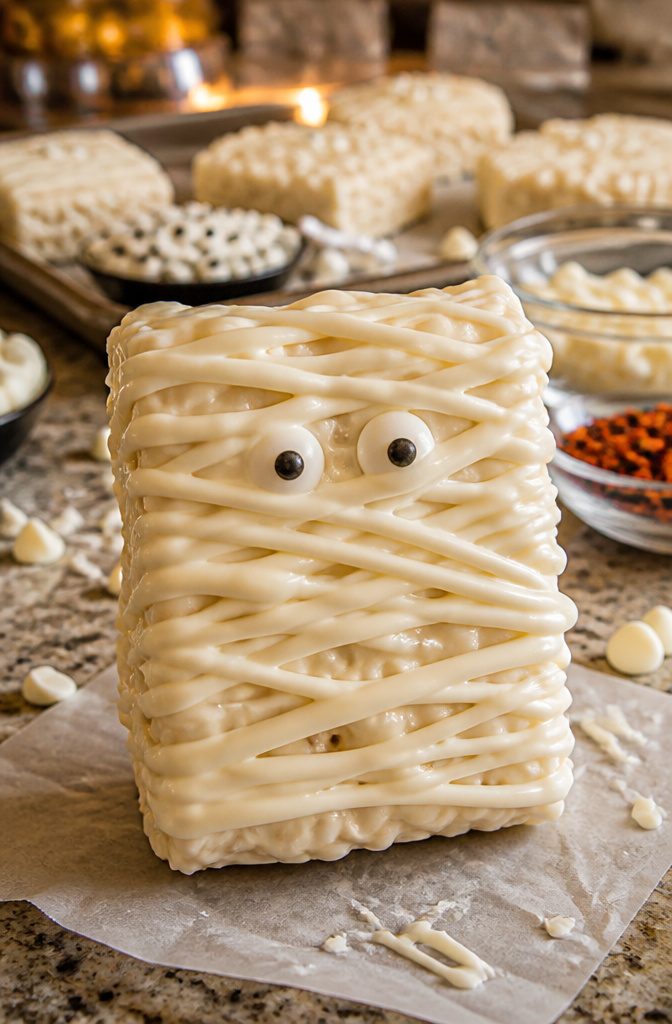
Coating a square in melted white chocolate gives you the blank canvas for a mummy. I use white chocolate chips with a half tablespoon of coconut oil melted together; the oil thins the chocolate so it coats smooth instead of clumping. Dip each treat, let the excess drip off, then set it on parchment to set.
The bandages are just more white chocolate piped in thin lines across the surface. A Wilton #104 petal tip makes clean, slightly ruffled strips that look like wrapped gauze, but a zip-top bag with the corner snipped works fine if you are not piping often enough to own the tip. Pipe at angles, crossing over each other, leaving gaps so the white base shows through.
Candy eyes go on first or last depending on your patience. Attach them with a dot of melted chocolate on the back, pressed onto the treat before the bandages go over. Two eyes peeking out from under the wrapping is the whole effect. Black sugar pearl sprinkles work too if that is what your store stocks.

Halloween Night Delights - Celebrate the spooky season with an assortment of yummy gummy candies in spine-chilling designs. Our gummies include vampire fangs, feet, candy skulls and eyeballs! - choose your favorite or simply purchase all 4 variety packs and enjoy them at the same time.

🎃 SPOOKY HALLOWEEN FUN - These creepy googly chocolate eyeballs bring the perfect spooky touch to Halloween parties, trick or treat bags, haunted houses, candy bowls, and festive seasonal celebrations.

FESTIVE 4-COLOR MIX FOR ULTIMATE CREATIVITY - Our candy eyes unique mix features candy eyeballs in classic black & white, spooky green, pumpkin orange, and mystic purple. Create a whole cast of colorful witches, aliens, and creepy creatures on your halloween desserts
8. Frankenstein Rice Krispie Treats
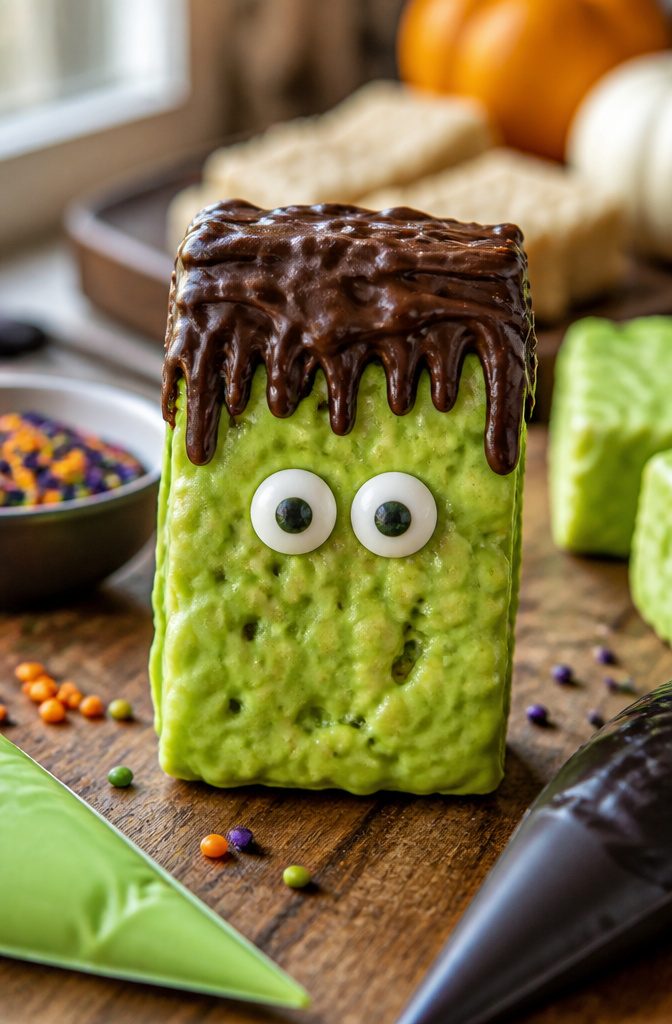
Green candy melts are your base here, and they behave better with a tablespoon of coconut oil or shortening stirred in once melted. Without it, the coating sets thick and gloppy; with it, you get a smooth dip that hardens clean.
Dip one broad face of each square and lay it on parchment. Press the candy eyes in right away while the surface is still tacky, or they will not stick. Let that set fully before you move on.
For the hair and the stitched scar across the forehead, pipe black buttercream through a small round tip. A Wilton #3 writing tip is the one sources name, though any narrow round tip does the same work. The contrast against the green is what sells the Frankenstein look, so do not skimp on the black. A half batch of frosting covers plenty of treats.

Rice Krispies Treats cereal bars are delicious snacks for everyday family moments; Perfectly sized, ready-to-enjoy treat

Contains 20 Chcoolatey Drizzle, 20 Sprinkles, and 20 Rainbow marshmallow squares

Stuffed with sweet marshmallowy flavor; Enjoy this delicious snack for everyday family moments
9. Ghost Rice Krispie Treats
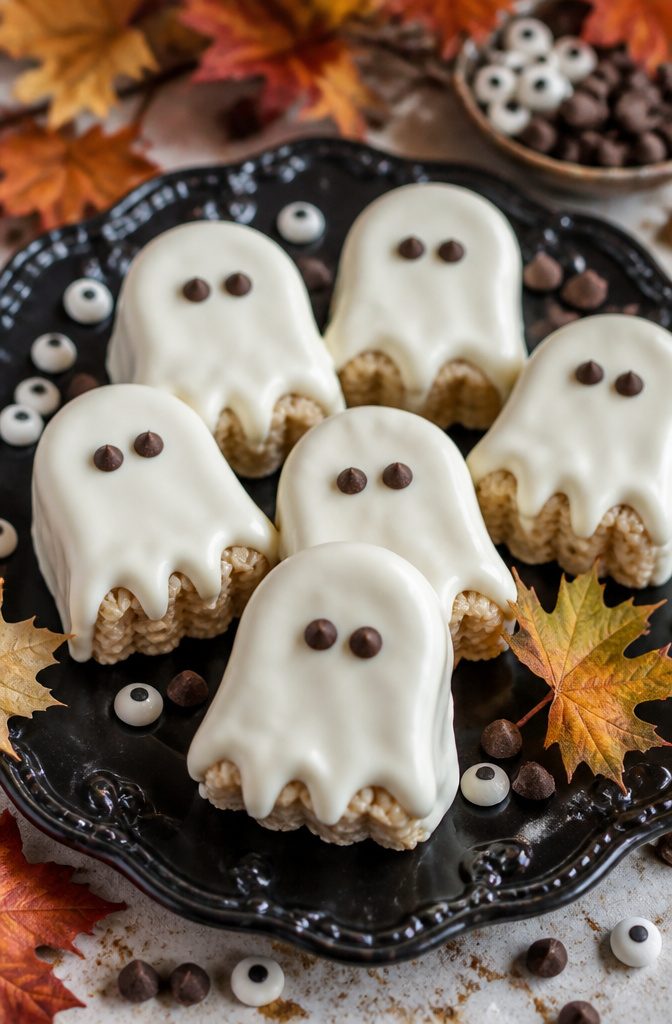
Ghost Rice Krispie Treats are the simplest of the bunch and the one most kids can finish without help. Melt 1 cup white chocolate chips with half a tablespoon of coconut oil until the mixture runs smooth and thin enough to coat. Dip or spread it over each cooled treat, working quickly since white chocolate sets fast and a second dip looks messy.
Two mini chocolate chips pressed in while the coating is still wet make the eyes. The sources stop there, but a third chip or a short line of melted dark chocolate turns the blank oval into a surprised mouth or a sad one, depending on the angle. Let the treats set on parchment, not a wire rack, or the coating hardens around the wires and cracks when you lift them off.
The coconut oil keeps the shell from turning brittle in the fridge, which matters if your kitchen runs warm and you need to store these overnight. Without it, the white chocolate can crack when you bite down, and the whole ghost effect collapses into shards.

NATURALLY EXTRACTED and NUTRIENT DENSE: Nutiva’s all-natural cold press extraction process yields a pure, light-tasting, nutrient-rich oil containing 63% medium chain triglycerides and 50% lauric acid without the use of dangerous and harmful chemicals, hexane, or heat.

Boost your energy: BetterBody Foods Refined Organic Coconut Oil contains roughly 60% energy-driving Medium Chain Triglycerides (MCTs). These MCTs help to boost your energy levels.

Organic refined coconut oil
10. Spider Rice Krispie Treats
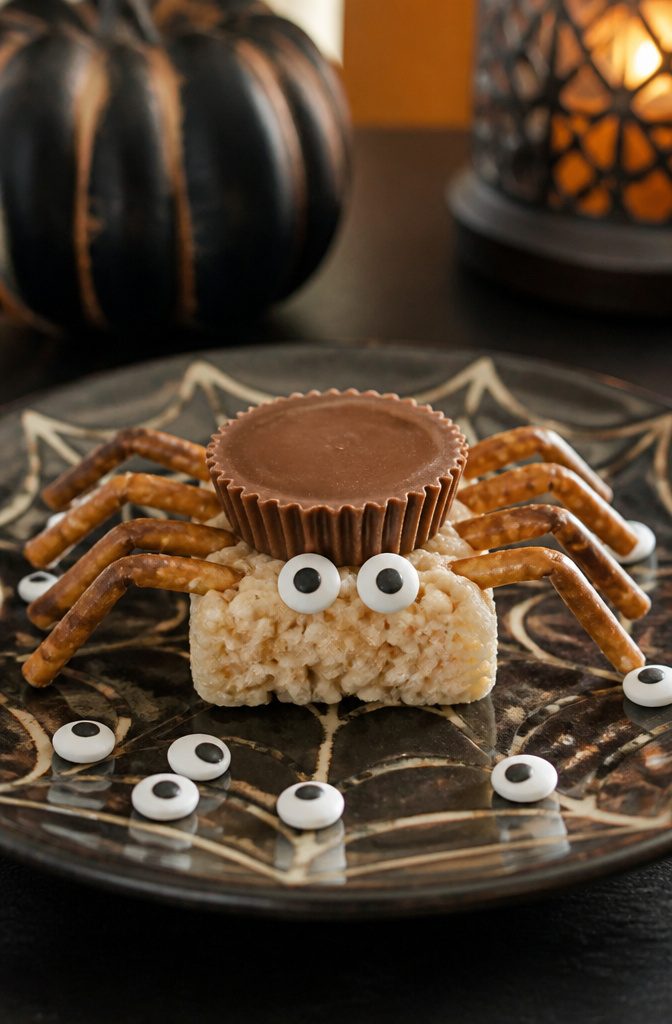
A single Reese’s Cup pressed onto a warm square makes the spider’s body, held in place with a dab of melted chocolate. Attach the candy eyes to the cup first, before the chocolate sets, so they have something to grip. For legs, melted chocolate piped in thin lines works, though pretzel sticks break less easily in a lunchbox and add a salty crunch that balances the sweetness. Eight legs, obviously, four to each side, angled slightly forward so the spider looks like it’s crawling rather than splayed. Let the chocolate harden at room temperature, which takes about twenty minutes, or speed it up in the refrigerator if the kitchen runs warm. The finished treats keep for two days layered between parchment in an airtight container, though the pretzel legs soften after the first.
11. Bat Rice Krispie Treats
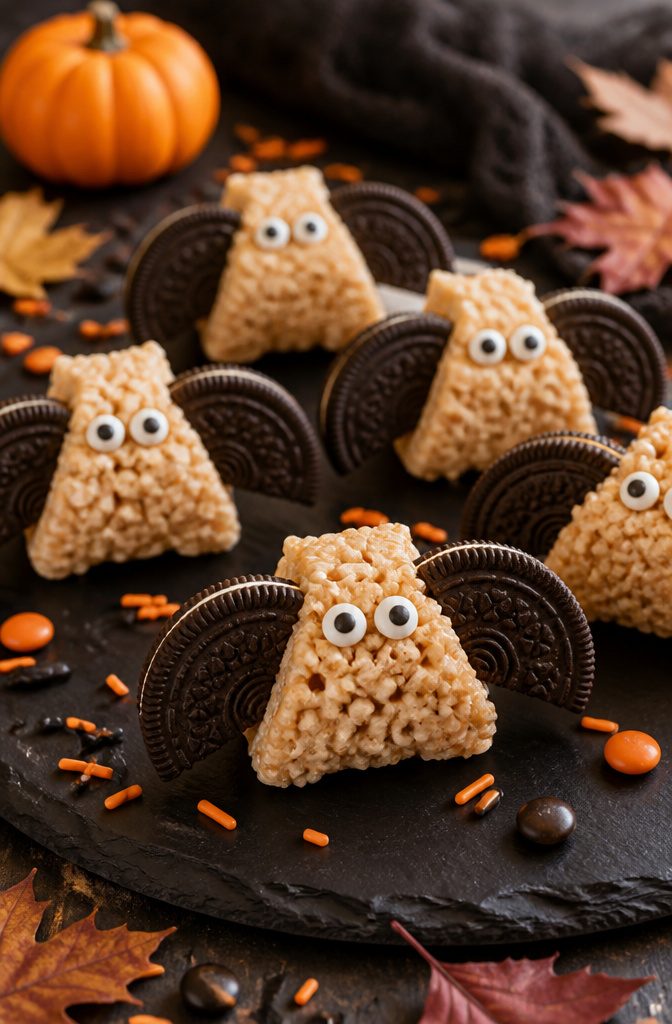
Oreo halves make the quickest bat wings I have found. Twist the cookies apart gently so the cream stays on one side, then scrape the filling off with the edge of a spoon. The plain cookie halves get pressed into the warm Rice Krispie base at a slight angle so they fan out like wings.
A little melted chocolate brushed on the back of each half works as glue if the treats have already cooled. For the face, candy eyes sit right on top of the treat with another dab of chocolate between them. Two eyes per bat is the standard look, though three reads more cartoonish if that is the mood you want. Let the chocolate set on parchment before moving them to a platter, or the eyes slide and the bat looks startled in the wrong direction.
12. Zombie Rice Krispie Treats
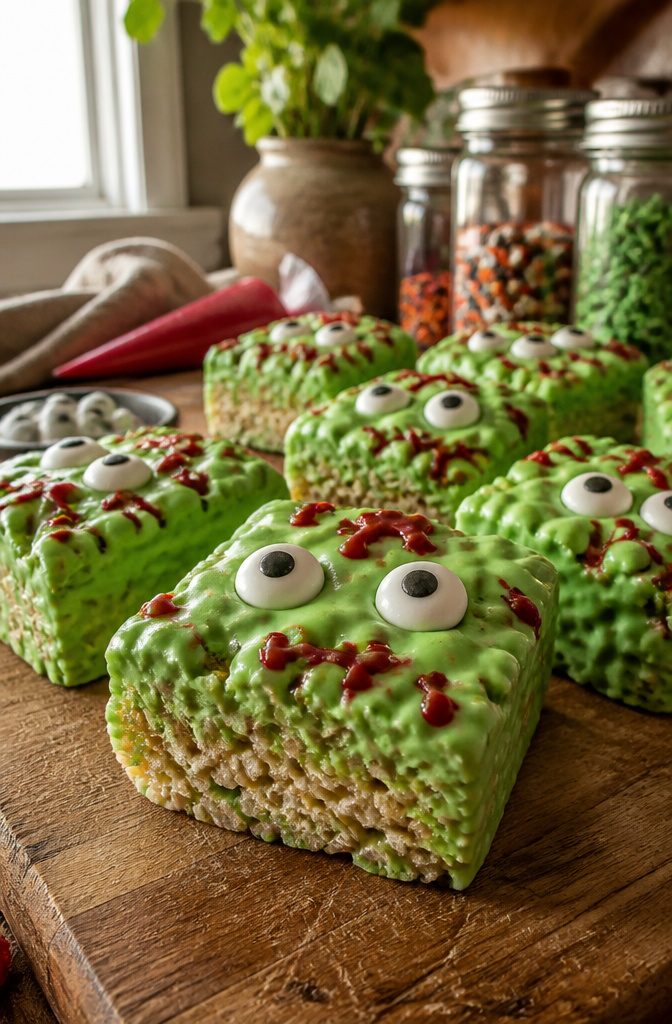
Green candy melts turn a plain Rice Krispie square into something that actually looks undead. I melt them at 50% power in 30-second bursts, stirring between each, because full power scorches the coating and leaves you with grainy clumps. The melted candy usually comes out thicker than I’d like, so I thin it with coconut oil or shortening, a tablespoon at first, then teaspoons until it drips off the spoon the way pancake batter does.
Dip one broad side of the treat into the green coating and set it on parchment to harden. The eyes go on immediately while the surface is still tacky; wait even a couple of minutes and they slide or refuse to stick. I press them in with my fingers, which works fine if I’m quick, though the candy holds heat longer than you’d expect.
The mouth detail comes after the green shell has set, 30 to 45 minutes depending on kitchen temperature. Red icing piped in a thin line, maybe a second line drawn jagged across it, gives the torn-skin look without requiring any special tip. The coating’s own texture, pressed in with the back of a spoon while it was still wet, adds enough irregularity that the finished treat looks rotted rather than merely decorated.
13. Black Cat Rice Krispie Treats
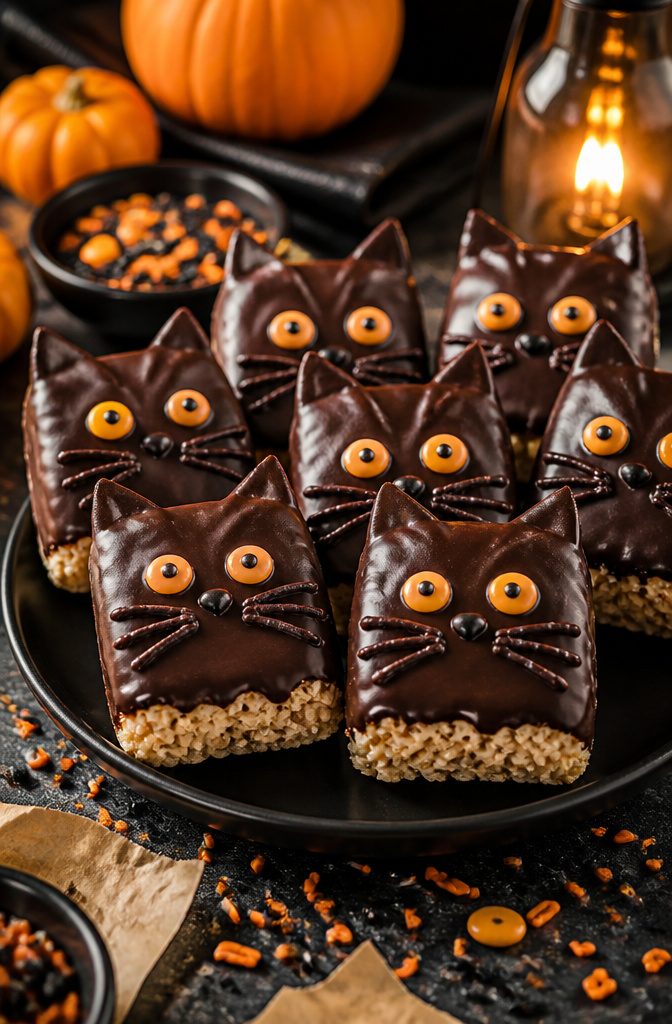
Black cats start with the same batch you already pressed and cooled. Cut each slab into rectangles first, then slice two small triangles off the top corners of every piece. Those triangles get flipped and pressed back into place with a little fresh marshmallow or melted chocolate as glue, which makes the ears sit upright instead of lying flat.
A full dip in dark chocolate covers the whole surface and gives you a clean backdrop for the face. Press the candy eyes in while the coating is still wet, before it skins over, or they slide. For whiskers, dip the end of a toothpick into the same chocolate and draw three thin lines on each cheek, then drop a line of black or orange sprinkles across them while the chocolate is tacky. The sprinkles stick where you put them, and the toothpick lines keep them from scattering into a blob.
The ears are the only part that takes extra knife work, but the shape reads instantly as cat even if the ears are slightly uneven. A white sprinkle or a tiny dot of white icing on the tip of each ear gives the silhouette a little more contrast against dark chocolate, though plain ears work fine too.
Ingredients and Substitutions
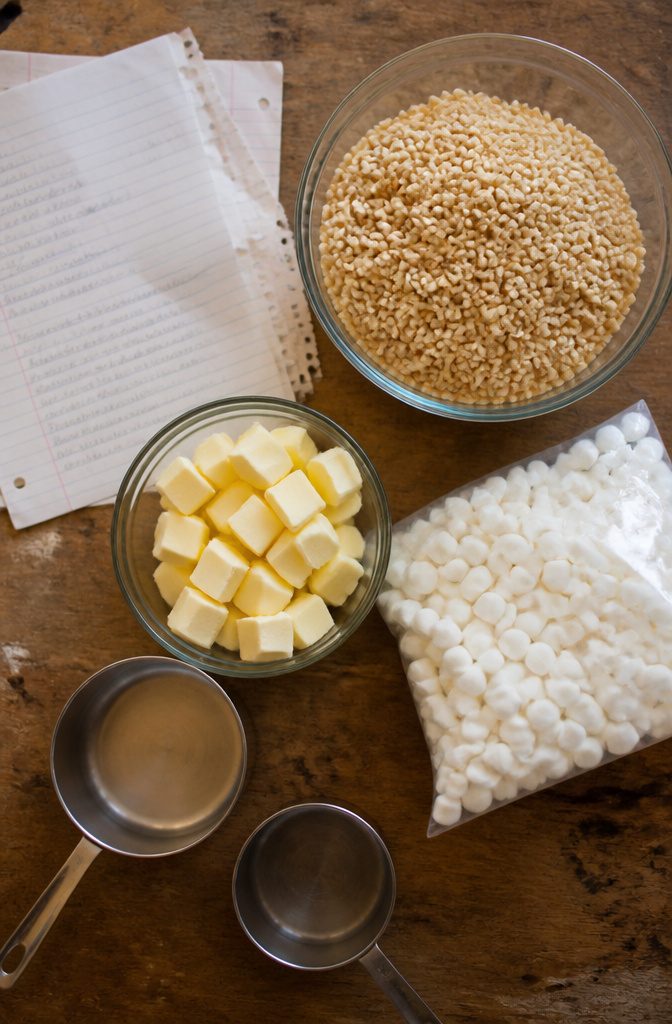
The standard batch needs three things: 6 tablespoons of butter, 10 ounces of mini marshmallows, and 6 cups of crispy rice cereal. Room-temperature butter cut into pieces melts evenly and keeps splatter down. Mini marshmallows melt faster and more uniformly than the large ones, and a fresh bag matters; stale marshmallows have dried out just enough to make the treats tough instead of chewy.
Some recipes swap the marshmallows entirely for peanut butter and maple syrup or honey. The ratio that works is ¾ cup peanut butter to ¾ cup sweetener. Creamy peanut butter binds better than crunchy, and real maple syrup runs thinner than pancake syrup, so it mixes through the cereal without clumping.
What you get is a noticeably different bar. The peanut butter version sets firmer and tastes denser, more like a no-bake cookie than the stretchy pull of a classic treat. It is a practical alternative if marshmallows are not in the pantry, but the texture change is significant enough that I would not plan to decorate those the same way. The stiffer base does not take to knife cuts as cleanly, and the surface stays slightly tacky.
- Butter: 6 tablespoons, room temperature and cubed
- Marshmallows: 10 ounces mini, fresh bag
- Cereal: 6 cups any crispy rice variety
- Peanut butter substitution: ¾ cup creamy, with ¾ cup maple syrup or honey
- Vanilla extract: 1 teaspoon, optional but adds depth
- Salt: small pinch, especially if using unsalted peanut butter
Storage and Make-Ahead Timing
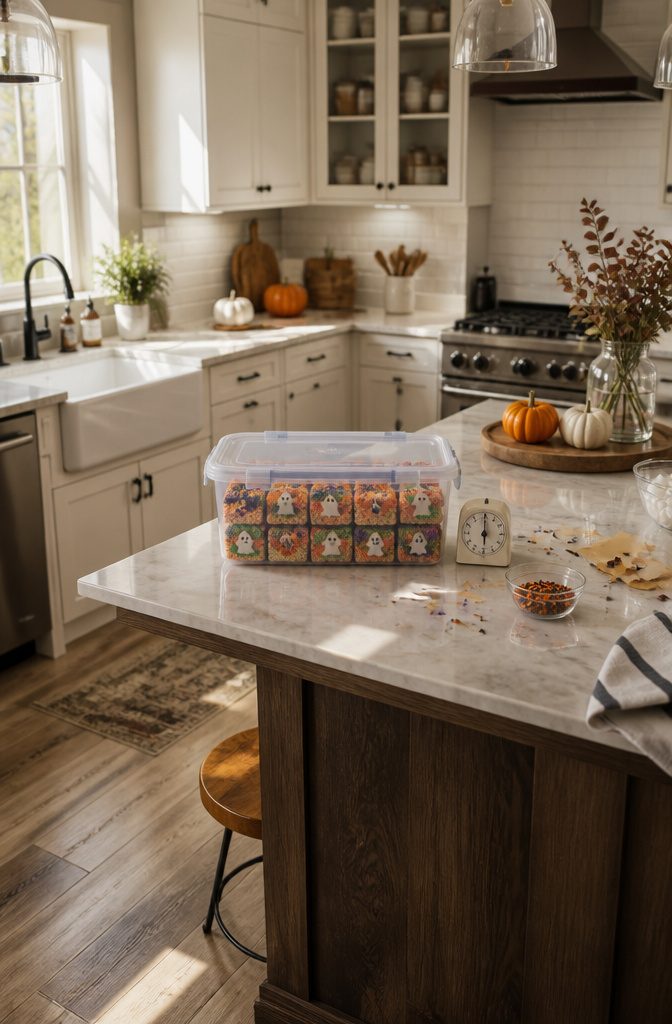
Airtight storage at room temperature keeps Halloween Rice Krispie treats at their best for up to 3 days, with the texture still yielding when you bite. After that point they start to harden, which matters more when you’ve got candy eyes and royal icing decorations that already set firm.
Some recipes suggest the refrigerator for longer keeping, and the treats will technically last a week there. The tradeoff is real though: cold hardens the marshmallow bond noticeably, so what comes back out tastes stiff rather than chewy. For decorated treats with candy melt faces or fragile spider legs, that brittleness risks cracking the design you spent the time on.
My read, after running this comparison, is that room temperature wins for anything you plan to serve. If you need true make-ahead timing, the better move is making the plain base a day ahead, storing it airtight, then decorating the morning of. Fresh marshmallows at the start help too; older ones set harder from the beginning and only get worse in storage.
What Makes Treats Hard and How to Avoid It
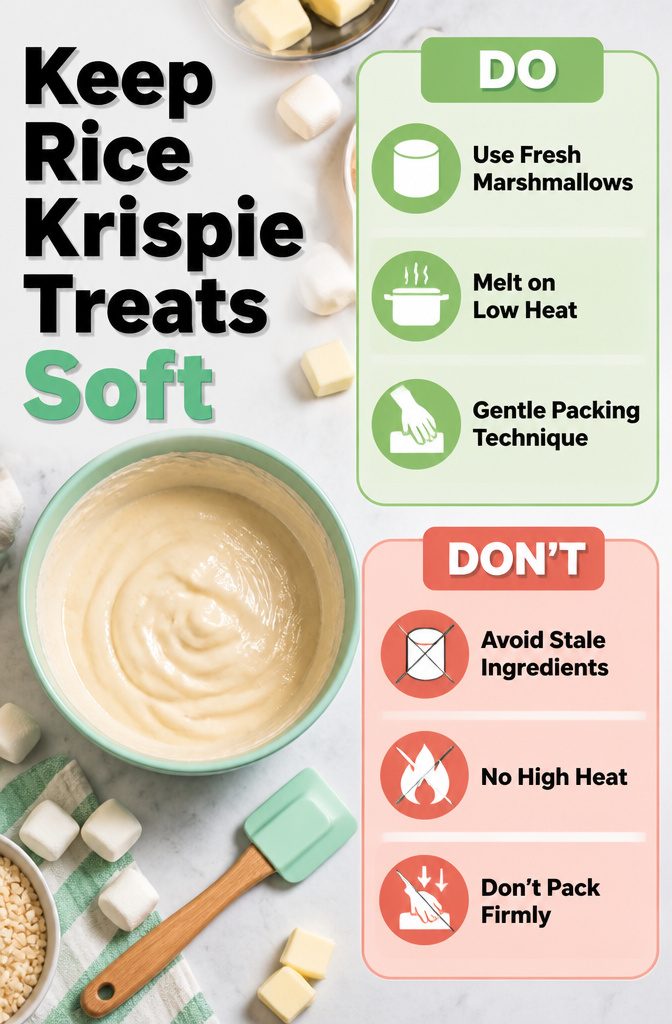
Hard Rice Krispie treats usually trace back to one of three mistakes, and the fix for each is simple once you know what went wrong.
Stale marshmallows are the first culprit. An open bag dries out fast, and dried marshmallows never melt back to the silky binder you need. If your marshmallows feel firm or the bag’s been open more than a couple weeks, buy fresh. The difference in how the mixture pulls together is immediate.
Overheating the melt does similar damage. High heat tightens the sugar proteins in marshmallows until they set like taffy instead of staying soft. Keep the burner low and pull the pot off the heat the moment the last lump disappears. The residual warmth finishes the job without pushing you into that stiff zone.
Packing the mixture too firmly into the pan squeezes out the air pockets that make treats light. Use your fingertips and a light touch, just enough to level the surface. Wet fingers or a quick spray of cooking oil keeps the marshmallow from gluing to your hands so you can stop pressing sooner. The bars hold together fine with less force than you’d think.
Frequently Asked Questions
How do you make Halloween Rice Krispie Treats?
Melt 8 tablespoons of butter with 15 ounces of mini marshmallows over medium-low heat, then stir in 6 cups of Rice Krispies cereal off the heat. Press the mixture gently into a parchment-lined 9×13 inch pan, cool for 30 minutes, then cut and decorate with melted candy, sprinkles, or icing.
What can you use instead of marshmallows?
Substitute ¾ cup creamy peanut butter and ¾ cup maple syrup or honey for the marshmallows. The bars will set firmer and taste denser, more like a no-bake cookie, so they do not decorate as cleanly as the classic version.
How do you store Rice Krispie Treats?
Keep them in an airtight container at room temperature for up to 3 days. Refrigeration extends life to a week but hardens the texture and risks cracking decorations; for make-ahead planning, prepare the plain base a day early and decorate the morning you serve them.