
A cast iron skillet chocolate chip cookie bakes in one thick round with crisp caramelized edges and a soft center, served warm in wedges straight from the pan. Total time runs 30 to 45 minutes from start to table.
The center stays underdone when you pull the skillet from the oven. The cookie keeps baking in the hot cast iron after you turn off the heat, so waiting until it looks fully set means you lose the gooey middle.
Ingredients
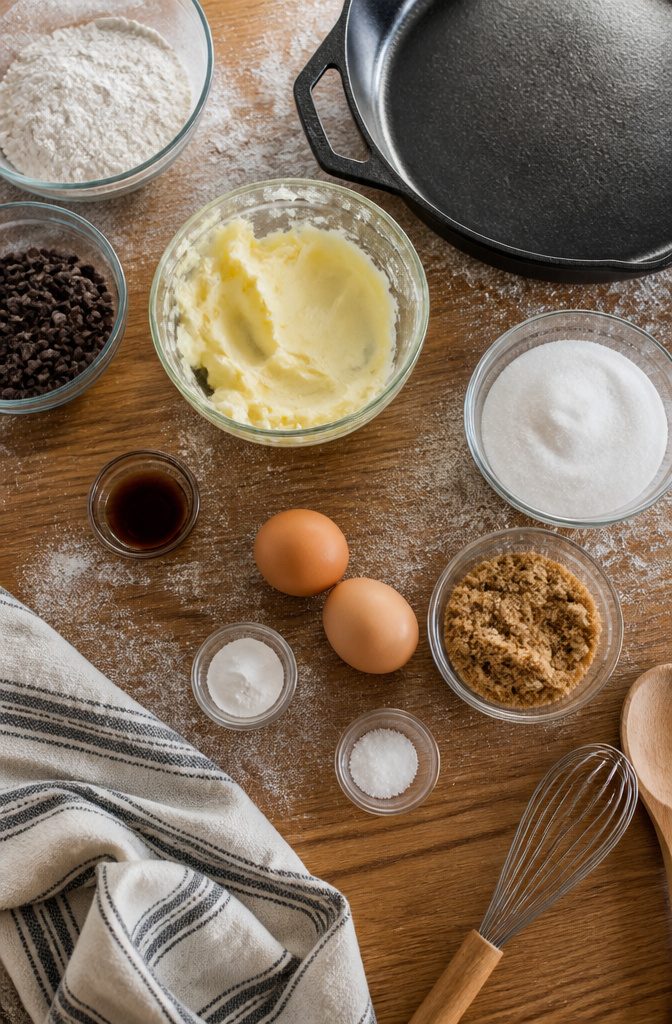
The recipe scales to the skillet you have, so measurements shift depending on pan size and how many servings you want.
For a 12-inch skillet (serves 10–12):
- 1 cup unsalted butter, softened
- ½ cup granulated sugar
- 1 cup packed brown sugar
- 2 large eggs
- 2 teaspoons vanilla extract
- 2½ cups all-purpose flour
- 1 teaspoon baking soda
- ½ teaspoon salt
- 2 cups semisweet chocolate chips
For a 10-inch skillet (serves 8–10):
- 10 tablespoons unsalted butter
- ½ cup granulated sugar
- ¾ cup packed dark brown sugar
- 1 large egg plus 1 egg yolk
- 2 teaspoons vanilla extract
- 1¾ cups all-purpose flour
- ½ teaspoon baking soda
- 1 teaspoon salt
- 1 cup semisweet chocolate chips
Some recipes dissolve the baking soda in 2 teaspoons hot water before adding it to the batter.
Others brown the butter first for deeper flavor. Add nuts, coconut, or chopped milk chocolate if you want more texture.

Durable Cast Iron Construction: Made from cast iron for long-lasting use and even heat distribution.

How to Make a Cast Iron Skillet Cookie
- Preheat the oven to 350–375°F and position the rack in the upper-middle or lowest position. Some recipes heat the skillet in the oven while mixing; others brown butter directly in the skillet on the stovetop first.
- Mix the dry ingredients in a separate bowl: flour, baking soda, and salt. A few recipes dissolve the baking soda in hot water before adding it to the wet mixture.
- Cream the butter and sugars together until smooth and no large lumps remain, about one minute. Softened butter works, or you can melt it (and brown it, if the recipe calls for that extra nutty depth).
- Add the eggs and vanilla, stirring until the mixture is smooth and resembles cake batter. One method calls for whisking, then letting the mixture rest for three minutes and repeating the process twice more until thick and shiny.
- Stir the dry ingredients into the wet mixture until just combined and no flour streaks remain. Fold in the chocolate chips, making sure no flour pockets hide in the dough.
- Press the dough into the skillet in an even layer, extending it to the sides. Add extra chocolate chips or sea salt on top if you like.
- Bake for 15–25 minutes, until the edges are set and golden brown. Rotate the skillet halfway through. Bake time depends on skillet size and oven temperature.


ENHANCED HONEYCOMB TEXTURE: Our baking cookie sheets boast a specialized honeycomb pattern across the surface, which amplifies non-stick performance and enables rapid, consistent heat dispersion throughout each cookie. This innovative design guarantees even baking results, effectively preventing overcooking or undercooking for perfectly golden treats every time.
When the Cookie Is Done
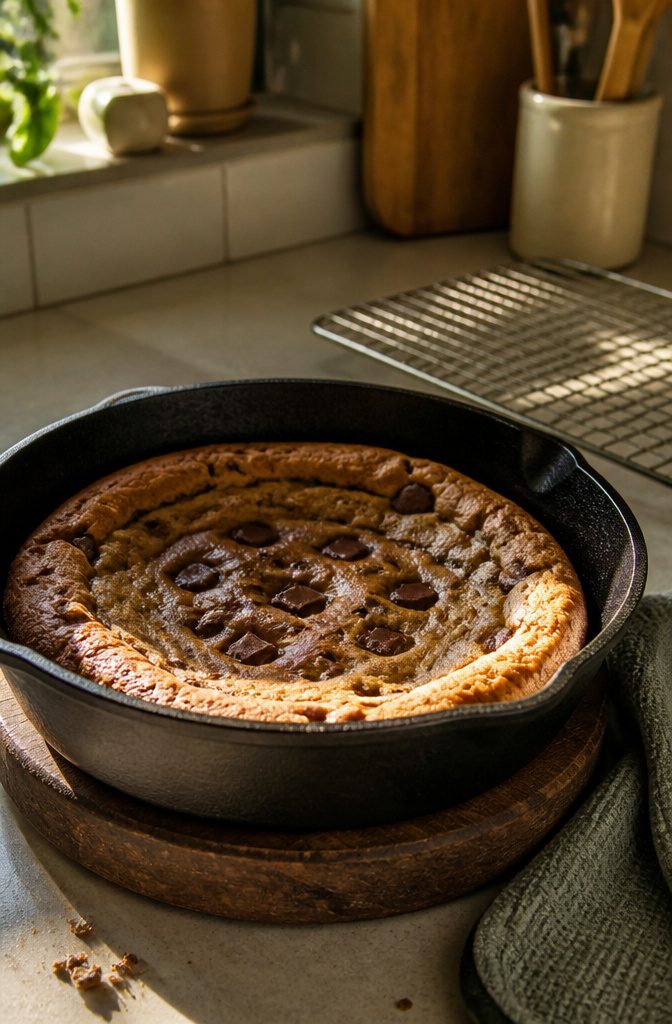
The edges will turn golden or lightly browned and the outer ring of the cookie will look set or slightly puffed, while the center stays soft.
Bake times run anywhere from 15 to 25 minutes depending on your oven temperature and the size of your skillet. The center may still look a little underdone when you pull the pan out, and that’s exactly what you want.
The cookie keeps baking in the hot cast iron even after you turn off the oven, so it will firm up as it cools.
If you wait until the middle looks fully set in the oven, you’ll end up with a dry cookie instead of the soft, gooey center you’re after.

aroma in every bite, perfect for autumn and holiday seasons.

Two pumpkin spice cookies with cheesecake frosting

Package Contents: ONE 15.25oz box of pumpkin spice cookie mix for baking delicious homemade cookies
Why the Skillet Works
The skillet shape really matters here. The heavy cast iron bottom gets hot and stays hot, giving you the crisp, caramelized crust that makes this work as a dessert rather than just thick dough.
The tall sides hold the batter in one thick round instead of spreading it across multiple sheets, so you press the dough in and bake once.
You can melt the butter directly in the skillet before mixing the dough, which saves a dish and means the pan is already greased.
If you want the deeper flavor of browned butter, you do that step in the skillet too.
No scooping, no shaping individual cookies, no waiting for sheet after sheet to finish. The whole thing bakes at once and goes straight from the oven to the table.

BISCOTTEA uses all natural, clean and healthier-for-you ingredients infusing real tea, and real coffee into our products for great pairing with your favorite warm beverage

Each share size bag contains at least 55 of our delicious bite size Loacker Quadratini Matcha wafer cookies, making this classic flagship European dessert perfect the perfect snack for your work or study break, game or movie night with friends and loved ones, and the ideal dessert to share at a picnic or barbecue. Our resealable cookie pouch helps you to keep the wafers fresh and crispy.

Jeju Matcha - Crafted with green tea leaves harvested from the volcanic soil of Jeju Island for an authentic aroma.
Serving the Cookie Warm
The cookie can be served straight from the skillet, sliced into wedges like a pizza. Let it cool for anywhere from 10 minutes to an hour before cutting, depending on how warm you want it.
Some people stop at 5 minutes, others wait a full 30. The cookie holds together better after a longer rest, but serving it warm means the chocolate is still soft and the edges have that just-baked give.
Vanilla ice cream is the natural pairing here. I’d set the pint on the table and let people add their own scoop over each wedge.
The cold-hot contrast is part of the appeal. If you prefer to serve the cookie at room temperature, it still works, just with a firmer texture and less drama when the ice cream hits it.

Precise heat distribution: the cast iron pan has better retention and distribution of heat. Even heat distribution for improved cooking and frying even on grills, stoves or induction hobs.
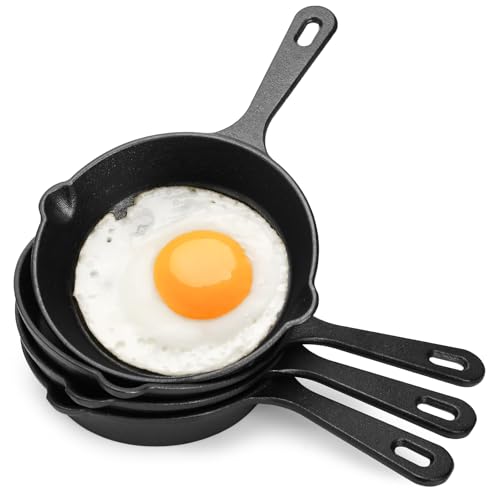
【Space-Saving Design & Universal Cooktop Compatibility】Each 5.5-inch cast iron pan for eggs features a hanging hole for easy storage. Compact yet durable, they’re ideal for small kitchens or RVs. Use these small cast iron skillets on all heat sources: induction, electric, gas, halogen, and even ovens. No compatibility worries—just versatile performance for any kitchen setup.

6 INCH CAST IRON SKILLET SET - 4-Piece set includes 4 cast iron 6 inch skillet and 4 wood trivets. This individual casserole dish set is oven safe. Trivets should not be used in the oven or placed on a hot stove. Mini cast iron dishes hold 12 ounces.
Should You Chill the Dough
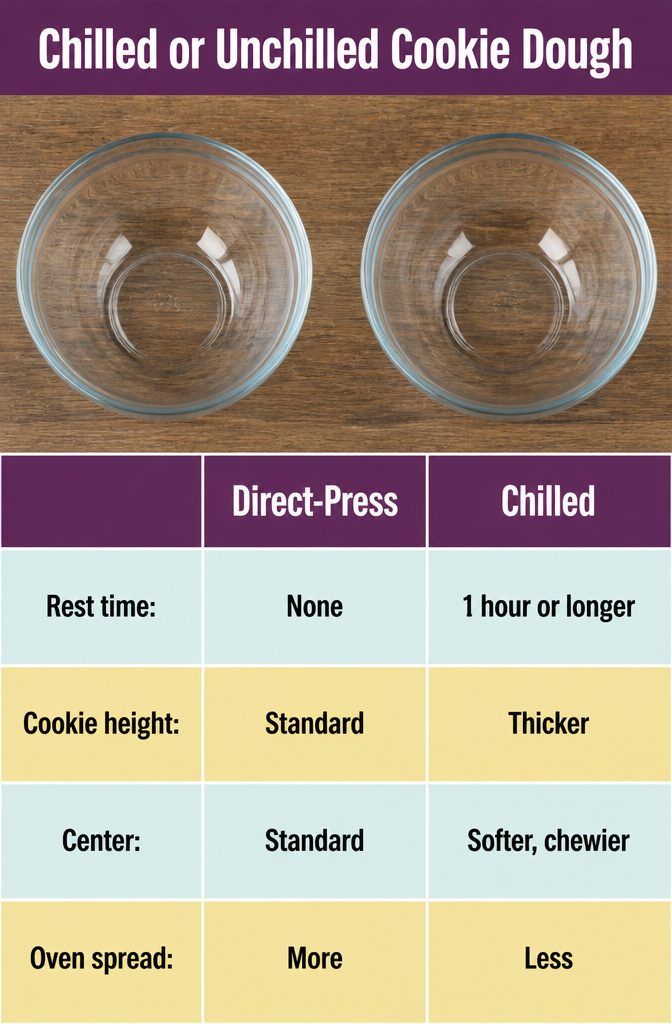
Most recipes press the dough directly into the skillet after mixing, keeping the whole process quick and minimal. The dough firms up enough in the pan to hold its shape, and the edges set before the center spreads too much.
Chilling the dough for an hour or longer does help the cookie bake thicker and softer, with a chewier center.
Cold dough spreads less in the oven, so the finished cookie keeps more height. If you have the time and want that result, refrigerate the bowl after mixing and let the dough sit covered until it firms up.
The skillet method works either way, and the difference is subtle enough that skipping the chill still gives you a very good cookie.

CHOCOLATE CHIP COOKIE SKILLET KIT – Bake a warm, gooey chocolate chip cookie in a reusable cast iron skillet and top it with colorful Milk Chocolate Candies for a fun homemade dessert.

Large Cast Iron Baking Pan: The Lodge Seasoned Cast Iron Baking Pan delivers consistent heat retention and distribution for even edge-to-edge heating

Chocolate and Mix-In Options
The chocolate itself splits between semisweet and bittersweet chips, with semisweet appearing most often. Some recipes mix in chopped milk chocolate bar alongside the chips for a sweeter contrast.
One recipe reserves half the chocolate to press into the top of the dough right before baking, which leaves visible chips on the surface and keeps them from sinking during the rise.
Mix-ins lean toward pecans and walnuts, usually chopped coarse.
Coconut flakes show up in one version, paired with pecans for texture. Flaky sea salt goes on top after baking, not stirred in.
It catches on the warm surface and gives a clean salt hit without dissolving into the dough. Optional in most recipes, but the salt makes the chocolate read sharper.

Healthy & Delicious: Our meringue cookies are gluten-free, fat-free, dairy-free, and kosher, making them an everyday, guilt-free treat with only 80 calories per serving.

Pepperidge Farm, Milano Cookies, Limited Edition, Pumpkin Spice, 7oz Bag (Pack of 4)

Healthy Snack with Only 1g of Sugar: Contains 1g of Sugar, 4g of net carbs, 0g Trans Fat, 130 calories, and 6g of Fiber in each 22g wafer
Storage and Reheating
The cookie keeps well at room temperature for up to three days if you cover the skillet tightly or transfer slices to an airtight container.
For longer storage, wrap individual slices in plastic wrap, then foil, and freeze for up to three months. Thaw frozen slices at room temperature before serving.
Reheating brings back that just-baked warmth. For a single slice, microwave for 10 to 15 seconds.
If you want to reheat the whole skillet, slide it into a 300°F oven for 5 to 7 minutes. The chocolate chips soften again and the edges crisp up, so it tastes fresh even a day or two later.

ORGANIC MATCHA TEA - The tea is filled into tea bags and packed into foil-lined kraft bags in the United States

The information below is per-pack only

JAPANESE MATCHA TEA BAGS: Our exclusive blend of organic matcha, Japan’s celebrated green tea powder and sencha green tea leaves, these tea bags offer a rich aroma and vibrant taste of Japan’s finest green tea.
Other Pans You Can Use
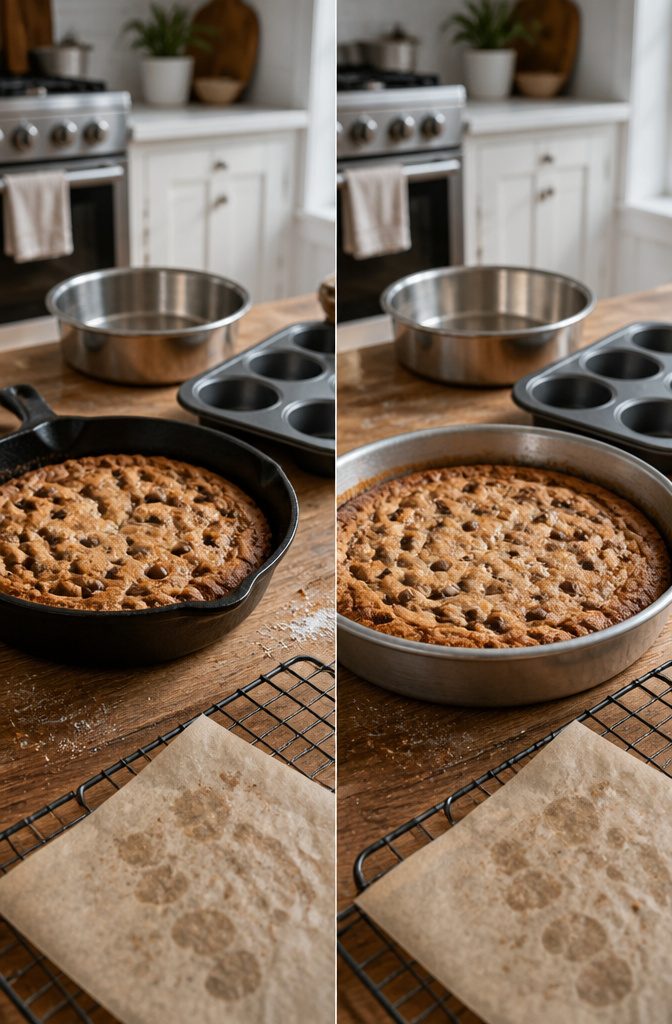
You can bake this dough in a round cake pan, a loaf pan, or even in a muffin tin for individual cookies.
The batter spreads the same way and the flavor stays put, so the swap is really about portion size and bake time.
Pan size changes both texture and timing.
A wider, shallower pan gives you more crisp edge and less gooey center, and the cookie finishes faster. A deeper pan keeps the center soft longer but needs extra minutes to set.
If you are working with stainless steel instead of cast iron, coat the surface with nonstick spray and drop the bake time to 15–18 minutes rather than the full 20–25.
Stainless conducts heat differently and the spray keeps the bottom from sticking when the sugar caramelizes.

LODGE WILDLIFE SERIES: Each unique piece in our seasoned cast iron Wildlife Series features one of America's most distinctive animals. SEASONED COOKWARE. A good seasoning...
Frequently Asked Questions
How long do you bake a cast iron cookie?
Bake for 15 to 25 minutes at 350–375°F, until the edges turn golden and set while the center stays soft.
The exact time depends on your skillet size and oven temperature. The cookie continues baking in the hot cast iron after you pull it out, so the center will firm up as it cools.
Can you chill the dough before baking a cast iron cookie?
You can press the dough directly into the skillet after mixing, or chill it for an hour or longer if you want a thicker, chewier center.
Cold dough spreads less in the oven and keeps more height. Both methods work, and the difference is subtle enough that skipping the chill still gives you a very good cookie.
How do you know when a cast iron cookie is done?
The edges will turn golden or lightly browned and the outer ring will look set, while the center stays soft and may look a little underdone.
Pull the pan out when you see that contrast. The cookie keeps baking in the hot skillet after you remove it, so waiting until the middle looks fully set will give you a dry cookie instead of a gooey center.
Can you use a different pan instead of cast iron for a skillet cookie?
You can bake the dough in a round cake pan, loaf pan, or muffin tin for individual cookies.
If you use stainless steel instead of cast iron, coat the surface with nonstick spray and drop the bake time to 15–18 minutes. Stainless conducts heat differently and the spray keeps the bottom from sticking when the sugar caramelizes.