
These peanut butter cookies bake soft and chewy, then take a warm mini Reese’s cup pressed into the center so the chocolate barely melts and locks on. Total time runs about 45 minutes plus optional chilling.
The catch is timing: wait even three minutes after pulling the tray and the cup won’t adhere, which is the most common failure in the recipe.
You need 48 candy eyeballs and a quarter cup of melted semi-sweet chocolate to finish the legs, and the dough demands a full two minutes of creaming or it bakes dense.
What Reese’s Spider Cookies Are
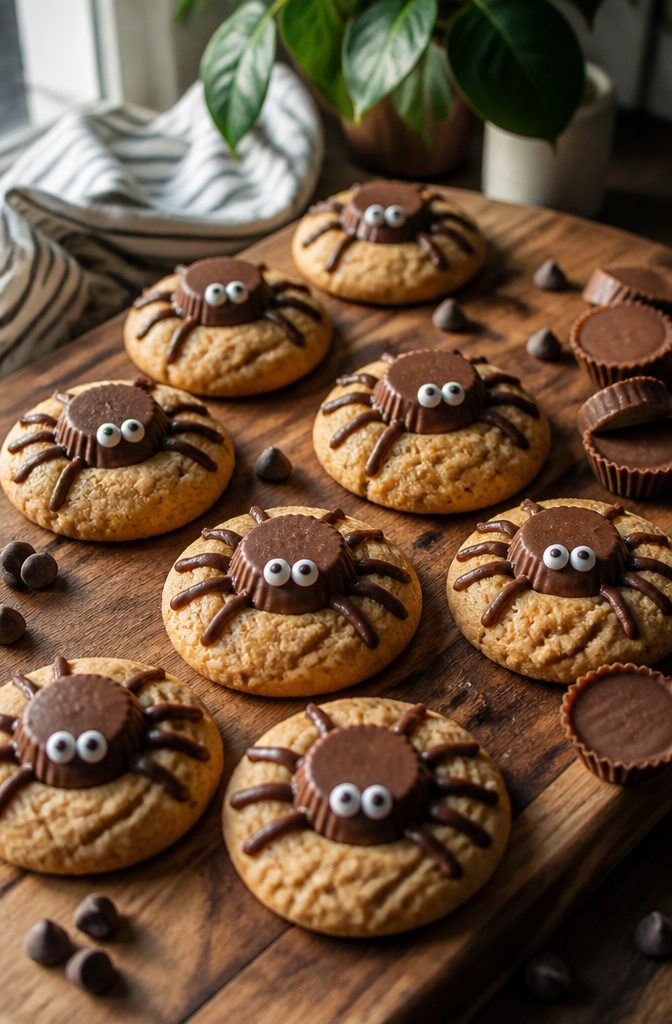
A warm peanut butter cookie comes out of the oven, and while it is still soft you press a mini Reese’s cup into the center.
The chocolate melts just enough to glue itself to the cookie underneath, so when it cools you get this soft chew against the snap of chocolate that makes the whole thing work.
Eight legs of melted semi-sweet chocolate get piped around the cup, two candy eyes stuck on with more chocolate, and suddenly you have a spider staring back at you.
The batch yields 24 cookies, which means 24 mini Reese’s cups and 48 candy eyeballs, plus 1/4 cup of semi-sweet chocolate chips melted down for the legs.
Some versions call for a Milk Dud body instead, or swap in dairy-free peanut butter cups, though the classic Reese’s version is what most people picture when they think of these.
It is the kind of project that fits an October afternoon.
Kids back from school, dough chilling in the fridge while you dig out the piping bag and wonder if the corner store still carries candy eyeballs this late in the season.

Contains one (1) 30-ounce party pack of REESE'S Miniatures Milk Chocolate Peanut Butter Cups Candy

Contains one (1) 7.6-ounce resealable bag of REESE'S Minis Milk Chocolate Unwrapped Peanut Butter Cups Candy

Mini peanut butter cups in premium milk chocolate
Ingredients
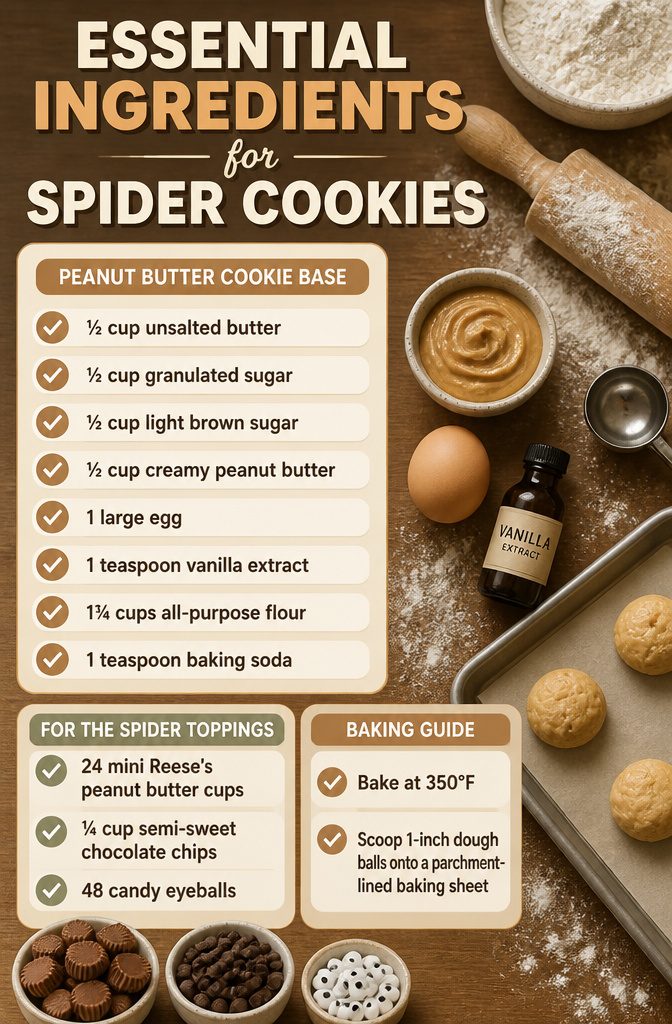
Here is what you need for the peanut butter cookie base and the three decoration methods.
- ½ cup (1 stick) unsalted butter, room temperature
- ½ cup granulated sugar, plus extra for rolling
- ½ cup light brown sugar
- ½ cup creamy no-stir peanut butter — natural peanut butter with separated oils will make the cookies spread wrong and turn out crumbly
- 1 large egg, room temperature
- 1 teaspoon pure vanilla extract
- 1¾ cups all-purpose flour
- 1 teaspoon baking soda
- ¼ teaspoon salt
For decorating:
- 24 mini Reese’s peanut butter cups, unwrapped
- ¼ cup semi-sweet chocolate chips (melted for the legs)
- 48 candy eyeballs
Bake at 350°F. Scoop 1-inch dough balls onto a parchment-lined baking sheet.
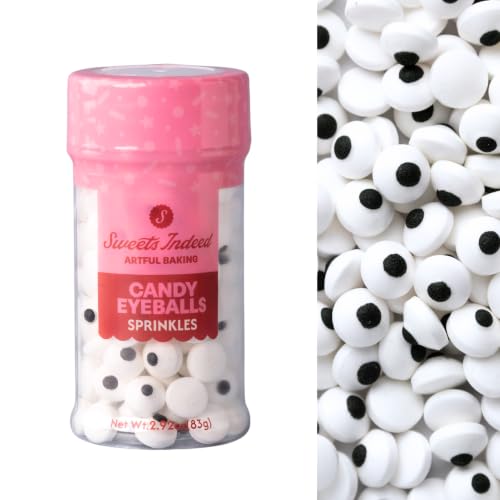
Halloween Candy Eyeballs: Edible eye sprinkles instantly add a spooky finishing touch to Halloween cookies, cupcakes, cakes, brownies, cake pops, and party desserts.

Use Date: You can see Production Date and Expiration date at the bottom of the bottle/ After open the seal of the bottle, its better to use them in 1 month/ Store in cool dry place

The candy eyes are medium-sized, approximately 0.4 inches in diameter, making them suitable for a wide range of dessert types.
Mix the Dough
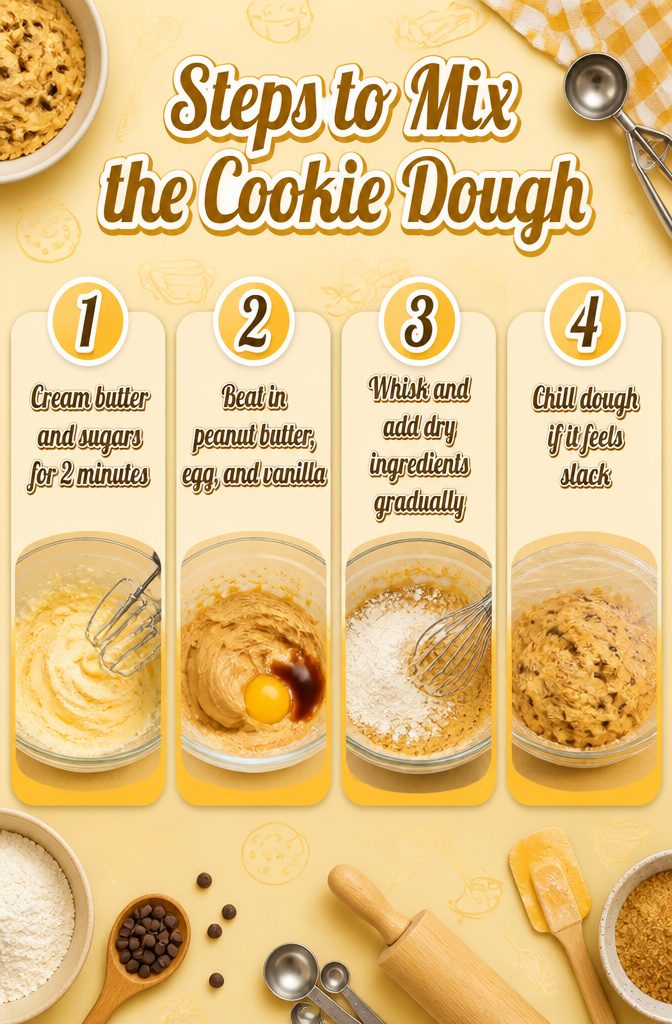
- Cream the butter with both sugars for a full 2 minutes, not 30 seconds. The mixture should turn noticeably lighter, almost pale, and look fluffy rather than just combined. That aeration is what keeps these from baking into dense disks.
- Beat in the creamy peanut butter, then the egg and vanilla. Scrape the bowl once before the dry ingredients go in and once after; unmixed streaks of peanut butter love to hide at the bottom.
- Whisk the flour, baking soda, and salt separately, then add gradually on low speed. The moment the last streak of flour disappears, stop. Overmixing here develops gluten and gives you tough, bread-like cookies instead of soft ones.
- If the dough feels slack or your kitchen runs warm, chill it 30 minutes to 1 hour. Last year my first batch spread to pancakes because I skipped this; now I chill when the dough clings to my fingers instead of holding a shape. Some bakers skip chilling entirely and still get puffy cookies, so this is your call based on how the dough feels and whether you’ve fought spread before.
Thick Pastry Bags: Did your previous bags leaked? Are you afraid to squeeze them? Not now! Made of durable, anti-burst, non-slip and food grade plastic that is flexible, strong, reliable and thick enough to bear pressure of squeezing and frosting without any burst or leakage

Affordable Piping Bags Combo: Package include 100 x disposable pastry bags, 1 x silicone pastry bags, 12 x stainless steel decorating tips, 3 x plastic scrapers, 1 x frosting couplers, 2 x piping bag ties. No matter your pro or novice, this affordable pack could meet your need.

Strong Grip: 8 inch disposable small pastry bag for household use, In addition, the particle surface of the pipe bag is easy to handle, It prevents skidding or popping and is easy to grip, The perfect cake decorating supplies for beginners, bakers or cake decorating enthusiasts
Bake the Base
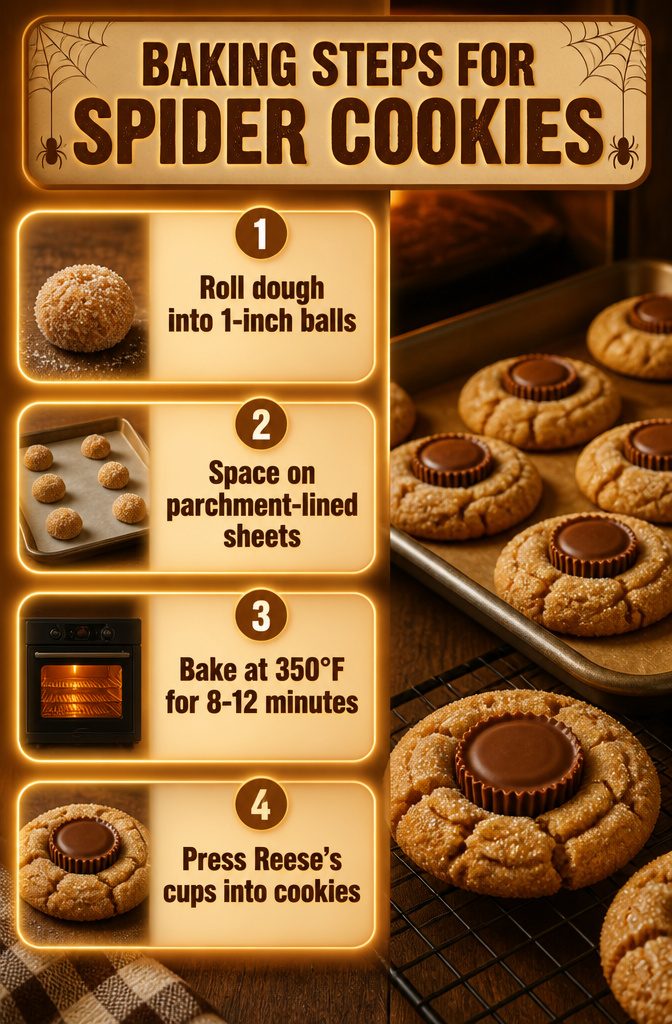
- Scoop a full tablespoon of dough and roll it into a 1-inch ball. Roll each ball in granulated sugar; that coating is what gives the baked cookie its crackled surface.
- Space the sugared balls on parchment-lined sheets. Bake at 350°F for 8–12 minutes. The edges should turn lightly brown while the centers still look underdone; they finish setting on the hot pan.
- Press an unwrapped mini Reese’s cup into each cookie the moment the tray comes out of the oven. Wait even three minutes and the surface sets, the chocolate won’t adhere, and you’ll get the most asked question in my inbox: why did the cup fall off? The residual heat softens the Reese’s just enough to bond without melting it to a puddle.
- Let the cookies cool on the pan briefly, then transfer to a wire rack. The cups need that cooling time to firm back up and lock onto the cookie base.

One 12 ounce bag of Semi-Sweet Chocolate Chips

One 24 ounce bag of Semi-Sweet Chocolate Chips

Organic semi-sweet chocolate chips
Draw the Legs and Eyes
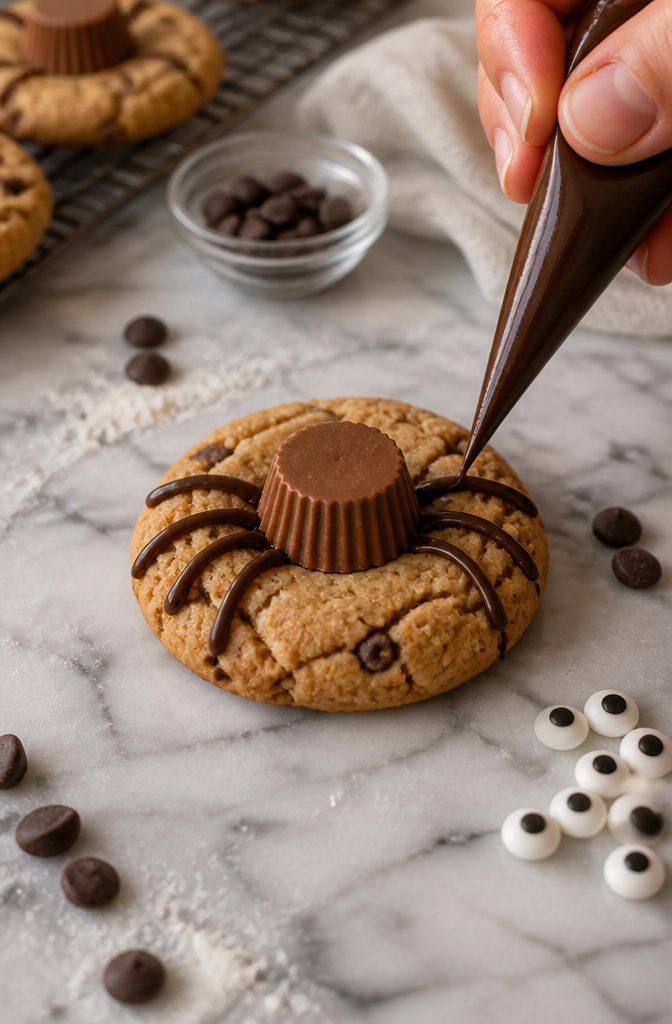
- Melt 1/4 cup semi-sweet chocolate chips until smooth, then load the chocolate into a piping bag or a zip-top bag with a tiny corner snipped off.
- Pipe eight legs radiating from each Reese’s cup, four per side, with a slight curve that gives the spider its scuttle. A small zip-top bag with a tiny snip works fine for neat lines; let the chocolate cool just slightly after melting so it holds its shape instead of spreading.
- Attach two candy eyeballs close together on the edge of the Reese’s cup using dots of melted chocolate. The googly look, placed near each other, is what makes kids laugh.
- Work while the cookies are still warm enough that the legs set onto the surface, but cool enough that the chocolate doesn’t run. If the Reese’s starts melting into the cookie, a few minutes in the freezer will firm it back up.
- Let the chocolate harden completely before stacking, about 30 minutes at room temperature.

40 ounce jar of creamy no-stir peanut butter

16 ounce jar of creamy no-stir peanut butter

Yield and Storage
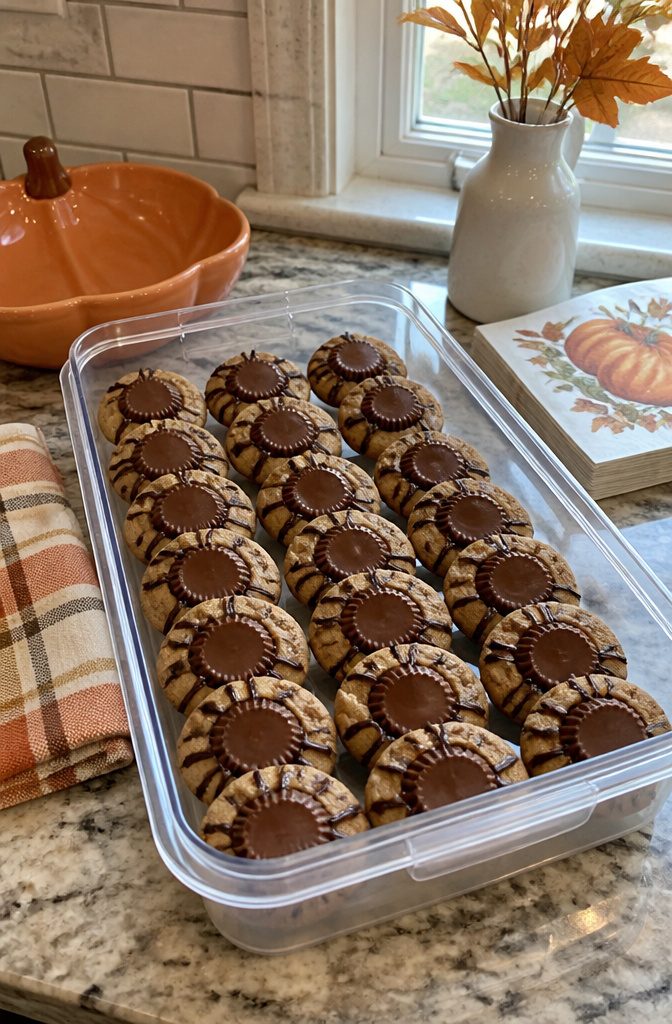
A single batch makes about 24 spider cookies, though that number shifts depending on how generous you are with the 1-inch dough balls.
Store them in an airtight container at room temperature and they hold well for 3 to 5 days. The Reese’s cup stays soft, the cookie stays chewy.
For longer storage, freeze the baked cookies for up to 3 months. Lay them in a single layer first, then stack once they’re solid.
Thaw overnight on the counter. One thing to watch: the candy eyeballs can bloom or soften in freezing humidity, so if you’re planning ahead, add those after thawing instead.

IRRESISTIBLE CHOCOLATE & PEANUT BUTTER: Experience the timeless, mouthwatering combination of smooth, rich milk chocolate and a creamy peanut butter center. Every single mini peanut butter cup is perfectly bite-sized, unwrapped, and crafted to deliver the ultimate sweet flavor profile that kids and adults love.

Contains one (1) 15.8-ounce family pack of REESE'S Miniatures Milk Chocolate Peanut Butter Cups Candy

MINI DARK CHOCOLATE PEANUT BUTTER CUPS: Our mini dark chocolate peanut butter cups are a delightful fusion of rich, smooth dark chocolate and creamy peanut butter, offering a perfect bite-sized indulgence. Each cup features a crisp dark chocolate shell that encases a luscious, melt-in-your-mouth peanut butter center, balancing sweetness with the smooth dark chocolate.
Ingredient Swaps
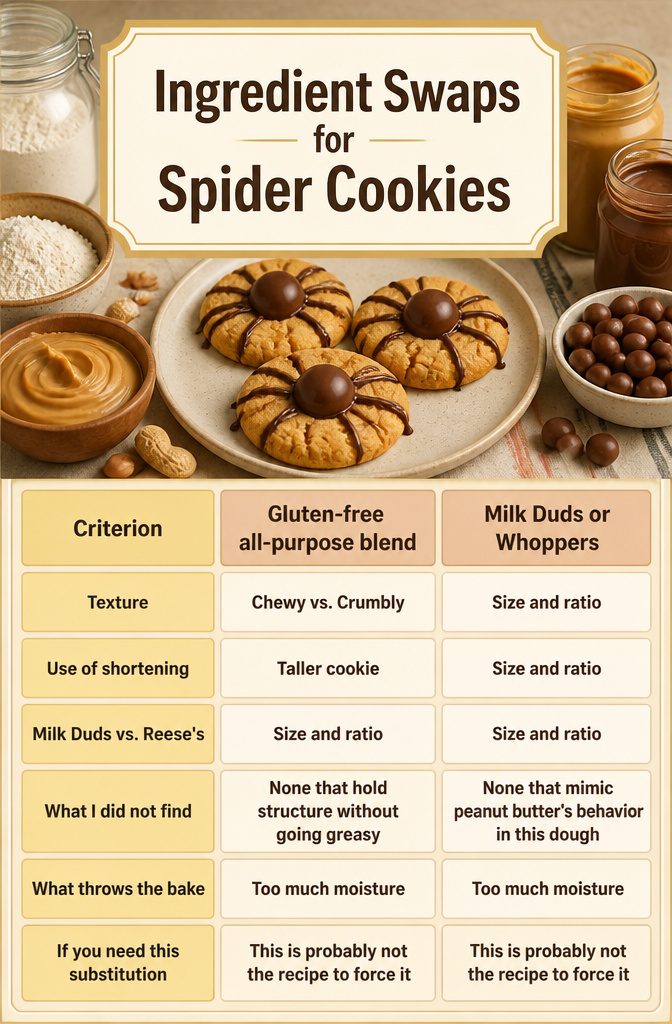
Crunchy peanut butter works in this dough, though the texture shifts toward crumble and away from chew. Shortening in place of butter produces a taller, cakier cookie with noticeably less flavor.
For the spider bodies, Milk Duds or Whoppers substitute cup for cup in size, but the chocolate-to-caramel ratio changes and the smaller footprint shifts how the legs read visually.
A gluten-free all-purpose blend swaps in at the same volume, though spread varies by brand enough that the first tray becomes your test.
What I did not find: a dairy-free butter that holds structure here without turning greasy, and no nut-free spread that mimics peanut butter’s particular behavior in this specific dough.
Sunflower or soy butters carry too much moisture and throw the bake. If you need either substitution, this is probably not the recipe to force it.

Three Sizes for Spooky Creativity: This set includes edible eye sprinkles in three sizes, allowing you to create everything from subtle details to dramatic accents on Halloween desserts.

【Fun Cake Decorating】Lightly sprinkle candy eyes, just a moment you can add fun expressions to cookies, cupcakes, cakes to bring your desserts to life

Playful Candy Eyes: Add a mischievous touch to your treats with our eyeball mix sprinkles in assorted sizes, resembling quirky eye motifs, perfect for adding a spooky yet fun twist to your Halloween or prank-themed creations
Chilling Time and Spread
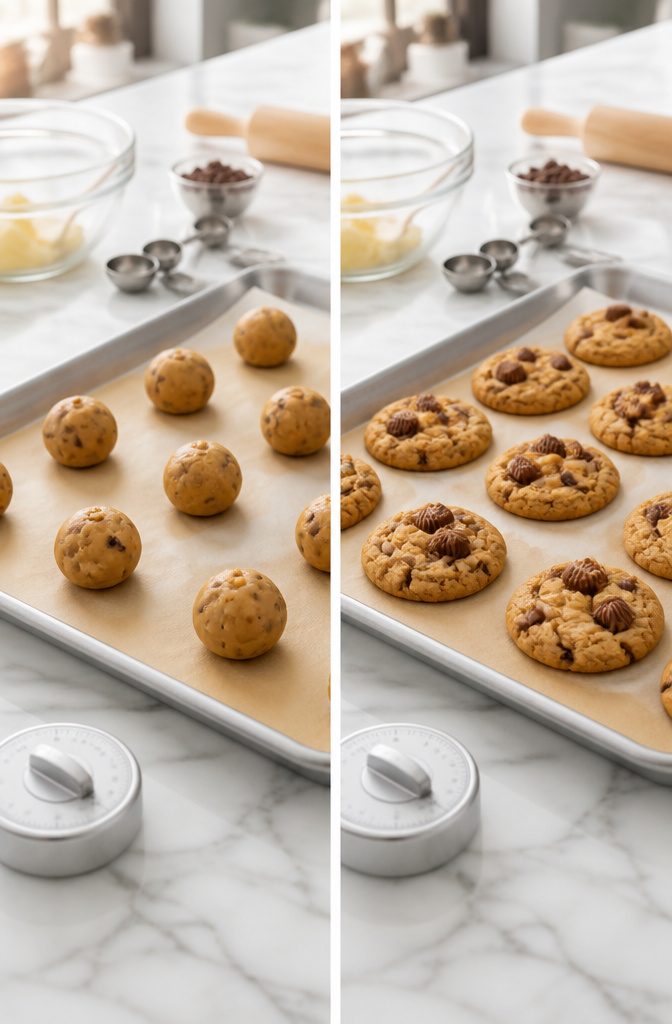
Chilling firms the butter so the cookie sets before the fat melts and pools.
Thirty minutes is the minimum, but a warm kitchen, soft butter from the start, or natural peanut butter that separates easily all push you toward the full hour. The test is simple: set a dough ball on the pan.
If it flattens immediately, it needed more time. If it holds its shape, half an hour was enough.
Skip the chill entirely and the Reese’s cup will sit on a thin, crunchy disc instead of a thick, chewy base. The candy needs that height to stay put while you pipe the legs.

Thick Pastry Bags: Did your previous bags leaked? Are you afraid to squeeze them? Not now! Made of durable, anti-burst, non-slip and food grade plastic that is flexible, strong, reliable and thick enough to bear pressure of squeezing and frosting without any burst or leakage
Thick and Durable Construction: Pastry bag features anti-burst strength for reliable performance during cake decorating and baking tasks

Microwave-safe decorating bags mean you can melt your Candy Melts candy or chocolate right in the bag
Decoration Methods Compared
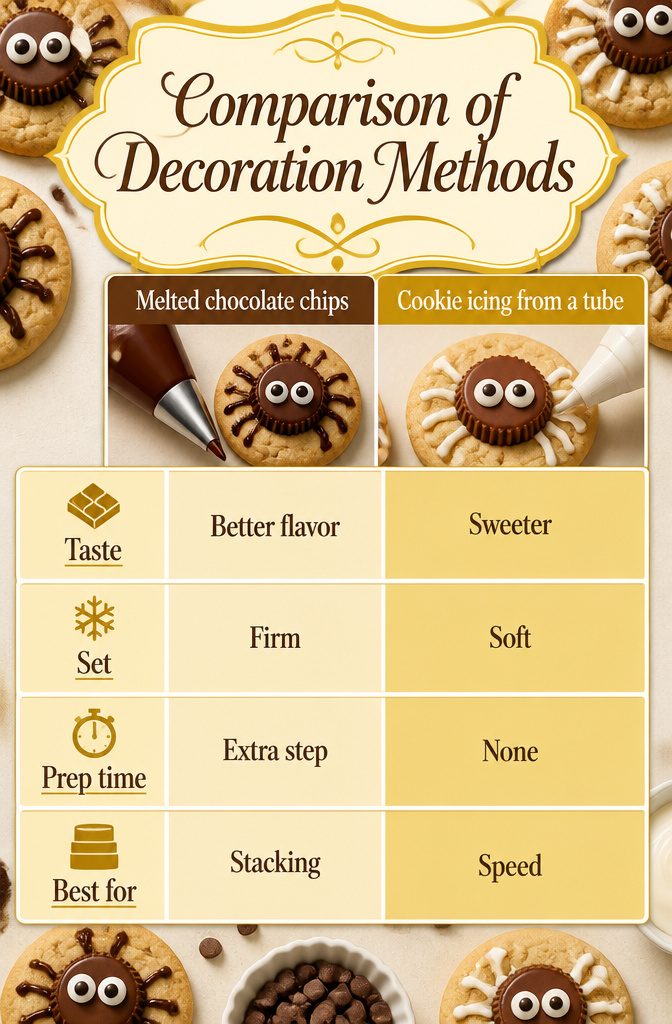
Melted chocolate chips piped from a bag give the cleanest snap and the best flavor, but they demand a melting step and a few minutes of setup.
Cookie icing from a tube skips all that; you squeeze and go, which saves real time when you are decorating two dozen legs at 9 PM on a school night. The tradeoff is texture and durability.
Chocolate sets firm enough to stack once it cools. Icing stays soft, which means a humid kitchen or a layered storage tin can smudge the legs into blurs.
Some bakers split the difference: cookie icing for the legs, melted chocolate only as glue to fix the candy eyes to the Reese’s cup.
That combination works, but the finished cookie carries two distinct textures on its face, and the contrast is visible up close.
| Attribute | Melted chocolate chips | Cookie icing from a tube | | Taste | Better; real chocolate flavor | Sweeter, more artificial | | Set | Firm; stacks without damage | Soft; smudges in humidity or when stacked | | Prep time | Extra step to melt and load bag | None; squeeze directly | | Best for | Crisp lines that hold overnight | Speed and last-minute decorating |
For cookies that travel to a party or sit on a platter, chocolate wins. For cookies that disappear straight off the cooling rack, icing is fast enough to forgive its softer finish.

MAGIC IN EVERY BITE Every moment deserves a piece of Toll House magic. Our Semi-Sweet Chocolate Morsels are made with 100% real chocolate for that soft, chewy texture just like homemade cookies that everyone loves SNAP and EBT item in eligible states

One (1) 12 oz bag of GHIRARDELLI Semi-Sweet Chocolate Premium Baking Chips

12 ounces of mini chocolate chips
Frequently Asked Questions
How do you make Reese’s cups stick to cookies?
Press an unwrapped mini Reese’s cup into each cookie the very moment the tray comes out of the oven.
The residual heat softens the chocolate just enough to bond with the still-soft cookie surface, and as everything cools the cup locks firmly in place. Wait even three minutes and the cookie surface sets, so the cup falls right off.
Can I freeze these cookies?
Yes, freeze the baked spider cookies for up to 3 months. Lay them in a single layer until solid, then stack in an airtight container.
Thaw overnight on the counter. If you are planning ahead, add the candy eyeballs after thawing rather than before freezing, since they can bloom or soften in freezer humidity.
What kind of peanut butter is best?
Use creamy no-stir peanut butter with no separated oil layer on top.
Natural peanut butter that separates will make the cookies spread too much and turn out crumbly and dry. Brands like Jif, Skippy, or Peter Pan work; all-natural styles do not.