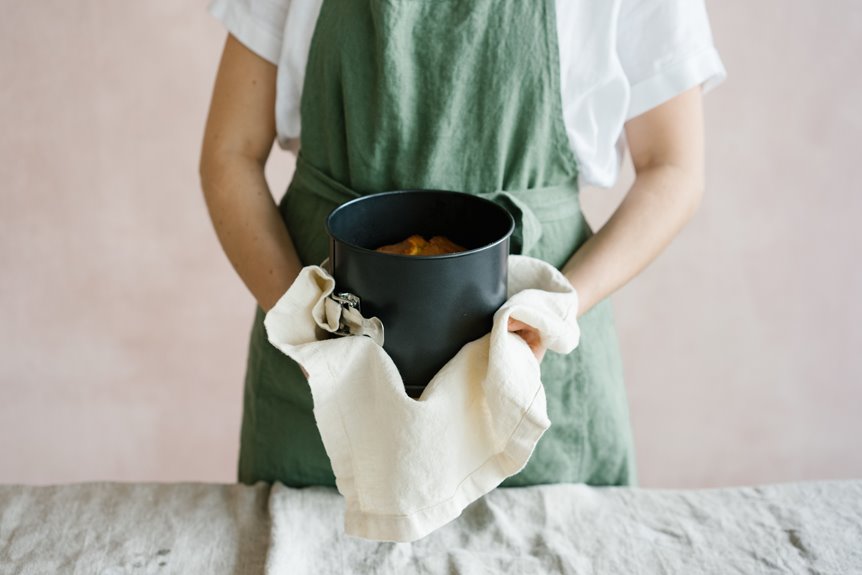
You wrap a dampened loop of aluminized cotton around your cake pan’s exterior. The edges stop racing ahead of the center, taming that stubborn dome into a level crown worthy of stacking. The strip’s saturated fibers fuel evaporative cooling, drawing heat away from the metal perimeter while the aluminized layer reflects radiant energy, creating a temperate blanket that slows conductive heat transfer. Your batter rises as one unified mass, the center and circumference reaching doneness in harmonious synchrony rather than competition. The result is a softer sidewall, gentler browning, and that coveted flat top. No mountain to trim, no cracked crust to disguise. Cake strips function as training wheels for layer cakes, helping you develop the judgment to determine when they’re essential and when your pan alone will suffice.
What Is a Cake Strip and Why Do Bakers Use It?
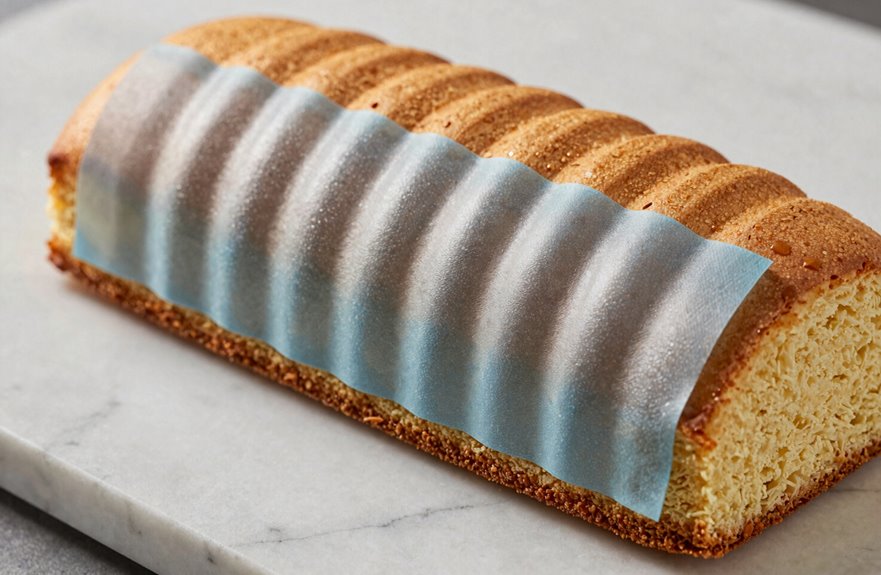
Why do some cakes emerge from the oven with crowns worthy of royalty while others bake up flat and ready for layering? The difference often lies in a simple fabric band you’d wrap around your pan like a hug. Cake strips, those aluminized cotton or cotton-poly loops, are your hidden ally for bakery-beautiful results. Fellow bakers rely on them because they solve a common problem: that frustrating dome in the middle and those overbaked edges. You dampen these strips, fasten them snug with Velcro, and they become your cake’s cooling companions, releasing moisture that tames the pan’s outer heat. With cake strips, you craft even-crumbed, tender-edged layers worthy of your most ambitious stacking dreams.
How Does a Cake Strip Actually Work?
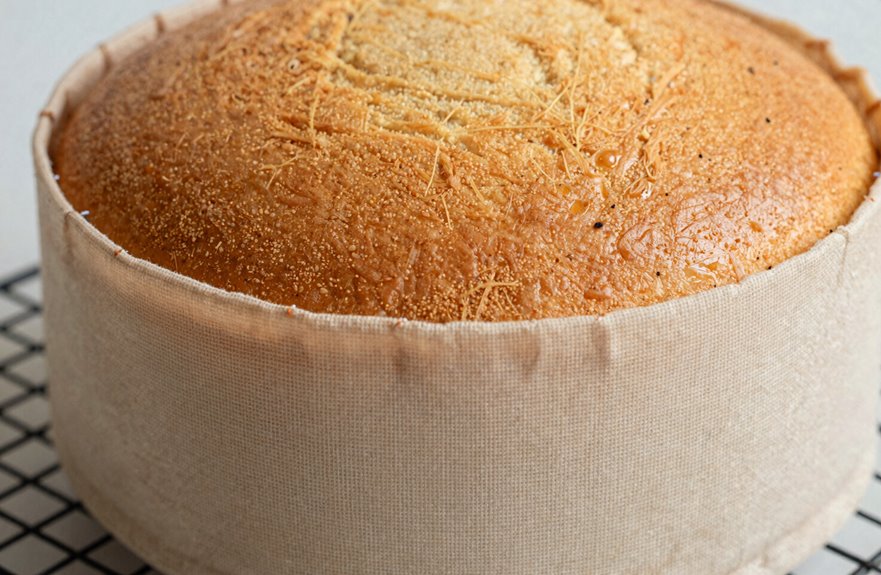
You’ll want to understand the heat transfer science that makes these strips so effective. Once you grasp how the dampened fabric creates a cooling barrier around your pan’s circumference, you’ll achieve consistently level cakes. The insulation mechanism relies on evaporative cooling: as the oven heats the moistened strip, water molecules escape, carrying thermal energy away from the metal edges while the center catches up. This balanced heat distribution allows all areas of the cake to bake at the same rate. You’ll see even baking results emerge, including flatter crowns, softer crusts, and layers that stack without requiring trimmed wedges from a domed cake.
Heat Transfer Science
When you slide that metal pan into a roaring oven, you’re witnessing a race against time that unfolds unevenly across every cubic inch of batter. The outer edges, those thin rings of batter pressed against scorching aluminum, will heat rapidly, coagulate proteins, and set into firm, domed walls while the center still rises slowly. Cake strips offer insulation, a barrier between ferocious heat and vulnerable batter.
| Heat Transfer Factor | How Cake Strips Intervene |
|---|---|
| Conduction from metal pan | Insulating fabric slows conductive flow |
| Rapid edge temperature spike | Moisture absorption moderates gradient |
| Premature protein coagulation | Delayed heat preserves elasticity |
| Steam generation in batter | Evaporative cooling from strip |
| Uneven thermal expansion | Balanced rise across crumb structure |
Control the heat, and you control the cake.
Insulation Mechanism Explained
How exactly does a strip of damp fabric transform your domed disaster into a bakery-worthy layer. You’re wrapping your pan in a thermal shield, a barrier of aluminized cotton or cotton-poly blend that acts as insulation against heat’s eager advance. You soak the strip, wring it gently, and fasten it snug, like swaddling your batter in a cool, protective embrace. That trapped moisture becomes your secret weapon, evaporating slowly while the insulation deflects thermal energy from the pan’s rim. Your edges stay cooler, lagging behind the center’s climb toward doneness rather than sprinting ahead. It’s thermodynamics made tactile and accessible; you’re not just following steps, you’re joining the conversation between craft and science. Dark pans or temperamental ovens might temper your triumph, but you’ve already understood the mechanism that separates home bakers from the truly initiated.
Even Baking Results
Understanding the insulation mechanism sets the stage for witnessing what actually happens inside your oven, where the real transformation unfolds in degrees and minutes rather than abstract theory. When you wrap your soaked strips around the pan, you’re creating a thermal buffer that moderates the fierce heat attacking your cake’s outer edges, like a moat protecting a castle from encroaching flames. The moisture in your strips absorbs excess thermal energy, preventing the perimeter from setting while the center lags behind, which means you’re baking in harmony rather than racing against uneven chemistry. You’ll notice the difference when your cake emerges with a smoother, more level crown instead of that dreaded dome that requires slicing and sacrificing precious crumb. Your strips won’t promise perfection every time, but you’re joining countless bakers who’ve discovered this simple technique transforms frustrating domes into reliable, layer-ready foundations.
What These Strips Are Made Of (And Why It Matters)
What exactly transforms a simple strip of fabric into the silent guardian of your cake’s structural integrity? The answer lies in aluminized cotton, a specialized material that combines absorbent cotton fibers with reflective aluminum coating to create a thermal barrier between your pan and the oven’s aggressive heat.
You’ll find these strips constructed from cotton or cotton-polyester blends, designed with Velcro or fasteners that wrap snugly around 8″ to 9″ pans, though you can link multiple strips for larger diameters. The aluminized cotton serves dual purposes: the cotton absorbs water before baking, while the aluminum reflects radiant heat, slowing conduction at the edges where your batter faces its greatest thermal stress.
This material choice prevents the temperature differential that causes domed centers and over-browned crusts. The strip releases moisture gradually, insulating your pan sides and protecting cake edges from excessive browning while allowing the center to bake evenly.
How to Prep and Attach a Cake Strip Before Baking
You’ll start by soaking your Regency Evenbake strips in cool water for ten minutes, wringing them gently until they’re damp but not dripping, like a well-wrung sponge. Wrap them snugly around your 8- or 9-inch pan’s exterior, fastening the Velcro so the insulation hugs the metal closely, and double-check that no gaps expose the pan’s edge before you slide your prepared batter into the oven. This pre-baking step slows the edge’s cooking time while the center catches up, eliminating that stubborn dome and the dry, overbaked rim that occurs in many home-baked cakes.
Soaking The Strips
Why do professional bakers achieve those perfectly flat cake tops while home efforts often dome dramatically? You’ll join their ranks when you soak the strips, activating the aluminized cotton’s insulating properties.
- Submerge your strips completely, letting the fibers absorb water for 10 to 15 minutes until fully saturated
- Squeeze gently, releasing excess water like wringing a damp sponge, leaving them moist but not dripping
- Wrap snugly around your pan’s exterior just before baking, securing that temperature-buffering layer
This ritual slows edge browning, promoting uniform doneness from crust to crumb. The soaked strips create an insulating barrier that moderates heat exposure at the pan’s edges, where cakes typically brown fastest.
Securing Around Pan
Nearly every lopsided layer cake traceable to uneven baking begins at the pan’s edge, that unforgiving rim where heat strikes first and hardest. Your Regency Evenbake strips, those slender guardians of confectionary precision, stand ready to interrupt this thermal ambush. Once you’ve soaked them, wrap these aluminized fabric bands around your 8″ or 9″ pan’s exterior, letting the Velcro fasten snugly to prevent any shifting during baking. This insulation slows edge browning, reduces doming, and promotes an even rise that transforms your layers into frostable perfection.
| Step | Action |
|---|---|
| Wrap | Encircle pan’s exterior with soaked strip |
| Fasten | Secure Velcro tightly, ensuring no gaps |
| Verify | Confirm strip sits level with rim |
| Protect | Shield with parchment paper if needed |
When your cake emerges level and moist, you’ll have achieved the reliable results that come from controlling heat distribution at the pan’s edge.
Pre-Baking Checklist
Before your batter meets the oven’s heat, you need to prepare your cake strip properly. Submerge the aluminized fabric in cool water for ten to fifteen minutes, allowing the fibers to absorb moisture thoroughly. Then wring it gently so it’s damp, not dripping. Working swiftly, wrap it around your 8″ or 9″ pan and secure the Velcro so the strip fits snugly against the metal. The thermal mass will cool the edges and help you achieve an even, flat cake top.
- Soak your strips until fully saturated, patting excess moisture away
- Wrap around the pan’s circumference, overlapping ends if needed for larger diameters
- Verify the fit sits snug and level, ready to orchestrate even heat distribution
We Tested Cake Strips: Here’s What Actually Happened
How exactly do these fabric bands transform your baking results when you wrap them around cake pans? Countless home bakers are discovering whether cake strips live up to their promise.
| Test Round | Cake Type | With Strip | Without Strip |
|---|---|---|---|
| One | Butter cake | Flatter top, browned edges, center dip | Domed middle, pale edges |
| Two | Boxed vanilla | Smoother, nearly level | Cracked top, middle bubble |
| Key Finding | All tests | Insulated pan, reduced edge browning | Faster edge cooking |
| Source | Verification | Kitchn Baking School, Christine Gallary | Independent, unsponsored |
| Verdict | Your investment | Worthwhile for easier trimming | Some leveling still needed |
Cake strips offer measurable improvement in creating more level cake layers with reduced browning at the edges. While they simplify trimming, some manual leveling is still necessary for perfectly even cakes. They are a useful tool rather than a complete solution.
How Cake Strips Change Your Cake’s Shape and Texture
You’ll notice the most dramatic transformation in your cake’s silhouette, as those dampened aluminized cotton strips wrap snugly around your pan like a temperate blanket, coaxing the batter’s edges and center to set in harmonious synchrony rather than the usual race-against-heat that crowns your cake with a stubborn dome. By insulating the perimeter, you’re essentially buying your cake’s middle more time, so the entire surface rises together and settles into that coveted flat plane; this means all zones rise evenly rather than having the center peak above the edges. The payoff extends beyond aesthetics, too, since you’re trading those overcooked, desiccated crusts for tender, evenly moist crumb from rim to rim. This texture improvement means every slice has consistent moisture and tenderness rather than varying between dry edges and a soft center.
Flatter Cake Tops
Why does your cake crown in the center while the edges stay stubbornly flat, creating that frustrating dome you’ll inevitably saw off into sad, uneven scraps? You’re witnessing the physics of uneven heat distribution, where your pan’s metal edges conduct thermal energy faster than the insulated center, causing perimeter batter to set while the middle continues rising like a bread loaf in miniature. Cake strips interrupt this process by wrapping your pan in a cooling, moisture-laden embrace that slows edge heating and synchronizes your bake from rim to core.
- You’ll soak your strips first, transforming them into thermal shock absorbers that tame aggressive oven heat.
- You’ll wrap them snug, creating an even temperature gradient across your batter’s entire surface.
- You’ll pair them with lighter pans, amplifying their flattening power through reflective synergy.
Your layers emerge level and professional, ready for stacking without additional trimming or waste.
Moist Cake Edges
Flattening your cake’s crown solves one puzzle, yet the story doesn’t end at the top. Your edges demand equal attention because a layer that’s moist at its heart but desiccated at its perimeter betrays the baker’s ambition of perfection in every slice. Cake strips become your ally here, those humble bands of aluminized cotton you soak, squeeze, and wrap snug around your pan like a protective embrace. They slow the thermal assault on your batter’s outer frontier, allowing the center and edge to reach doneness evenly rather than racing toward unequal fates. You’ll notice the difference immediately. No more caramelized crusts that crumble when sliced, no more sacrificing the outer half-inch to your paring knife. Your layers emerge uniformly tender, their crumb yielding from circumference to core, creating the structural integrity needed for professional-looking finished cakes.
Which Pan Sizes and Materials Work Best With Cake Strips
- Your aluminized cotton strips, soaked and ready, insulate aluminum pans exceptionally well.
- Dark or nonstick finishes require strips to counteract rapid edge browning.
- Extend or combine strips when you need to accommodate larger pan sizes beyond standard dimensions.
How to Make a DIY Cake Strip From Kitchen Towels
Now that you’ve grasped how different pans respond to insulation, you’re ready to craft your own solution without ordering specialty gear. You’ll transform humble kitchen towels into a cake strip that rivals commercial versions, joining countless home bakers who’ve walked this path before you.
| Step | Action |
|---|---|
| Soak | Submerge terry cloth towels for 15 minutes, then wring thoroughly |
| Measure | Cut fabric to your pan’s height, folding to match its circumference |
| Wrap | Encircle the pan, covering the top edge without overflow |
| Secure | Fasten with tape or string, maintaining snug contact |
| Bake | Slide your creation into the oven, moisture working its magic |
This damp barrier slows thermal conduction along the perimeter, allowing the crumb’s center and edges to reach doneness at the same rate. Your layers emerge level and ready for frosting.
Cake Strips vs. Leveling Without Them: Speed, Cost, and Results Compared
Why settle for a domed crown when you can distribute heat evenly? You wrap a pre-soaked strip around your pan, and you’re not just baking; you’re engineering. Without strips, you’re racing against time with a serrated knife, shaving off domes while precious crumbs fall. Strips cost mere dollars and demand only ten soaking minutes, yet they provide softer edges and markedly improved evenness, though you’ll likely still trim for perfection.
- Silver pans paired with strips yield the gentlest, most level results you’ll achieve
- Dark pans demand lower temperatures, testing your adaptability as a craftsperson
- Strips reduce but don’t eliminate doming, so keep your knife ready for final refinement
Cake Strip Mistakes That Ruin Your Layers
Mastering cake strips is less like following a recipe and more like learning to tune an instrument, where every adjustment shapes the final harmony of your layers. You might think wrapping strips around your pan guarantees perfection, but small missteps create discord in your crumb structure.
| Mistake | Consequence | Your Fix |
|---|---|---|
| Wrapping too loosely | Uneven insulation, persistent doming | Snug fit, no gaps |
| Skipping proper soaking | Dry edges, cracked crusts | Saturate, wring gently |
| Over-tightening strips | Moisture pooling, soggy bottoms | Firm but breathable |
| Ignoring pan darkness | Over-browned sides | Lower temperature 25°F |
When you neglect these details, your strips become decorative rather than functional, and your layers emerge uneven, dense at the edges, or crowned like a hill instead of flat like a plateau. These adjustments separate consistent results from inconsistent ones.
Why Cake Strips Work Better With Some Pans Than Others
How does your choice of pan reshape the physics of heat transfer through your batter, and why does a simple strip of soaked fabric respond differently to dark anodized aluminum than to bright, mirror-finished steel. Your pans actively work for or against you. Dark pans absorb heat like asphalt in July, accelerating browning at the edges even with a strip wrapped around them, while lighter, silver-finished pans provide better thermal harmony with insulation, yielding the soft sidewall and level crown you want.
Your strip becomes effective when matched wisely. Consider these factors:
- Light-colored pans paired with strips create the gentlest heat barrier, allowing your batter to rise as one unified mass
- Dark pans require lower temperatures alongside strips, a dual adjustment that prevents over-baked results
- Material thickness in pans varies your results, with thin walls transmitting heat faster than heavy gauge pans
When to Skip the Strip: Cases You Don’t Need One
Not every bake demands the extra step of wrapping your pans in damp fabric. Recognizing when you can set the strip aside builds kitchen wisdom over time. When your lighter-colored or silver pans already coax batter into a flat, even crown without the center rising like a mountain, cake strips become unnecessary equipment. If your tested recipes consistently yield smooth tops free of cracked domes or dried edges, you’ve found the conditions where conventional bakeware performs well. Some batters, perhaps your trusted yellow cake or sturdy pound cake, simply behave, rising evenly without sinking centers or demanding thermal manipulation. When time runs short and Velcro-secured strips scatter unlocated in your drawer, reliable pans and well-matched recipes carry you forward. Mastery means knowing which tools serve the moment and which wait for another day.