
You’ll transform a simple buttercream cake into a showstopping centerpiece by mastering five essential techniques: mixing a silky 3:1 white chocolate ganache, chilling your frosted canvas until firm, tinting with gel coloring for visual drama, applying controlled drips with a spoon or squeeze bottle, and troubleshooting consistency issues. Each step builds your confidence, turning precise measurements and patient timing into edible art that cascades with intention. Master these techniques to achieve professional results.
Mix White Chocolate Ganache (3:1 Ratio)

The foundation of any stunning drip cake begins with mastering your white chocolate ganache. Precision here ensures success throughout the decorating process. You’ll measure your white chocolate chips and heavy whipping cream using the essential 3:1 ratio, which gives your chocolate drip the perfect viscosity for dramatic, controlled cascades. Chop your chocolate finely, as if preparing treasure for melting, then heat your cream until small bubbles form around the edges. Do not let it boil. Pour it over your chocolate, wait one minute, then whisk until you’ve achieved smooth ganache without a single stubborn bit remaining. If you’re coloring your creation, add gel after melting. Cooling ganache to room temperature before your pour design ensures those elegant drips that distinguish skilled decorating work.
Chill the Buttercream Cake First
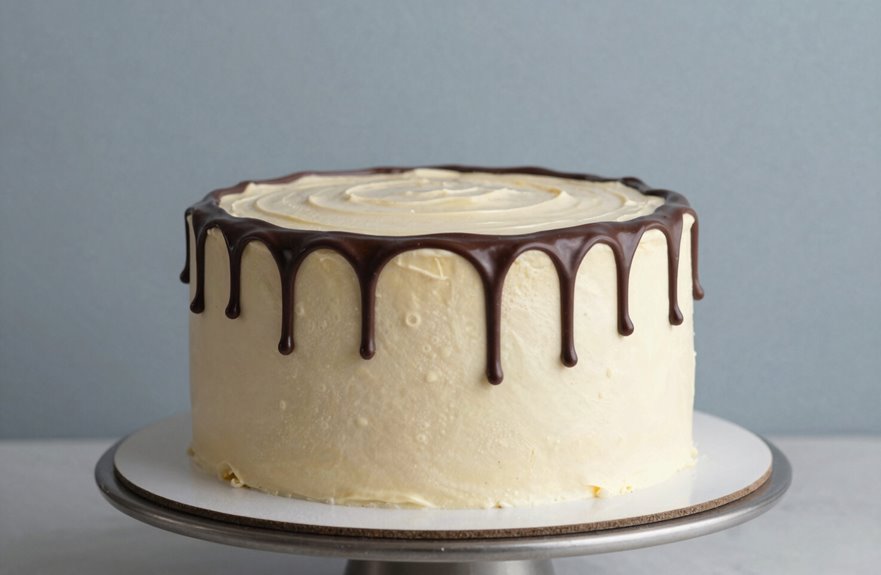
With your ganache now silky and waiting, turn your attention to the canvas itself: your buttercream-frosted cake, still soft and vulnerable at room temperature. Before you transform it into a showstopping drip cake, chilling becomes essential, firming that buttercream into a solid, welcoming stage. Lower the cake temperature for twenty to thirty minutes, and the chilled surface will grant you control over every descending ribbon.
Test the drip consistency by releasing a small stream of white chocolate ganache along one edge. Observe the ganache flow; does it cascade with grace, or does it race too quickly? The chilled surface reveals truths about your drip consistency that room temperature conceals. Adjust and adapt as needed before proceeding. A properly chilled cake provides the stable foundation necessary for controlled drips.
Color Ganache With Gel Food Coloring
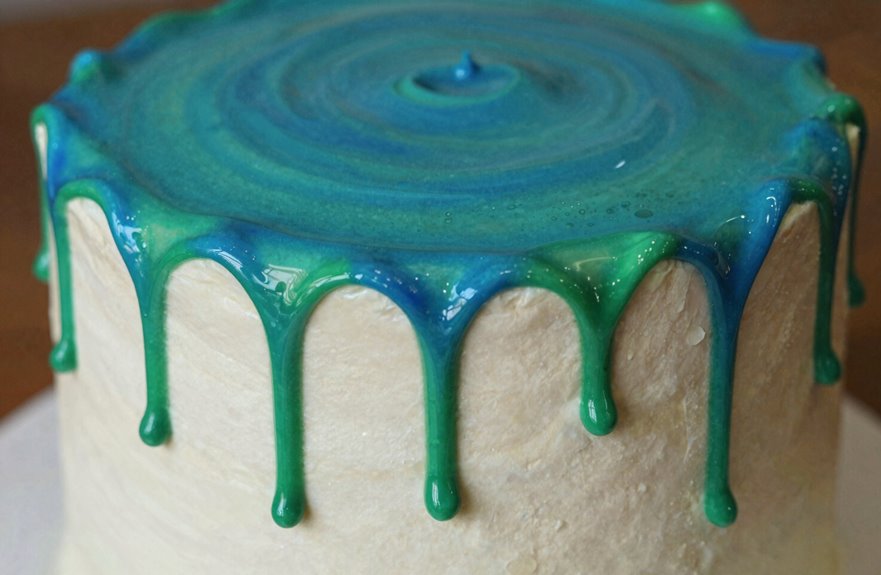
Why settle for ordinary when your drip cake could burst with personality? You’ve chilled your buttercream canvas, and now it’s time to transform your white chocolate ganache into something extraordinary. Color ganache with gel food coloring, never liquid, because you’re preserving that perfect drip technique that distinguishes amateur attempts from professional cake decorating.
Food coloring elevates your chocolate drip through these steps:
- Heat your heavy cream and white chocolate until silky, creating the foundation for flawless drips
- Add a tiny squirt of gel coloring, stirring until you’ve achieved uniform saturation without streaks
- Adjust gradually, testing flow and shade because precision separates good from breathtaking
- Make intentional color choices that make your drip cake unmistakably yours
Apply Drips With Spoon or Squirt Bottle
Reach for your spoon or grab that squeeze bottle to transform your chilled buttercream canvas into cascading ribbons of glossy ganache, with each drip serving as a deliberate stroke in your edible masterpiece. Your drip method choice depends on comfort. The spoon method lets you guide each chocolate drip with deliberate control, scraping away rogue bits for clean edges, while the squeeze bottle offers swifter, tidier application with leftover ganache ready for tomorrow’s cake decoration.
Before committing, execute one test drip. Watch how your white chocolate or dark ganache flows, adjusting temperature until you achieve that gravity-defying cascade. Your chilled buttercream must be firm, a solid foundation catching each even drip like morning frost on glass. Whether crafting dramatic lengths or subtle beads, you’re applying the same techniques used by experienced decorators, with a squeeze bottle in hand and focused attention on creating controlled, beautiful results.
Fix Runny, Thick, or Cracked Ganache
Even the most practiced hands encounter ganache that refuses to cooperate. Recognizing when your mixture has strayed from that silky, pourable ideal shows you’re learning to read your materials like a seasoned chocolatier reads temper.
- Rescue runny drip ganache by reheating in 10-second microwave bursts, whisking smooth, then test drip on the cake edge before committing.
- Thicken your white chocolate base by cooling to the lower end of room temperature or add white chocolate chips, never extra cream, to adjust ganache viscosity.
- Prevent cracks when you chill cake completely before applying drips and avoid air bubbles by stirring gently, not aggressively.
- Fix separated ganache by reheating to 92°F, whisking to restore emulsion, then testing the drip. This temperature and technique restore the proper consistency for application.