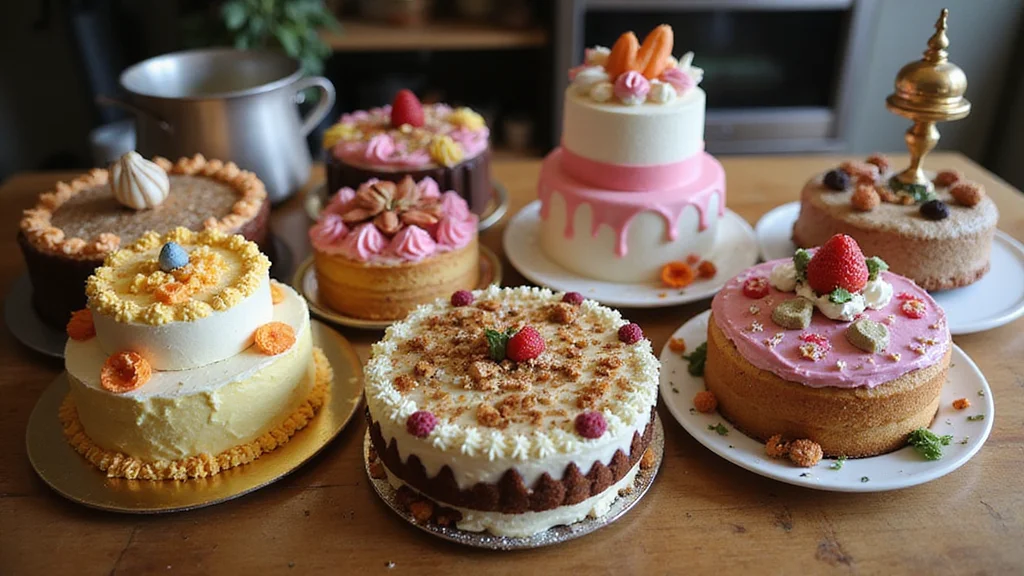
Have you ever found yourself staring at a plain cake, wishing it could be something much more exciting? You’re not alone. There’s nothing quite like the joy of transforming a simple dessert into a stunning masterpiece. That’s why I put this post together! I wanted to share some of the most creative drawing cake ideas that will not only satisfy your sweet tooth but also leave your friends in awe.
If you’re someone who loves baking, cake decorating, or simply impressing your friends with artistic desserts, this list is for you. Whether you’re prepping for a birthday party, a special occasion, or just want to treat yourself, these unique designs will inspire you to take your cake game to the next level. From whimsical unicorns to elegant watercolor drip cakes, there’s something here for everyone looking to create memorable treats.
In this article, you’ll discover 15 creative drawing cake ideas that are sure to wow your guests. Each cake is designed to be visually stunning and delicious, giving you the best of both worlds. You’ll find step-by-step guidance and tips to help you bring these artistic desserts to life. So, get ready to roll up your sleeves and dive into the sweet world of cake decorating—your friends won’t believe what you can create!
Let’s get started and unleash your inner cake artist!
Key Takeaways
– Explore 15 drawing cake ideas, each offering a blend of creativity and deliciousness.
– Discover cakes like the 3D Animal Cake and Galaxy Cake that stand out at any gathering.
– Learn practical decorating techniques that can elevate your baking skills.
– Get inspired by fun themes, such as Mermaid and Unicorn cakes, perfect for kids or the young at heart.
– Find tips for using everyday ingredients to create stunning visual effects in your cakes.
1. Watercolor Drip Cake
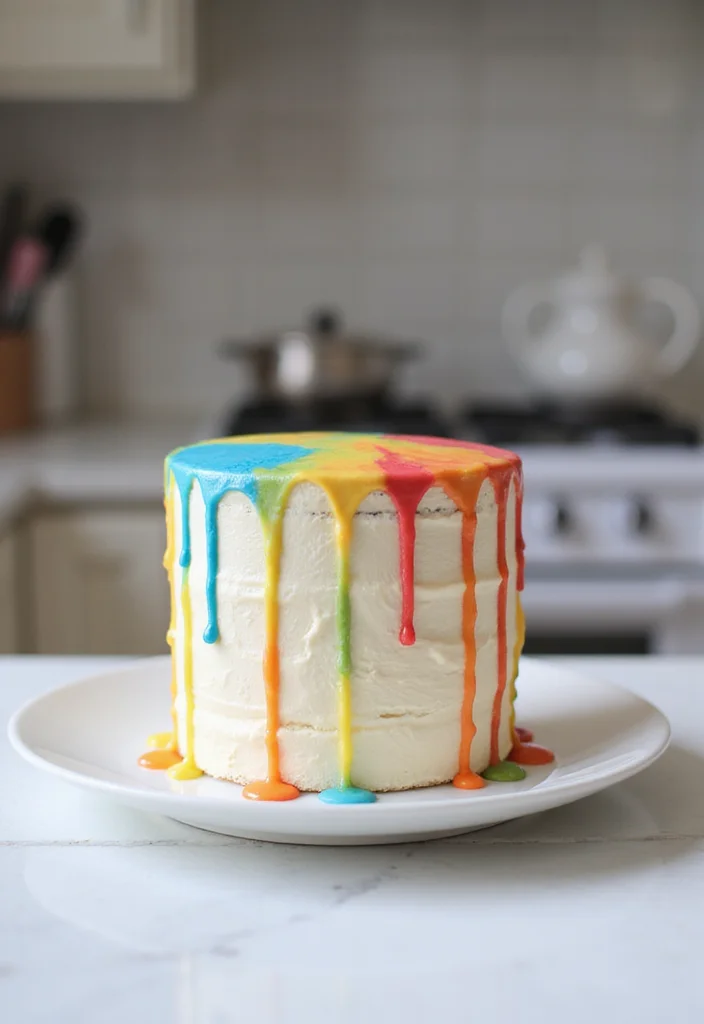
Imagine a cake that combines the artistic flair of watercolor painting with the rich delight of chocolate ganache. The watercolor drip cake is a fun project for anyone who loves to create and eat delicious desserts! You can create beautiful streaks of color that gracefully drip down the sides of your cake, making it truly a feast for the eyes. Start with a soft vanilla or chocolate sponge cake. Once it’s baked and cooled, layer it with your favorite whipped cream or buttercream. Pour a luscious dark chocolate ganache on top, letting it cascade down the sides. To make it even more stunning, sprinkle some edible gold dust or colorful sprinkles on top to catch the light. This cake is not just a treat; it’s a masterpiece!
Ingredients: – 2 cups all-purpose flour – 1 ½ cups sugar – 1 cup unsweetened cocoa powder – 1 ½ tsp baking powder – 1 tsp baking soda – 1 tsp salt – 2 large eggs – 1 cup buttermilk – ½ cup vegetable oil – 2 tsp vanilla extract – 1 cup boiling water – Edible gel colors for watercolor effect – 1 cup dark chocolate for ganache
Instructions: 1. Preheat your oven to 350°F (175°C) and grease two 9-inch round cake pans. 2. In a large mixing bowl, combine the flour, sugar, cocoa powder, baking powder, baking soda, and salt. 3. Add the eggs, buttermilk, oil, and vanilla. Mix until well combined, then stir in boiling water. 4. Pour the batter evenly into the prepared pans and bake for 30-35 minutes. Let them cool completely. 5. Whip the cream or buttercream, layer it between the cakes, and apply a crumb coat. 6. Make the ganache by melting the dark chocolate and pouring it over the top of the cake. Use gel colors to create watercolor effects on the sides. 7. Chill to set and serve beautifully!
FAQs: 1. Can I use fondant instead of buttercream? Yes, but it will change the texture! 2. How long will this cake last? If refrigerated, it can last up to a week!
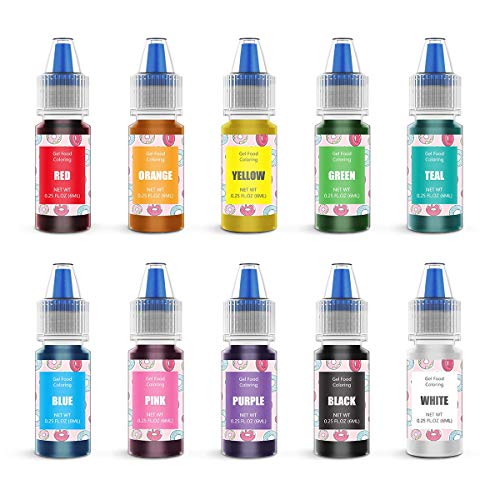
CHOOSE FOOD GRADE PREMIUM MATERIAL - Gel food coloring for easter eggs is made from food-grade ingredients, MSDS APPROVED edible gel food color, gluten-free, vegan, kosher certified, .25 Fl.Oz Each Bottle

VIBRANT LASTING COLORS - This highly concentrated gel food coloring set contains 15 brightly colored colors (6 grams per bottle). Each color is unique, and of course you can mix different colors of gel food coloring to create your custom colors for different needs such as Christmas, Halloween, Easter, family gatherings or theme parties.

12 Colors Included: Comes with Kelly Green, Copper, Brown, Black, Burgundy, Violet, Royal Blue, Teal, Lemon Yellow, Golden Yellow, Pink, and No-Taste Red
2. 3D Animal Cake
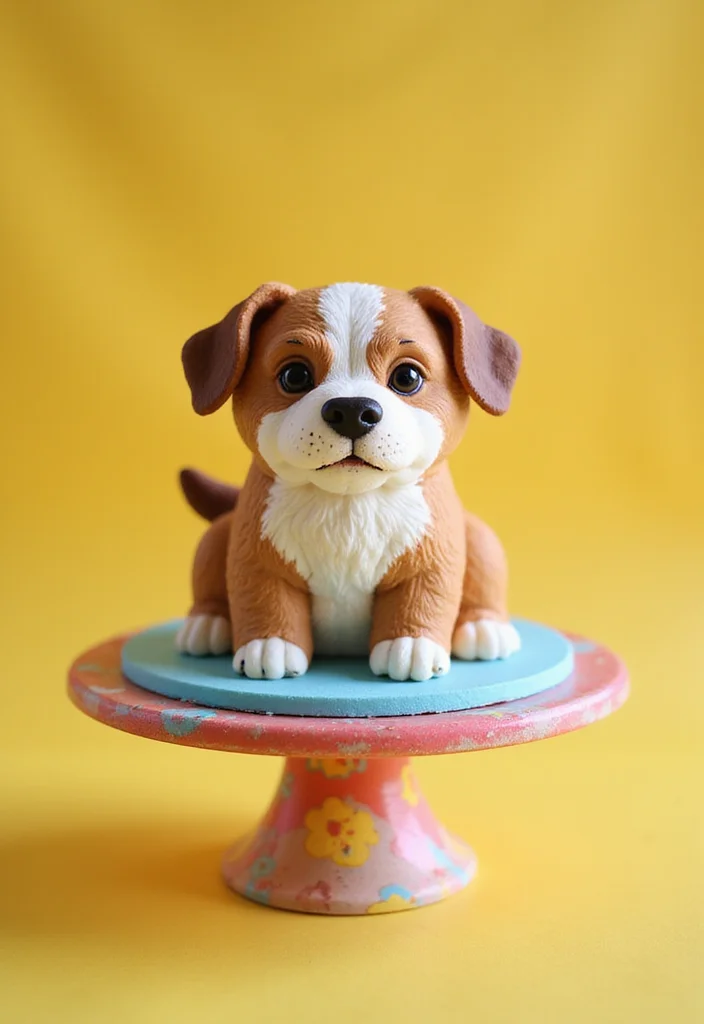
Bring your favorite animal to life with a 3D animal cake that will surely make everyone’s jaws drop! This cake lets you sculpt any animal shape, whether it’s a cute puppy or a fierce lion. The trick to making a great 3D cake is to use a dense recipe, like a pound cake or rich chocolate cake, which holds its shape well during sculpting. After it cools, carve the cake into your desired animal figure and coat it with buttercream to create a smooth surface. You can use fondant to craft details like ears and eyes, making your cake look lifelike. Adding edible glitter or luster dust will give your creation a magical finish!
Ingredients: – 3 cups all-purpose flour – 2 cups sugar – 1 cup butter, softened – 4 large eggs – 1 cup milk – 1 ½ tsp baking powder – 1 tsp vanilla extract – Food coloring (for fondant) – 2 cups buttercream frosting
Instructions: 1. Preheat your oven to 350°F (175°C) and grease a bundt cake pan. 2. In a mixing bowl, cream the butter and sugar until fluffy. Add the eggs one at a time, mixing well. 3. Combine the flour, baking powder, and milk, then add to the butter mixture. Stir in vanilla. 4. Pour the batter into the pan and bake for about 50 minutes or until a toothpick comes out clean. Let it cool completely. 5. Shape the cake into your chosen animal and cover it with buttercream, smoothing it out. 6. Roll out fondant to create the animal’s features and attach them with a bit of water. 7. Add details like eyes and fur textures using tools and colors.
FAQs: 1. Can I use regular cake mix? Yes, but a denser cake works better for sculpting! 2. How do I prevent the fondant from drying out? Keep it covered and work quickly.

Cute Squirrel Mold: The package includes 1x Cute Squirrel Shape Silicone mold. It could used for making cake fondant, chocolate, soap, candle, resin and more

Safari Animal Cake Topper Set: 1 x elephant cake topper, 1 x lion cake topper, 1 x giraffe cake topper, 1 x monkey cake topper, 1 x Happy Birthday sign, 4 x Leaves cake topper, 4 x grasses cake topper, 6 x balls cake decorations, 19 pieces in total

[Comprehensive Farm Theme Kit] This set includes essential components such as horns, ears, eyes, a nose, and a cow figure to help create a coordinated animal-themed design on your cakes
3. Geode Cake
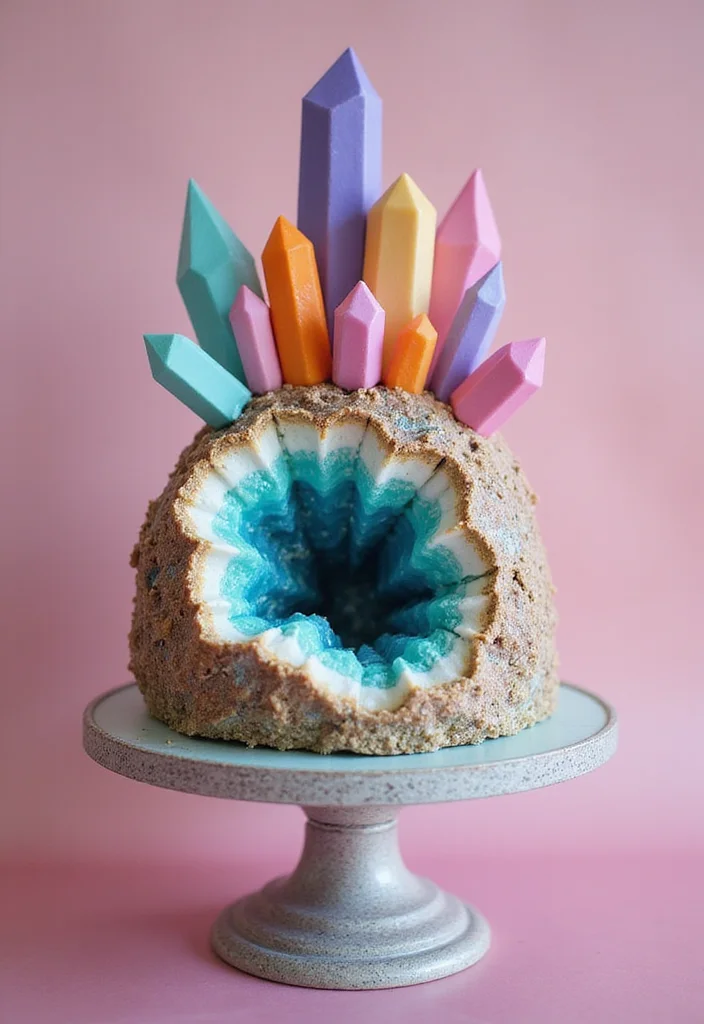
Elevate your baking with a stunning geode cake that captures the beauty of crystals! This cake design looks intricate but is actually simple to create with a few clever techniques. You can start with a basic cake recipe of your choice. After baking and cooling, cover the cake with a smooth layer of buttercream. To achieve the geode effect, mix sugar, water, and food coloring. Pour the colored sugar into a crack made in the cake to mimic sparkling gemstones. You can customize the colors to match any theme or celebration!
Ingredients: – 2 cups cake flour – 1 ½ cups sugar – 1 cup unsalted butter – 4 large eggs – 1 cup milk – 2 tsp baking powder – Edible crystal sugar (various colors) – Fondant for details
Instructions: 1. Preheat your oven to 350°F (175°C) and prepare two 8-inch round cake pans. 2. Cream the butter and sugar until fluffy, then add the eggs one at a time, mixing thoroughly. 3. In another bowl, blend the cake flour and baking powder, then alternately mix with milk into the butter mixture. 4. Pour the batter into the pans and bake for 30-40 minutes. Allow them to cool completely. 5. After cooling, layer the cakes with frosting and apply a smooth coat of buttercream to the outside. 6. Create the geode effect by pouring colored sugar into a crack made in the cake. 7. Add fondant details around the edges for more dimension!
FAQs: 1. Can I use regular granulated sugar? Coarse sugar gives a better texture! 2. How do I store this cake? Keep it in a cool place to prevent melting.
Fun fact: Geode cakes look intricate but are surprisingly simple to pull off. A broken crust, colored sugar, and a kiss of blue, pink, or gold crystals can wow your crowd in under an hour—perfect for showing off drawing cake ideas.

Black Series Sprinkle:Each bottle weight 100g/3.53oz,Production Date and Expiration date at the back of the bottle,You can see Production Date and Expiration date at the bottom of the bottle. After open the seal of the bottle, its better to use them in 1 month and Store in cool dry place.

Package includes :1 bottle edible Galaxy Stars sugar sprinkles candy ,3.4oz

Pearl Sprinkles: Each bottle weighs 4.23 oz, 120 g. Our Galaxy Star sprinkles are made from safe ingredients, Nut Free. Our cake sprinkles are in different shapes of Spaceship and Star Sprinkles.
4. Rainbow Layer Cake
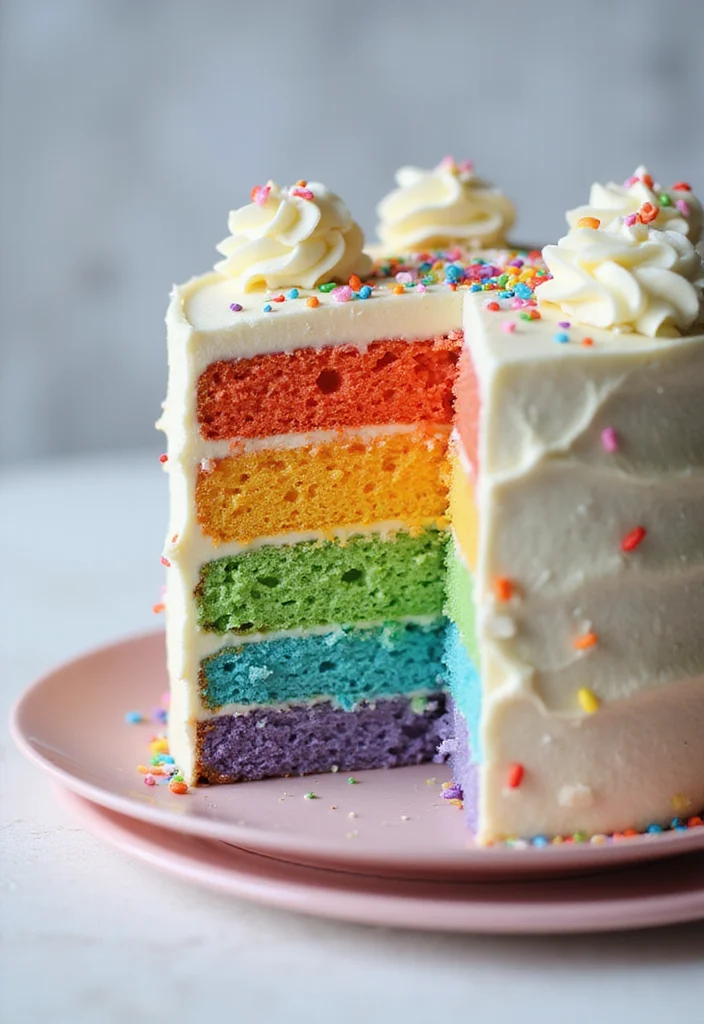
Brighten up any celebration with a joyful rainbow layer cake full of color and flavor! This cake is perfect for kids’ parties or anyone who loves a splash of fun. To create this cheerful dessert, bake separate layers of cake, each dyed with different food colors. A classic vanilla sponge works wonderfully for this. Once cooled, stack the layers with fluffy buttercream or cream cheese frosting in between. The result is not just a beautiful cake; it’s a deliciously moist treat that surprises guests with a colorful interior when sliced!
Ingredients: – 2 ½ cups all-purpose flour – 2 ½ tsp baking powder – ½ tsp salt – 1 ½ cups sugar – 1 cup unsalted butter – 4 large eggs – 1 cup milk – Food coloring (red, orange, yellow, green, blue, purple) – 2 cups buttercream frosting
Instructions: 1. Preheat your oven to 350°F (175°C) and grease six 6-inch round pans. 2. In a bowl, mix flour, baking powder, and salt. In another bowl, cream butter and sugar until fluffy. 3. Add the eggs one at a time, mixing well, then incorporate the milk. 4. Divide the batter into six bowls and color each with food coloring. 5. Pour each color into a separate pan and bake for 20-25 minutes. Let them cool completely. 6. Stack the cakes, alternating colors with buttercream frosting in between layers. 7. Frost the outside and create a fun swirl pattern for a playful finish!
FAQs: 1. Can I use store-bought frosting? Yes, but homemade is always tastier! 2. How can I get even layers? Level the cakes after cooling.

Complete 24pcs Mermaid Cake Topper Set Create a dreamy ocean-inspired cake with this 24-piece mermaid cake topper set, including mermaid tails, Happy Birthday topper, seashells, starfish, pearl balls, seaweed decorations and iridescent shell pieces for a full under the sea cake design.

【Mermaid Cake Decorations 】Includes 2 mermaid tail cake topper, 2 starfish cake topper, 2 seashell cake topper, 2 seaweed cake topper, 1 coral cake topper, 6 kelp cake topper, 6 bubble ball cake topper, and 6 glitter cake toppers. Caution: Not edible. Do not heat

Luxurious Edible Gold Sparkle: Add a touch of elegance to your desserts with these dazzling sprinkles crystals. Perfect for creating glamorous treats that shine!
5. Floral Cake
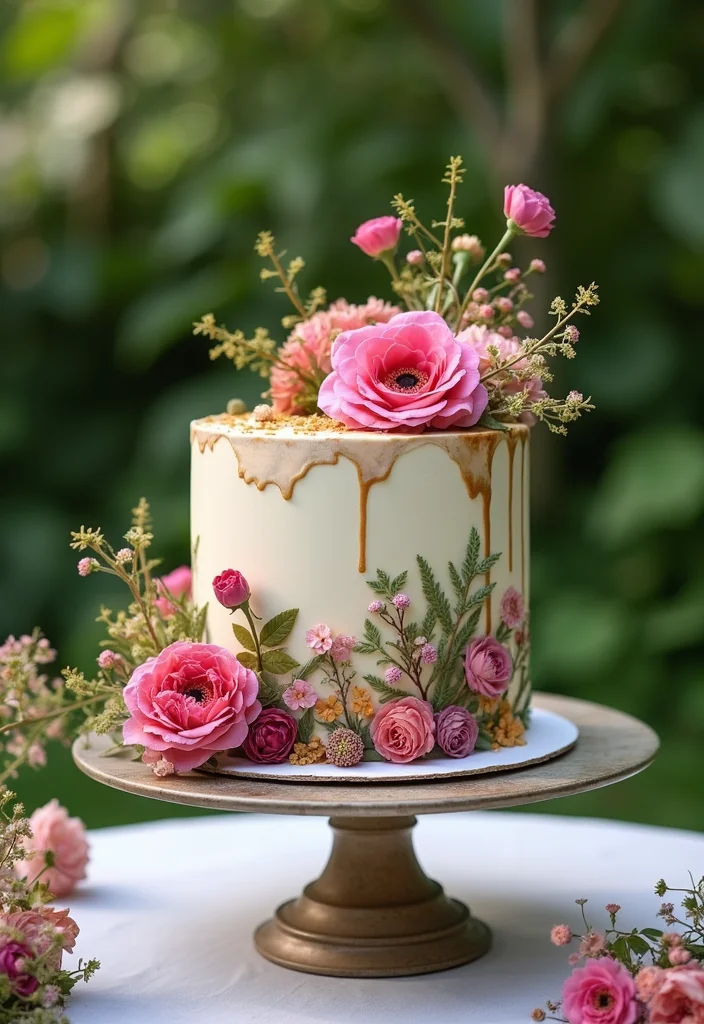
Celebrate the beauty of nature with a floral cake that can enhance any event! This cake is ideal for weddings, anniversaries, or springtime gatherings. To create a stunning floral design, start with a smooth buttercream base. Use edible flowers like pansies, roses, or lavender, which can be sourced at local markets or even grown in your garden. Arrange the flowers artfully on the cake for a fresh and organic look. For more intricate designs, you can also use edible sugar flowers. This cake is not just tasty; it’s a work of art!
Ingredients: – 3 cups all-purpose flour – 2 cups sugar – 1 cup unsalted butter – 4 large eggs – 1 cup milk – 1 tbsp vanilla extract – 2 tsp baking powder – Edible flowers for decoration
Instructions: 1. Preheat the oven to 350°F (175°C) and grease two 9-inch round cake pans. 2. Cream the butter and sugar together until fluffy. Add the eggs one at a time, mixing well. 3. Sift the flour and baking powder. Alternately mix with milk and vanilla into the batter. 4. Pour the batter into the pans and bake for 25-30 minutes. Allow to cool completely. 5. Frost with buttercream and creatively arrange edible flowers on top! 6. Chill before serving for the best presentation!
FAQs: 1. How long do edible flowers last? They usually last a few days when refrigerated. 2. Can I use fresh flowers? Yes, but be careful with pesticide use.
Floral Cake ideas are for everyone—start with a smooth buttercream canvas, add edible flowers, and suddenly your cake feels personal and garden-fresh. It’s proof that simple, artful details turn any celebration into a memory.

WILTON-Pip designs and messages or glaze cakes before icing

Piping gel is an essential decorating tool, the edible "glue" that keeps decorations looking flawless

Allows you to easily "glue" fondant decorations to your project
6. Mermaid Cake
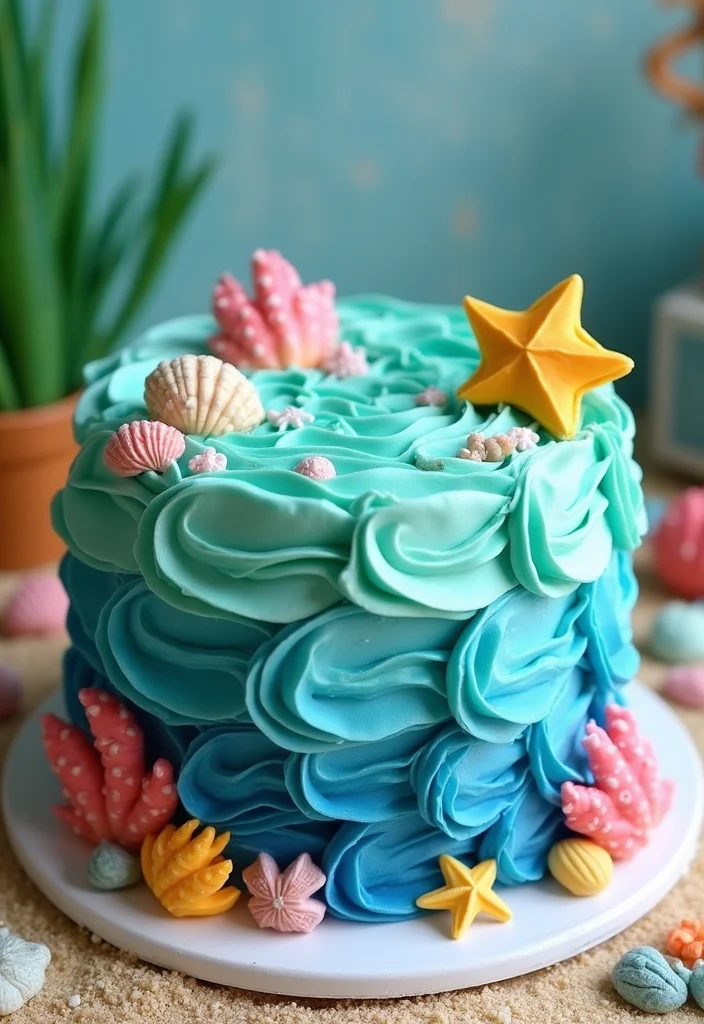
Capture the enchanting spirit of the sea with a whimsical mermaid cake, perfect for ocean-themed parties! This cake can be a fun centerpiece for children or anyone who loves the ocean. Start with layers of your favorite cake flavor and cover them with shimmering blue and green buttercream to imitate ocean waves. Use molds to create chocolate or fondant decorations of starfish and seashells to enhance the underwater theme. Adding edible glitter on top will give it that magical mermaid touch, making it sparkle like the ocean!
Ingredients: – 2 ½ cups cake flour – 1 ½ cups sugar – 1 cup unsalted butter – 4 large eggs – 1 cup milk – 2 tsp baking powder – Blue and green food coloring – Fondant for decorations
Instructions: 1. Preheat your oven to 350°F (175°C) and prepare your cake pans. 2. Mix flour, sugar, baking powder, and butter until fluffy. Add the eggs one at a time, then incorporate milk. 3. Bake for 30 minutes or until a toothpick comes out clean. Allow to cool completely. 4. Layer with buttercream, tinting portions blue and green. 5. Create ocean wave designs with a spatula, then mold seashells and starfish from fondant or chocolate. 6. Decorate the top with the molded shapes and edible glitter!
FAQs: 1. Can I make this ahead of time? Yes, you can freeze the layers and decorate later! 2. What can I use instead of fondant? Chocolate modeling clay is a great alternative!

DELICIOUS CAKE DRIZZLE: This mouthwatering strawberry-flavored drizzle wonderfully complements the taste of cakes, cookies, donuts, strawberries, and pastries

Complete 9-Color Gel Set – Includes vibrant decorating gels in blue, orange, green, pink, black, purple, red, white, and yellow, perfect for any celebration.
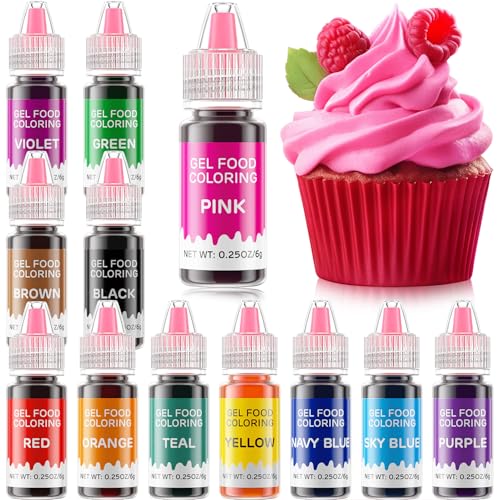
Gorgeous Colorful & Classic Gel Food Coloring Baking Kits - Comes with 12 classic edible colors: Red, Pink, Orange, Yellow ,Green,Teal, Sky Blue, Navy blue, Purple, Violet, Brown, Black.As lovers of baking, you can freely match their.The variety of color choices and better meet the needs of different designs,whether it is the white, red and green of Christmas, the black and orange of Halloween, or the classic red of Valentine's Day, etc
7. Chocolate Paint Cake
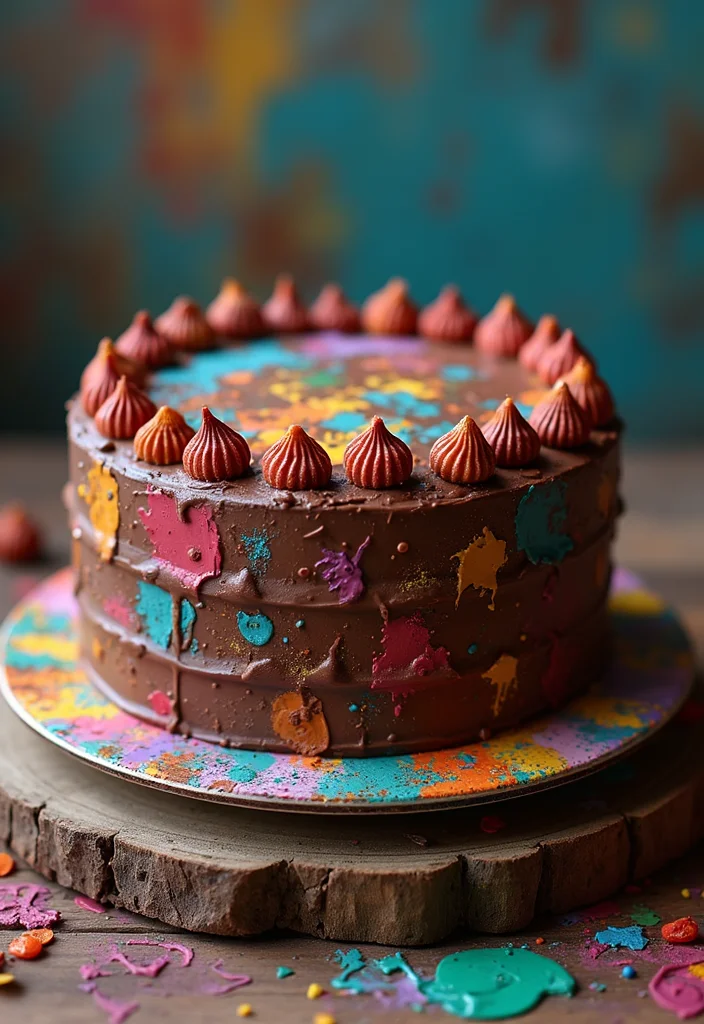
Express your artistic flair with a chocolate paint cake that combines dessert and art! This cake is suitable for any occasion when creativity meets deliciousness. Start with a rich chocolate cake base and cover it with a smooth layer of ganache or buttercream. Use melted colored chocolates to ‘paint’ fun designs on the surface of the cake. A palette knife or brush can help you create detailed patterns and strokes—everyone will be impressed by your artistic skills!
Ingredients: – 2 cups all-purpose flour – 1 ½ cups sugar – 1 cup unsweetened cocoa powder – 2 tsp baking powder – 1 tsp baking soda – 1 tsp salt – 2 large eggs – 1 cup buttermilk – ½ cup vegetable oil – 2 tsp vanilla extract – Chocolate (white, milk, dark) for painting
Instructions: 1. Preheat your oven to 350°F (175°C) and grease two 9-inch round cake pans. 2. Combine the flour, sugar, cocoa powder, baking powder, baking soda, and salt in a bowl. 3. Add the eggs, buttermilk, oil, and vanilla. Mix well. 4. Pour the batter into the prepared pans and bake for 30-40 minutes. Cool completely. 5. Cover with ganache or buttercream, then melt chocolates for painting. 6. Use a brush to create unique designs on the cake. 7. Chill to set the chocolate before serving!
FAQs: 1. Can I use regular food coloring? Yes, but colored chocolate yields better results! 2. How do I store this cake? Keep it in a cool place to maintain the painted look.

WARNING: CHOKING HAZARD—Small parts. Not for children under 3 Years.

WARNING: CHOKING HAZARD—Small parts. Not for children under 8 years.
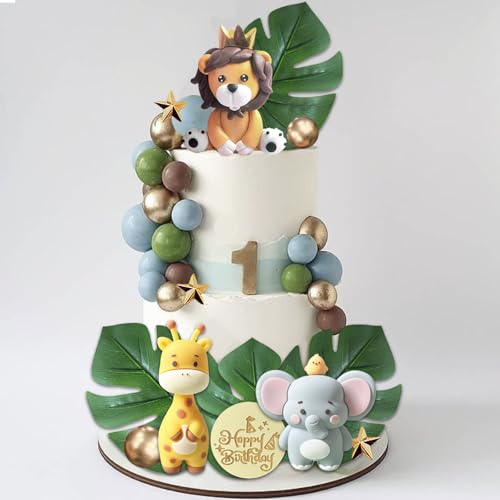
【Package】 Our safari jungle animals cake topper set comes with 27 colorful balls, 5 simulated leaves, 1 giraffe cake topper, 1 elephant cake topper, 1 lion cake topper, 1 colorful flag cake topper, 5 star cake topper, 1 happy birthday cake topper.
8. Unicorn Cake
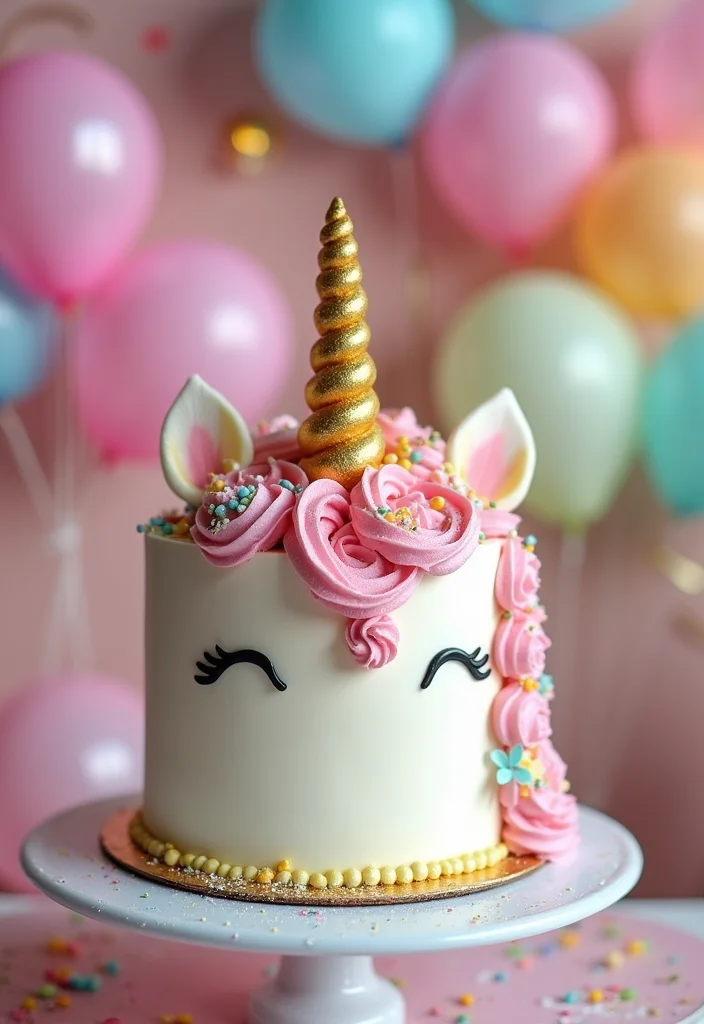
The unicorn cake is a dream come true for anyone who adores magical creatures! Its whimsical design will charm both kids and adults, making it perfect for any celebration. Begin with a soft vanilla or rainbow sponge cake and cover it with a smooth layer of pastel-colored buttercream. Mold a unicorn horn from fondant and create ears for a delightful 3D effect. Adorn the cake with sprinkles, edible glitter, and vibrant flowers to add enchanting charm. When your guests see this spectacular cake, they’ll be amazed that it’s edible!
Ingredients: – 3 cups all-purpose flour – 2 cups sugar – 1 cup unsalted butter – 4 large eggs – 1 cup milk – 2 tsp vanilla extract – 3 tsp baking powder – Fondant for the horn and ears – Edible glitter for decoration
Instructions: 1. Preheat your oven to 350°F (175°C) and prepare your cake pans. 2. Cream the butter and sugar until fluffy. Add the eggs, mixing well. 3. Mix flour, baking powder, and milk into the butter mixture. 4. Divide the batter into different bowls and color them for a rainbow effect. 5. Bake for 30 minutes, and then cool completely. 6. Layer the cakes with buttercream and cover with a smooth layer. 7. Create the unicorn horn and ears using fondant and decorate creatively!
FAQs: 1. How do I get the colors vibrant? Use gel food coloring! 2. Can I make this ahead of time? Yes, just assemble closer to serving time.

🌌 𝗚𝗔𝗟𝗔𝗫𝗬 𝗠𝗔𝗚𝗜𝗖 - Elevate your treats with our galaxy sprinkles for cupcakes. Perfect as outer space cake toppers or space cake decorations, these edible delights 𝙬𝙞𝙡𝙡 𝙢𝙖𝙠𝙚 𝙚𝙫𝙚𝙧𝙮 𝙙𝙚𝙨𝙨𝙚𝙧𝙩 𝙩𝙝𝙚 𝙝𝙞𝙜𝙝𝙡𝙞𝙜𝙝𝙩 𝙤𝙛 𝙮𝙤𝙪𝙧 𝙜𝙖𝙡𝙖𝙭𝙮 𝙗𝙞𝙧𝙩𝙝𝙙𝙖𝙮 𝙙𝙚𝙘𝙤𝙧𝙖𝙩𝙞𝙤𝙣𝙨.

Gold Star Sprinkles with food-grade raw materials:Preservative Free,Nut Free,Dairy Free,Chemical Free,Soy Free,Non-GMO.Produced using food-safe standards,the process does not come into contact with allergenic substances and uses Tamper-proof food label

✨ Edible Metallic Silver Stars – Add a brilliant sparkle to your cakes, cupcakes, and cookies with our edible silver star sprinkles. The high-shine metallic finish creates a show-stopping look for any celebration.
9. Cookie Cake
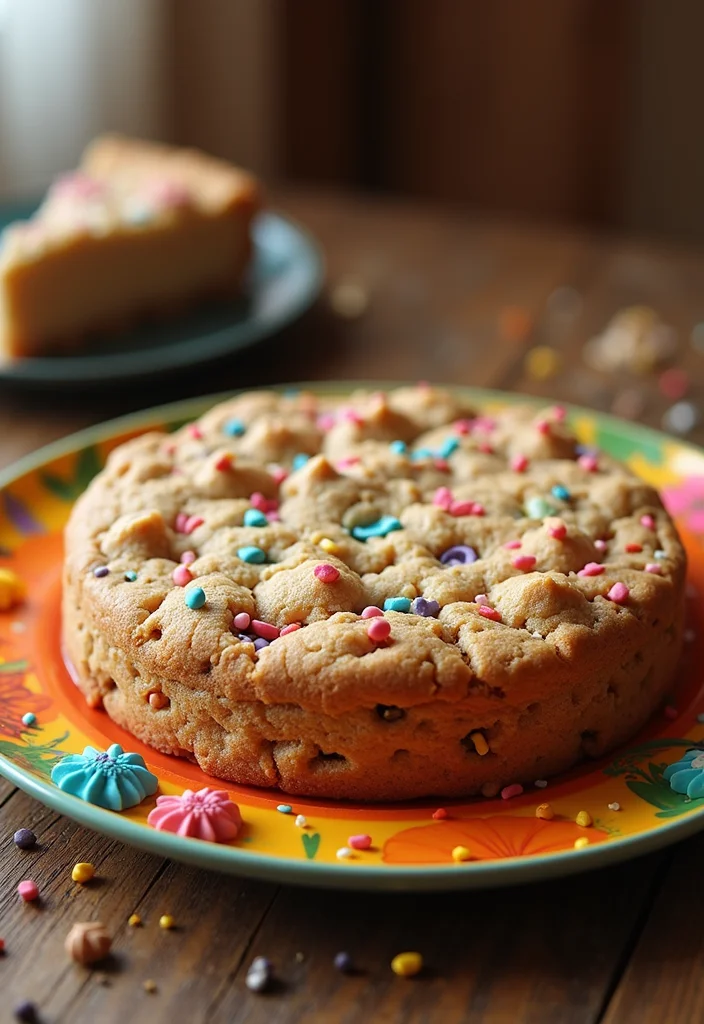
Combine the best of both worlds with a delightful cookie cake that’s both chewy and cake-like! This giant cookie cake is perfect for any gathering, bringing joy to all. Begin with classic chocolate chip cookie dough and press it into a round cake pan. Bake until golden and slightly soft in the center. Once cooled, top it with creamy frosting and sprinkle colorful candies for extra fun and texture. This cake is easy to slice and serve, making it a favorite among guests!
Ingredients: – 2 ½ cups all-purpose flour – 1 tsp baking soda – 1 tsp salt – 1 cup unsalted butter – ¾ cup sugar – ¾ cup brown sugar – 2 large eggs – 2 tsp vanilla extract – 1 cup chocolate chips – Frosting for the top
Instructions: 1. Preheat your oven to 350°F (175°C) and grease a 9-inch round cake pan. 2. In a bowl, mix the flour, baking soda, and salt. 3. In another bowl, cream the butter, sugar, and brown sugar until smooth. Add the eggs and vanilla. 4. Gradually mix in the dry ingredients, then fold in the chocolate chips. 5. Spread the dough into the prepared pan and bake for 20-25 minutes. 6. Cool, then decorate the top with frosting and colorful candies!
FAQs: 1. Can I add nuts? Absolutely! They add a nice crunch! 2. How do I store leftovers? Keep them in an airtight container.
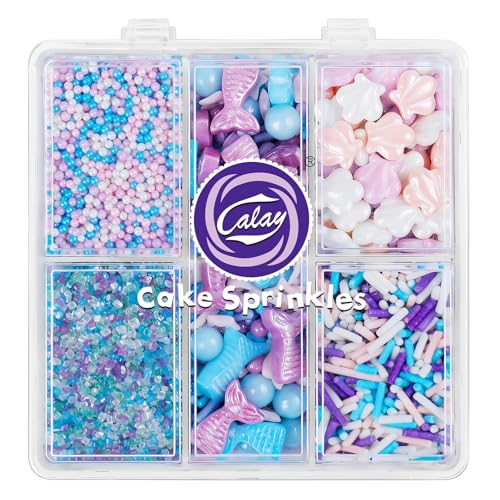
All-in-One Pastel Sprinkles Set in 5 Parts: This handy divided box comes with five soft-colored decorations: pastel nonpareils sprinkles, sanding sugar, classic jimmies sprinkles, along with pretty seashells and mermaid tail shapes

Enchanting Mermaid-Themed Shapes: Bring fairy tale magic to your desserts with this charming mix featuring mermaid shapes, classic jimmies, playful confetti, and elegant pearl sprinkles for a touch of underwater fantasy.

Shells Cake Toppers Set Includes 31 Pieces Featuring 6 Seaweed Cake Toppers, 4 Seashells Cake Toppers, 8 Starfish Cake Toppers, 2 Conch Cake Toppers, 6 Pearl Ball Decorations, 4 Pearl oyster shell,and 1 Pearl Chain Decoration for Complete Beach Theme Cake Decorations
10. Cupcake Cake
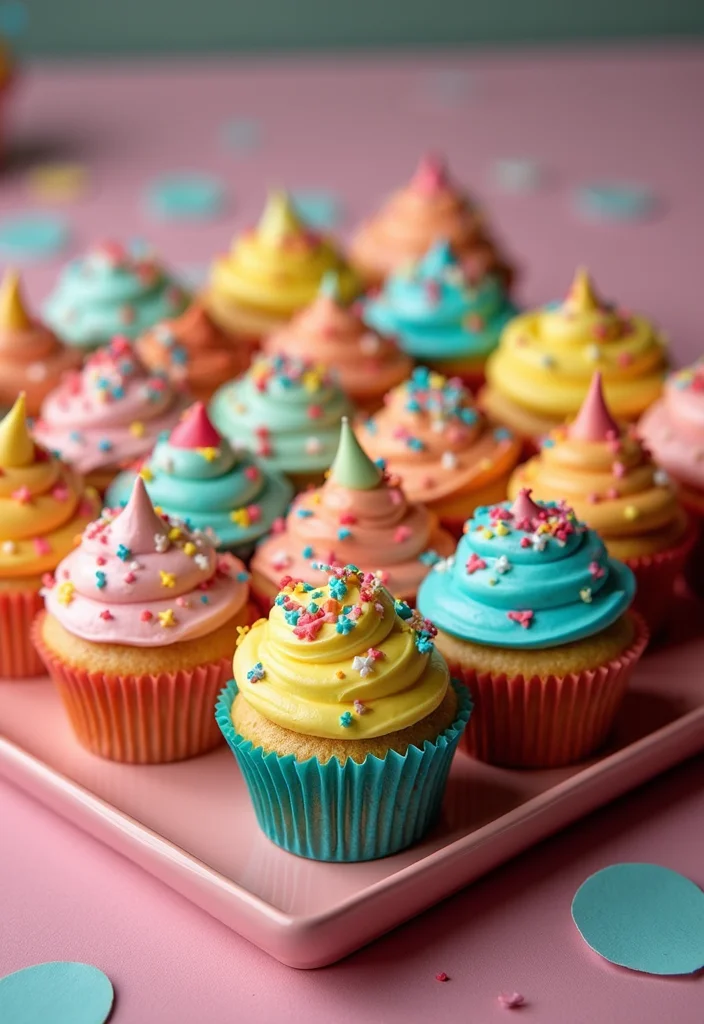
Create a fun cupcake cake that combines individual cupcakes into one eye-catching design! This cake is perfect for parties and allows for endless creativity. Bake a dozen or more cupcakes and arrange them into your desired shape—like a number, heart, or even a cartoon character! Instead of frosting each cupcake individually, use a base layer of frosting to connect them all, creating the illusion of one large cake. Top with colorful sprinkles, edible glitter, or candy for a delightful finish!
Ingredients: – 2 cups all-purpose flour – 1 ½ cups sugar – 1 cup unsalted butter – 4 large eggs – 1 cup milk – 2 tsp vanilla extract – 1 tbsp baking powder – Sprinkles for decoration
Instructions: 1. Preheat your oven to 350°F (175°C) and line cupcake trays with liners. 2. In a bowl, mix the flour, baking powder, and sugar. In another bowl, cream the butter and add eggs and milk. 3. Combine the wet and dry ingredients, then fill the cupcake liners. 4. Bake for about 20 minutes, then cool completely. 5. Arrange the cupcakes in your desired shape on a large board and frost them together with a base frosting. 6. Decorate with sprinkles or candies as desired!
FAQs: 1. Can I make this ahead of time? Yes, just frost closer to serving! 2. How do I transport it? Use a sturdy tray!

47 PCS RUSSIAN PIPING TIPS SET: Includes: 12 flower frosting tips nozzles Icing tips for cake decorating tips kit. Baking supplies for cookie cupcake, 2 leaf piping tips, 2 couplers, 30 pastry baking bags, 1 reusable silicone bag. Our 47 russian piping tips set let you have everything you need to decorating your cupcakes, cakes, cookies, pastries etc!
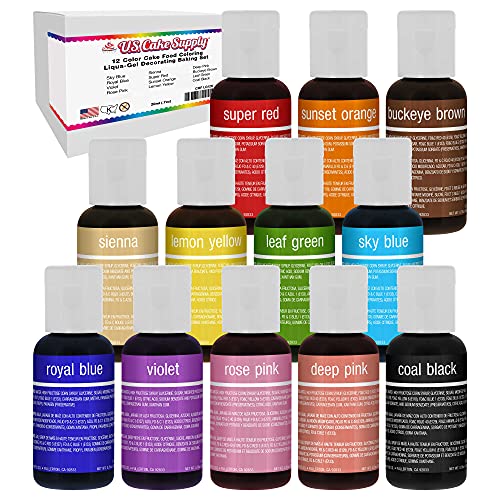
MADE in The USA - Liqua-Gel Colors are highly concentrated edible cake decorating colors in a wide range of bright vivid intense colors

Consistency Preserved: Keep your cake batter and icing intact with this gel-based color formula. These liquid food coloring won't change textures and alter the consistency of your creations.
11. Topsy-Turvy Cake
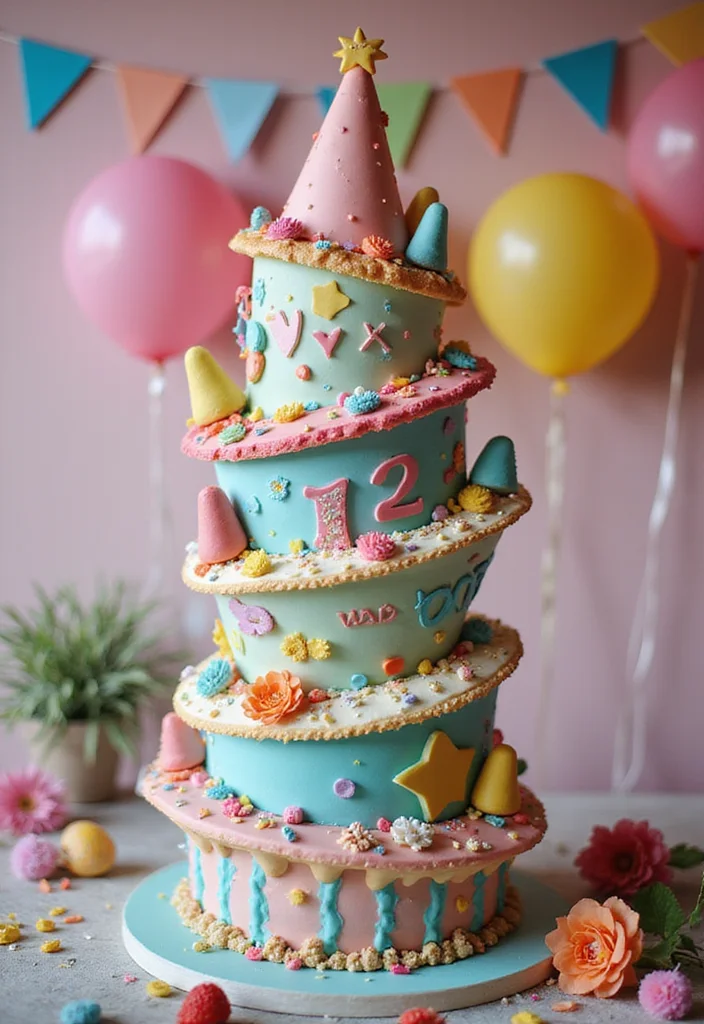
Create a whimsical topsy-turvy cake that appears to defy gravity! This unique design will amaze your guests and show off your creative baking skills. Start with layered cakes of different sizes. Stack them in a way that creates a leaning illusion, placing the smaller cake on top of the larger ones. Use a sturdy buttercream to secure everything in place and cover the cake with colorful fondant. Add fun details, like draping fondant or whimsical decorations, to enhance the playful vibe. This cake is sure to be a conversation starter!
Ingredients: – 2 ½ cups all-purpose flour – 2 cups sugar – 1 cup unsalted butter – 4 large eggs – 1 cup milk – 2 tsp vanilla extract – 3 tsp baking powder – Fondant for decoration
Instructions: 1. Preheat your oven to 350°F (175°C) and prepare your cake pans in various sizes. 2. In a mixing bowl, cream together the butter and sugar until light and fluffy. Add the eggs one at a time. 3. Mix in the flour, baking powder, and milk until just combined. 4. Bake for 30-40 minutes, and cool completely. 5. Stack the cakes at angles and secure them using buttercream. 6. Cover with fondant and decorate creatively for a fun effect!
FAQs: 1. Do I need special pans? Yes, angled cake pans work best! 2. Will it hold its shape? If stacked correctly, absolutely!
Did you know that 78% of guests remember drawing cake ideas that feature a topsy-turvy cake long after the party? A leaning stack is more than a trick—it’s practice with sturdy buttercream and fondant that turns great presentation into real kitchen skill.
12. Galaxy Cake
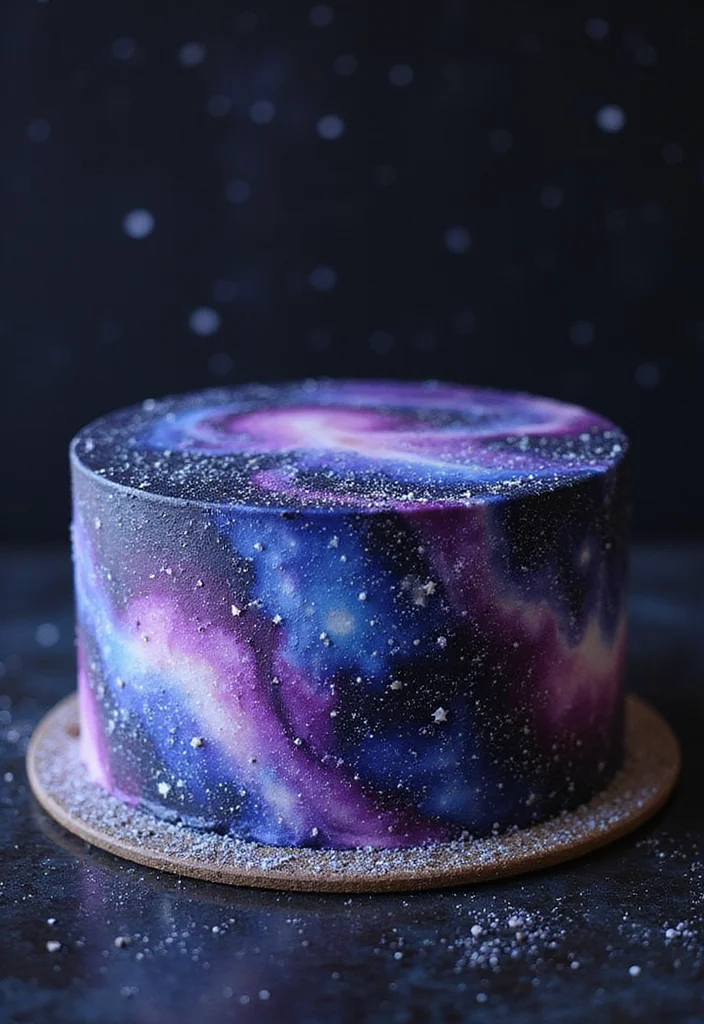
Take your cake decorating skills to new heights with a galaxy cake that looks like a piece of the universe! This cake is perfect for space enthusiasts and anyone wanting to add a touch of magic to their dessert table. To achieve a galaxy theme, bake a chocolate or vanilla cake and coat it with dark buttercream. Using shades like purple, blue, and black, create swirling patterns that mimic the night sky. Sprinkle edible glitter or star-shaped sprinkles for extra shimmer. This cake will certainly be a focal point at any occasion!
Ingredients: – 2 cups all-purpose flour – 1 ½ cups sugar – 1 cup unsweetened cocoa powder – 2 tsp baking powder – 1 tsp baking soda – 1 tsp salt – 2 large eggs – 1 cup buttermilk – ½ cup vegetable oil – Food coloring (purple, blue, black)
Instructions: 1. Preheat your oven to 350°F (175°C) and prepare two 9-inch round cake pans. 2. In a large bowl, mix the flour, sugar, cocoa powder, baking powder, baking soda, and salt. 3. Add the eggs, buttermilk, oil, and mix until smooth. 4. Pour the batter into the pans and bake for 30 minutes. Let them cool completely. 5. Frost with dark buttercream and swirl in colors to create a galaxy effect. 6. Scatter edible glitter or star sprinkles on top before serving!
FAQs: 1. Can I make this a layer cake? Yes! Add more layers for a more impressive look. 2. How do I store it? Keep it in a cool place to maintain the color vibrancy.
13. Black Forest Cake
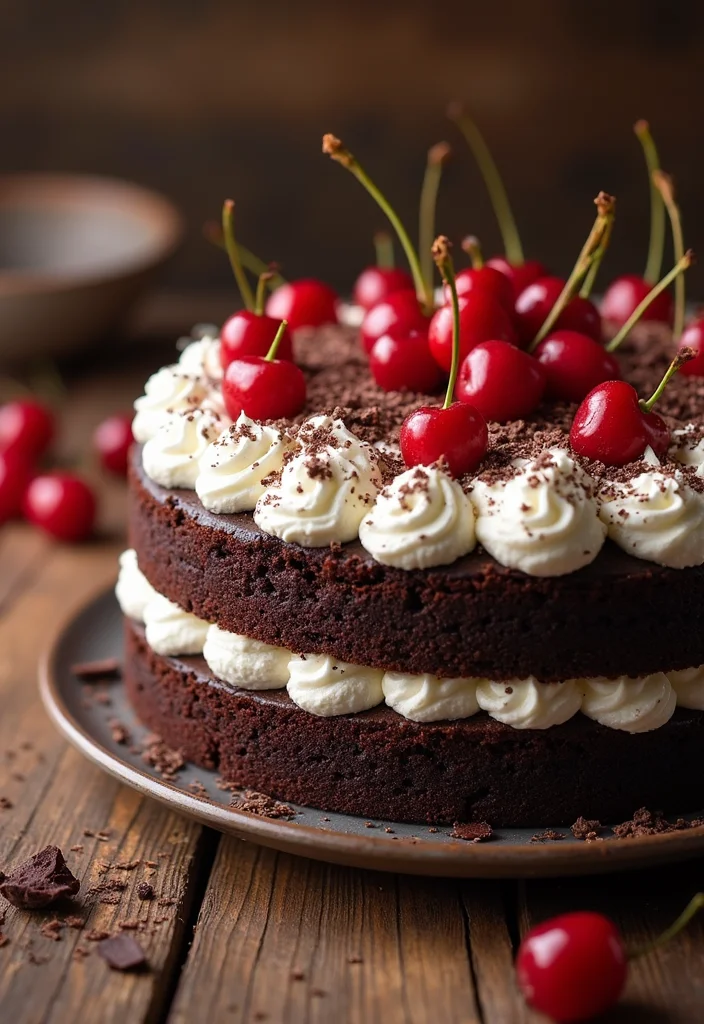
Treat yourself to the rich flavors of a classic Black Forest cake, famous for its chocolate layers, whipped cream, and cherries! This cake is perfect for any chocolate lover and is sure to delight at gatherings. Start with layers of chocolate sponge cake, soaked in cherry syrup for extra moisture and flavor. Spread whipped cream and chopped cherries between the layers. Top it off with more whipped cream, chocolate shavings, and whole cherries for a gorgeous finish. This cake offers a perfect balance of sweetness and tartness, making it a favorite!
Ingredients: – 2 cups all-purpose flour – 1 ½ cups sugar – 1 cup unsweetened cocoa powder – 1 tsp baking powder – 1 tsp baking soda – 1 tsp salt – 3 large eggs – 1 cup buttermilk – ½ cup vegetable oil – 1 cup cherry syrup – 2 cups heavy whipping cream – Cherries for topping
Instructions: 1. Preheat your oven to 350°F (175°C) and grease two 9-inch round cake pans. 2. In a mixing bowl, combine the flour, sugar, cocoa powder, baking powder, baking soda, and salt. 3. Add the eggs, buttermilk, and oil. Mix until well combined. 4. Bake for 30 minutes and let it cool completely. 5. Soak the layers with cherry syrup, then layer with whipped cream and cherries. 6. Frost the top with whipped cream, sprinkle with chocolate shavings, and garnish with cherries!
FAQs: 1. How long does this cake last? Refrigerated, it lasts up to 3 days. 2. Can I make it ahead of time? Yes! Just assemble it close to serving time.
14. Cheesecake Cake
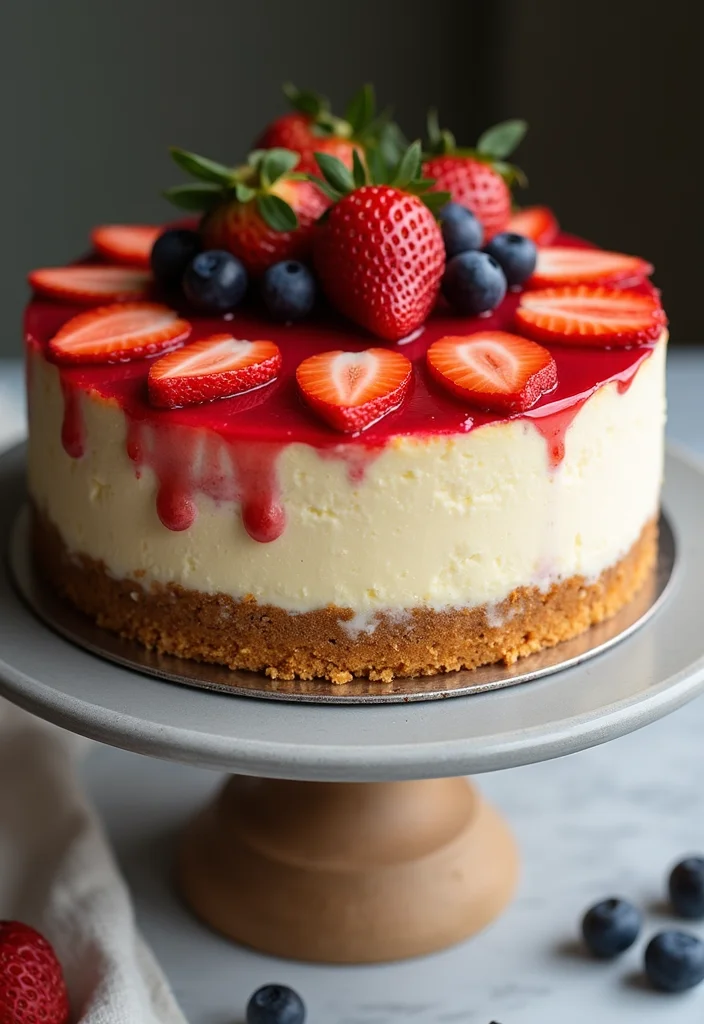
Combine the creamy delight of cheesecake with the classic texture of cake for a dessert that satisfies every craving! A cheesecake cake is a unique and delightful choice for any celebration. Start by preparing a classic cheesecake batter and bake it in layers alongside your favorite sponge cake. Alternate the layers, stacking cake and cheesecake, and finish with a fruity glaze on top. This combination is irresistibly creamy and sweet, giving you the best of both worlds!
Ingredients: – 2 cups graham cracker crumbs – 1 cup sugar – ½ cup unsalted butter – 4 packages (8 oz each) cream cheese – 1 cup heavy cream – 4 large eggs – 1 tsp vanilla extract – Sponge cake ingredients (as preferred)
Instructions: 1. Preheat your oven to 325°F (160°C). 2. In a bowl, mix graham cracker crumbs, sugar, and melted butter for the crust. Press this into the bottom of a springform pan. 3. Beat cream cheese until smooth. Gradually add sugar, then the eggs, and vanilla. Mix in the heavy cream. 4. Pour the cheesecake batter over the crust and bake for 50 minutes. 5. Cool completely, then layer with sponge cake and top with fruit glaze!
FAQs: 1. Can I freeze this cake? Yes! Just wrap it well! 2. How do I serve it? Chilled is best for the best flavor!
15. S’mores Cake
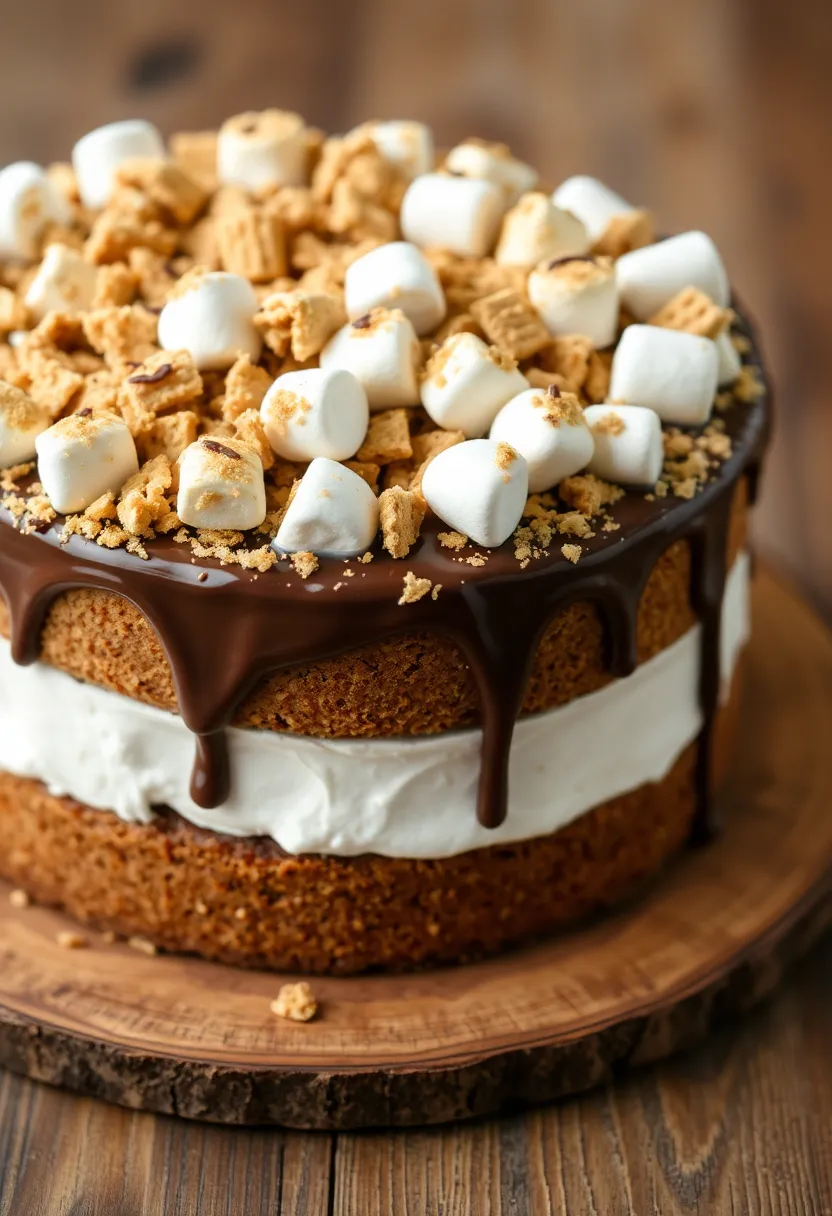
Bring the campfire fun indoors with a s’mores cake that combines the delightful flavors of graham crackers, chocolate, and marshmallows! This cake is perfect for outdoor lovers and anyone with a sweet tooth. Start with layers of chocolate cake, then add a filling of marshmallow fluff between the layers. For the frosting, use a rich chocolate ganache. Top the cake with graham cracker crumbs, mini marshmallows, and a drizzle of chocolate sauce to achieve that true s’mores experience. Each bite tastes like a cozy campfire treat!
Ingredients: – 2 cups all-purpose flour – 1 ½ cups sugar – 1 cup unsweetened cocoa powder – 1 tsp baking powder – 1 tsp baking soda – 1 tsp salt – 3 large eggs – 1 cup buttermilk – ½ cup vegetable oil – 1 cup marshmallow fluff – 1 cup chocolate ganache – Graham cracker crumbs and mini marshmallows for topping
Instructions: 1. Preheat your oven to 350°F (175°C) and prepare two 9-inch round cake pans. 2. In a bowl, mix the flour, sugar, cocoa, baking powder, baking soda, and salt. 3. Add the eggs, buttermilk, and oil, and mix until smooth. Pour into pans and bake for 30-35 minutes. 4. Cool completely, then layer with marshmallow fluff in between. Frost with chocolate ganache. 5. Top with graham cracker crumbs, mini marshmallows, and drizzle with chocolate sauce.
FAQs: 1. Can I use store-bought chocolate frosting? Yes, for a quicker option! 2. How do I store leftovers? Keep in an airtight container at room temperature.
Conclusion
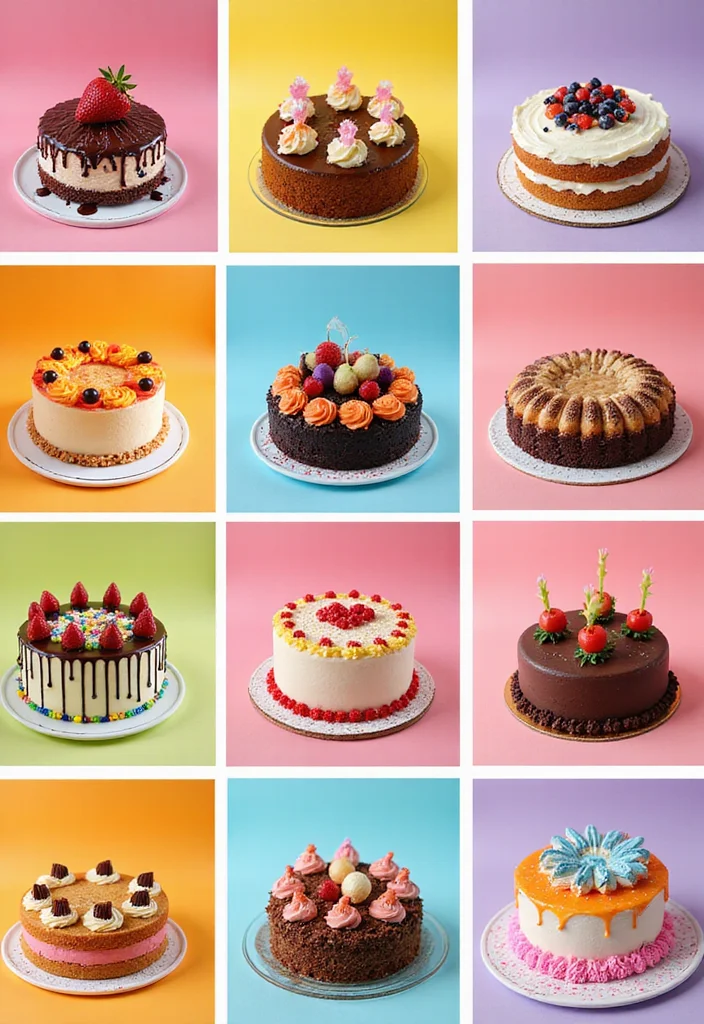
Creating beautiful drawing cakes is a delightful way to express your creativity while making lasting memories.
Whether you’re looking to impress friends or simply celebrate a special occasion, the cakes on this list provide a perfect blend of artistic flair and deliciousness. Don’t hesitate to experiment and add your personal touch to each design, and soon you’ll become the cake artist everyone admires!
Frequently Asked Questions
What Are Some Unique Drawing Cake Ideas for Beginners?
If you’re just starting out with cake decorating, you might be looking for some unique drawing cake ideas that are easy yet impressive!
You can begin with simple designs like geometric patterns or floral motifs using edible markers. These designs don’t require advanced skills but can still wow your friends. Plus, they allow you to practice drawing while having fun with colors and shapes!
How Can I Make My Drawing Cakes Look More Professional?
Want to elevate your drawing cakes to a professional level? Start by using high-quality fondant or buttercream as your canvas. Smoothly iced surfaces provide a perfect backdrop for your artwork!
Additionally, invest in some fine-tipped edible pens for detailed work. Practice your sketching skills on paper first, and don’t forget to use stencils for intricate designs!
Are There Any Creative Cakes That Are Suitable for Special Occasions?
Absolutely! There are countless creative cake designs that can be tailored for special occasions. For birthdays, consider a themed drawing cake that reflects the interests of the birthday person, like their favorite movie or hobby.
Weddings can benefit from elegant designs featuring intricate floral drawings or personalized monograms. Just let your imagination run wild and create something that tells a story!
What Supplies Do I Need to Get Started with Drawing Cake Ideas?
Getting started with drawing cake ideas is easier than you think! You’ll need some basic supplies like edible food markers, piping bags, and different sizes of tips for decorating. Don’t forget about a good offset spatula for icing your cakes smoothly!
Having a turntable can also be a game changer, as it allows you to effortlessly rotate your cake while you draw and decorate.
Can I Use Regular Food Coloring for Drawing Cakes?
While regular food coloring can work in a pinch, it’s best to use gel food colors or edible inks specifically designed for drawing cakes. They offer more vibrant colors and don’t alter the consistency of your icing!
For drawing, edible pens are ideal as they provide precision and are easy to use. Make sure to let your creativity flow and have fun with your artistic desserts!
Related Topics
drawing cake ideas
creative cakes
artistic desserts
cake decorating
fun party cakes
easy cake designs
themed cakes
beginner friendly
impressive desserts
seasonal cake ideas
unique cake styles
birthday cake inspiration